Activity
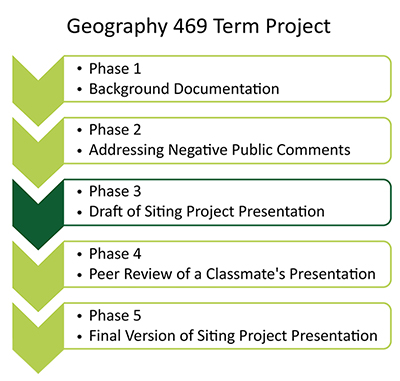
Prior to the public meeting roll out of your selected route for the proposed transmission line, the site selection committee would like you to make a brief (10-12 minutes) presentation to them.
Note
For this assignment, you must first create a slide presentation. You are welcome to use whichever software you are most comfortable with, such as PowerPoint, Google Docs (the "Presentation" component), Prezi, or Keynote. You will then use Kaltura, a Penn State video conferencing platform, to record your presentation.
Directions
- Create your presentation. Your presentation should include a separate slide for each of the following components:
- A brief project description
- A base map showing the study area to include:
- Aerial Imagery
- Start and End Points
- Avoidance, Conservation, and Floodplain Information
- Building Centroids
- Land Use & Land Cover
- A map showing your alternate route selections
- Include the Built, Natural, and Simple Average Corridors
- Alternate routes you selected through each of these corridors
- The Simplified Route Evaluation Spreadsheet including:
- Route Data
- Data Normalized
- Built Emphasis
- Natural Environment Emphasis
- Simple Average Emphasis
- Combined Rank Chart
- Graphs
- A map showing your final route selection
- An explanation of why this route was selected, based on your analysis
- An explanation of your approach to addressing public participation
- A summary of your presentation
- Narrate your presentation
-
You may choose your own screen recording software, or record your screencast from within Canvas. Here is a link to instructions (Links to an external site.) on how to use Kaltura Capture to record within Canvas. Note: Kaltura Capture is accessed in Canvas by clicking on My Media in the Canvas menu and "Add new". If you do not use Kaltura Capture, you will need to upload your own video file to My Media using these instructions (Links to an external site.).
-
Record your screen while you give your five to seven-minute slideshow (make sure the slides are visible and the audio is clear - using a headset microphone is normally the best way to ensure decent audio quality).
-
Need more help? Contact the World Campus Helpdesk for assistance.
-
NOTE: Review the rubric CAREFULLY! You will be graded on the above items as well as the organization, appearance and professional delivery of your presentation.
Submitting Your Work
Directions for creating, submitting, and sharing your presentation can be found with the dropbox.
Grading Criteria
This initial version of your presentation will be not be graded by me. Instead, it will be reviewed by one of your classmates. You will then use the feedback you receive from your peer to improve upon the final presentation you will submit to me during week 13. Use the Final Project Presentation Rubric as a guide when creating your project. Even though this is ungraded, it is required. (Failure to turn this in on time will result in the inability to participate in the peer-review process next week and a zero on the Lesson 12 peer review assignment which is graded).
REMINDER: This must be turned in by the due date (see the calendar for specific due dates). No late assignments will be accepted. It is scored out of 40 total points.
