
- To Obtain ArcGIS, you must contact our Program Assistant, Kary Islett at kdb6@psu.edu to request an Esri Authorization Code if you have not done so already.
- You will need to contact E-Education Software with your request for a copy of Windows and a activation key. Please send your mailing address, and a screen shot of your "About this mac"
- To do this click on the apple icon in the top left and click "About this mac"
- Click "More Info"
- Take a screen shot using the key combo: command + shift + 3
- Download Virtual Box.
- Open the dmg file and follow the install instructions.
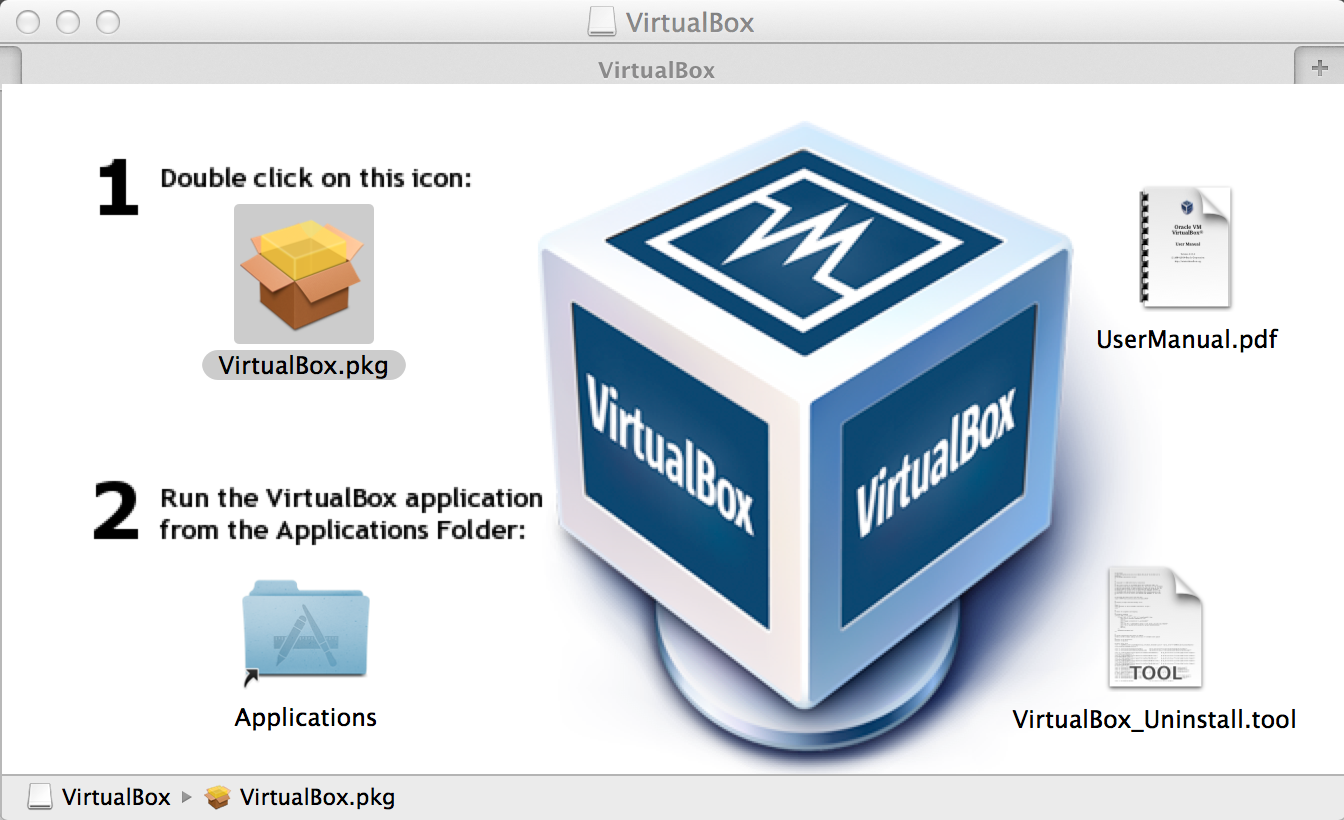
- Once installed, open Virtual Box from the Applications folder.
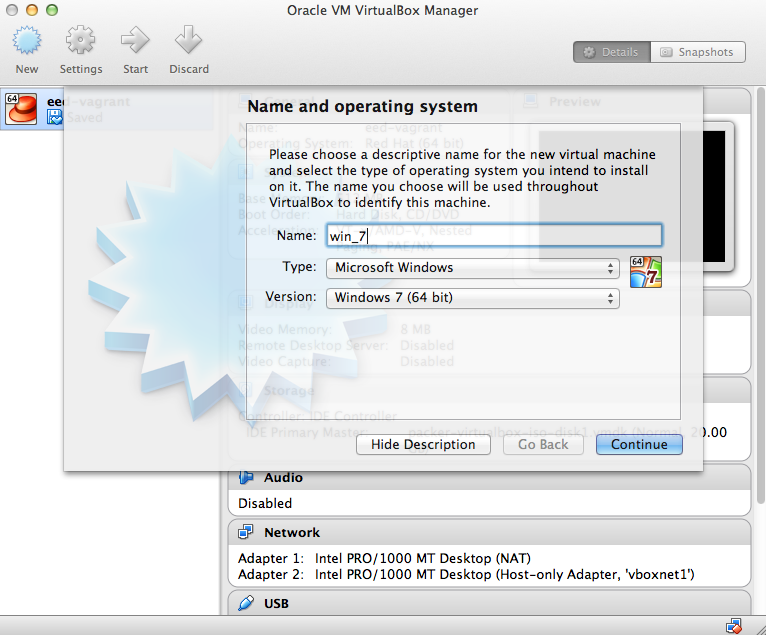
- Click on "New" in the top left and use the following settings
- Name: win_7
- Type: Microsoft Windows
- Version: Windows 7 (64 bit)
- Click Continue
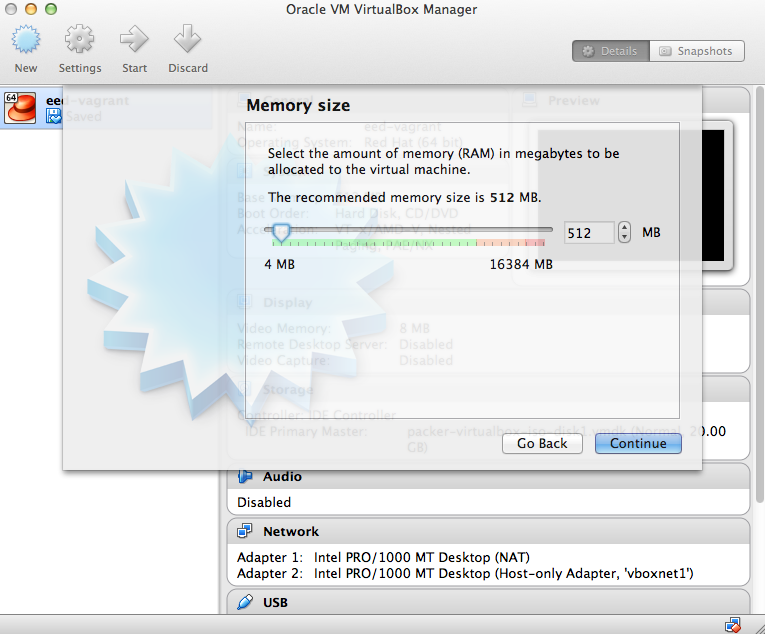
- On the next screen, set the memory size to 512 and then click Continue.
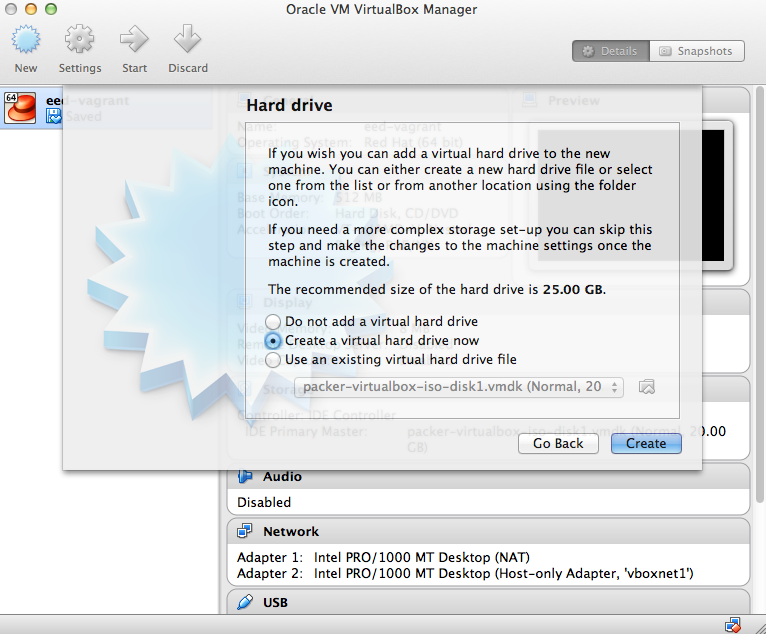
- The next screen should have "Create a virtual hard drive now" checked. Click Create.
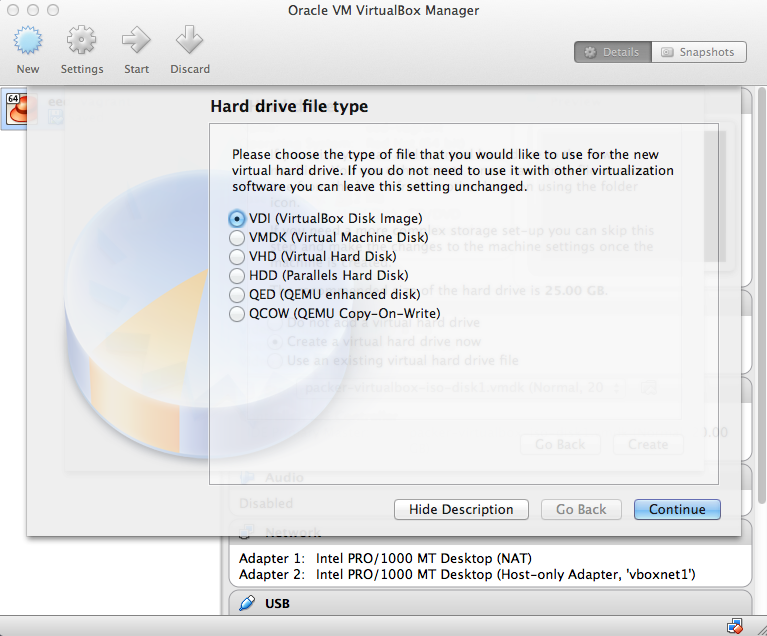
- Select "VDI" then "Continue"
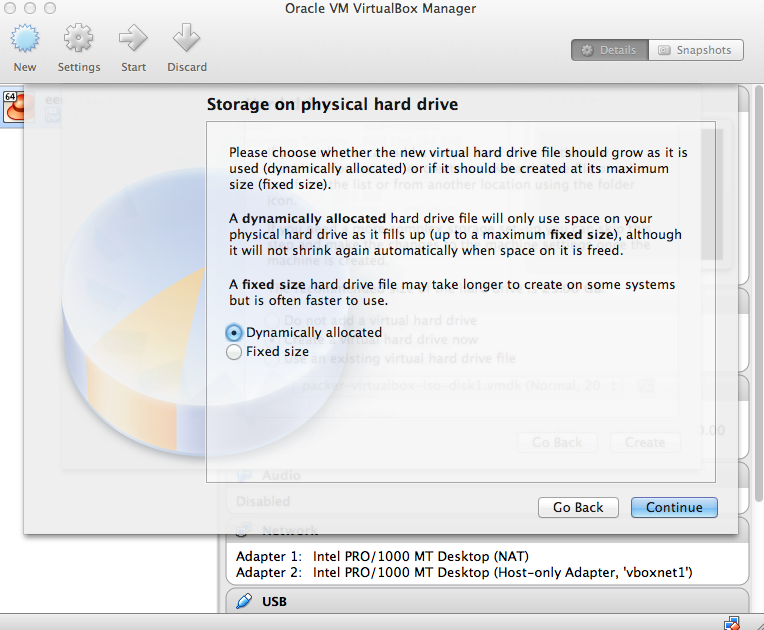
- Select "Dynamically Allocated" and Click "Continue"
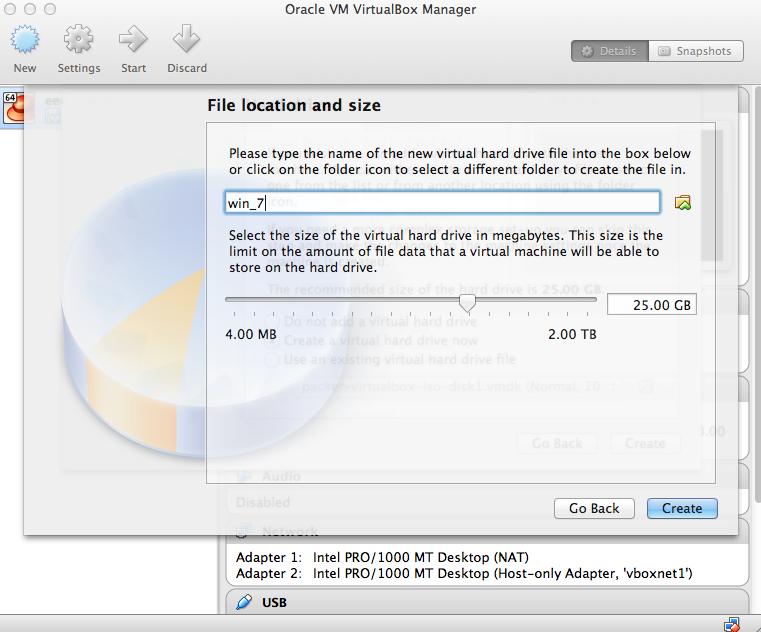
- The defaults for the next window should be "win_7" and "25.00 GB". Click "Create" and continue.
- Once done, Virtual Box should have a similar setup. Some things may be different based on the age of your laptop.

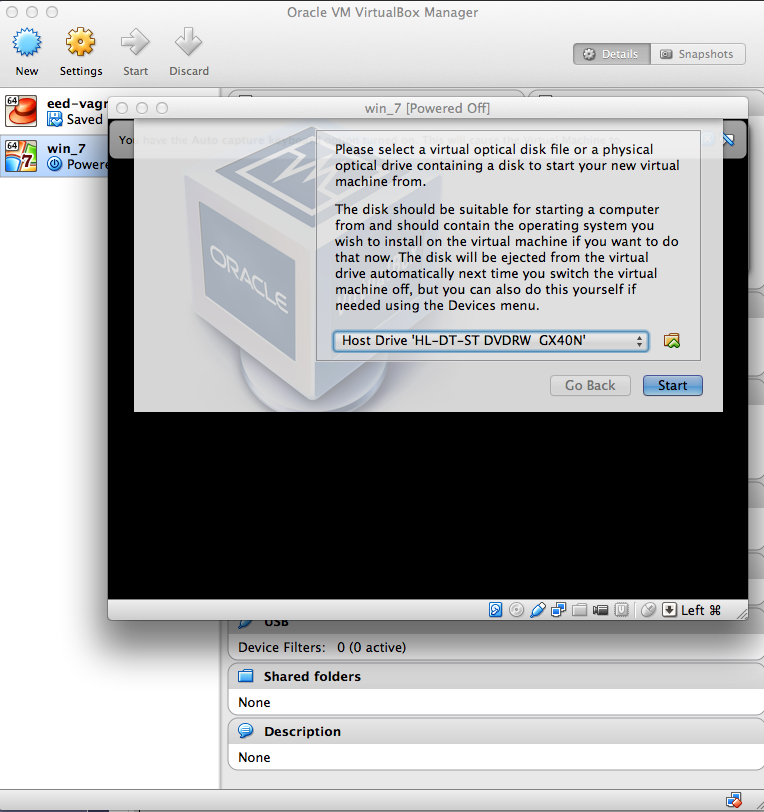
- Double click on the win_7 image and it will ask you to insert the Windows 7 disk to being setup. Select your CD-Rom drive and press "Start".
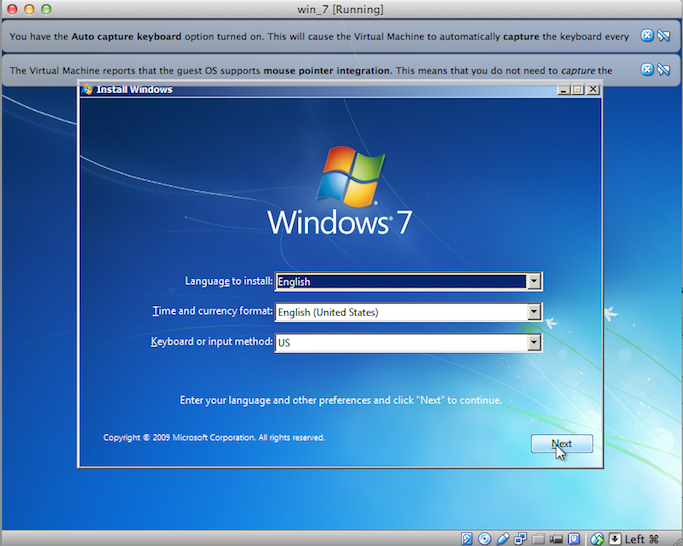
- The windows setup process will begin. Select your language.
- Select Custom for the instillation type

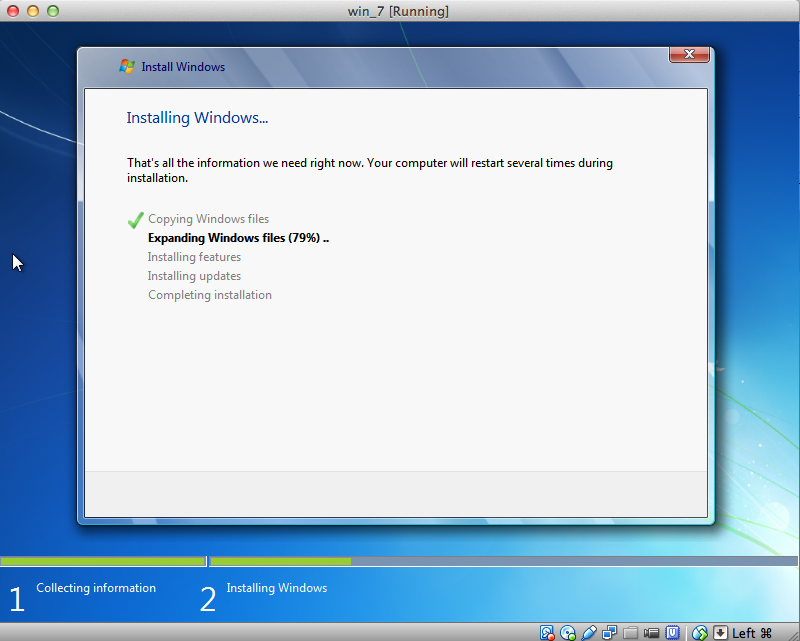
- The next process will take some time, just let it finish. The Virtual Machine will restart twice and continue the setup process.
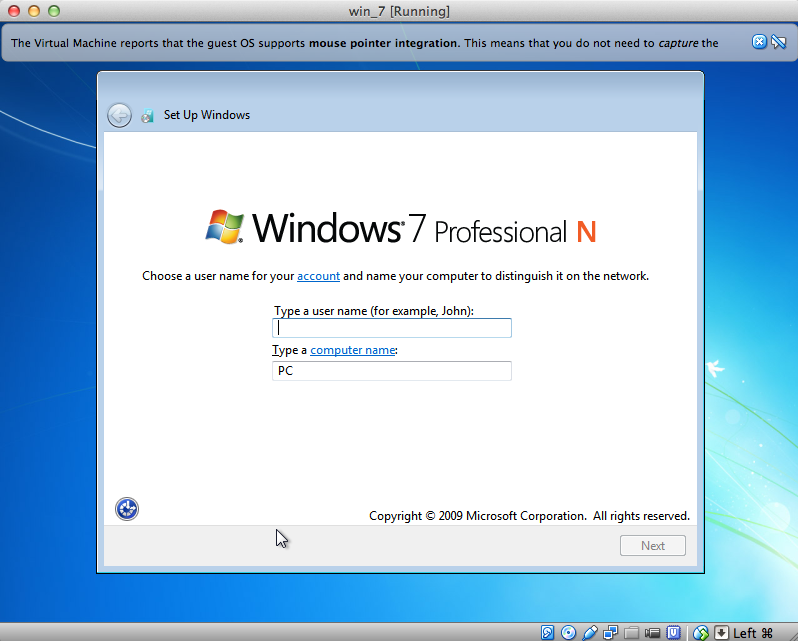
- After restarting the last time, you will be prompted for a user name and password.

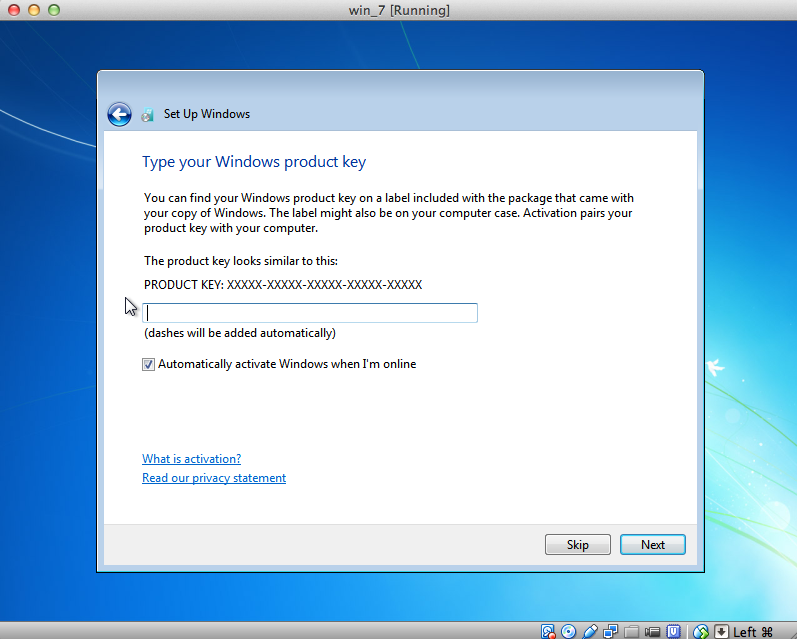
- Enter the Windows 7 key that was sent to you. If for some reason it comes up as invalid, then press skip and contact us to verify you have the correct key.
- Click "Use Recommended Settings" for updates and security.

- Click Home Network. Windows will finish setting up, and you will be taken to the Windows desktop.

- Once you are taken to the Windows Desktop, you can remove the instillation disk.
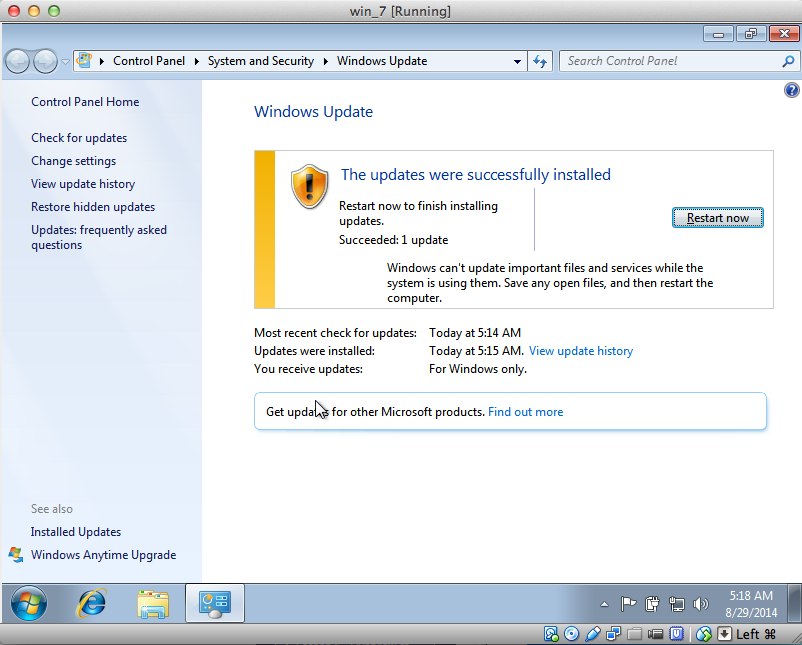
- If Windows installs updates upon setup, click "Restart Now" and the virtual machine will restart.
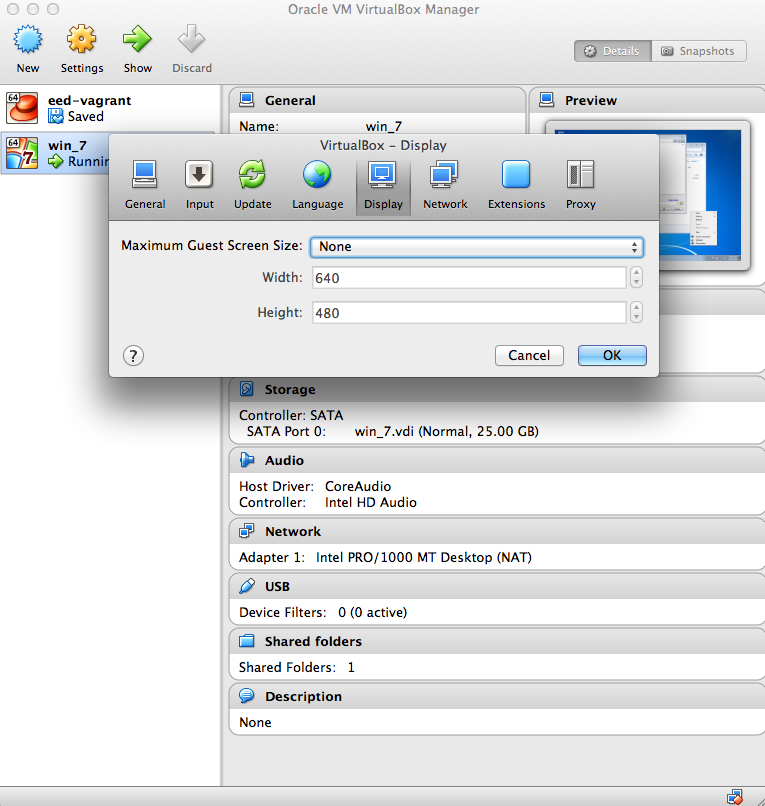
- Before installing ArcGIS, stop the virtual machine by going to the windows logo and click "Shut Down". Open Virtual Box. Click "VirtualBox" in the top Menu bar. Then click "Preferences". Click on "Display" and select "None" as Maximum Guest Screen Size.
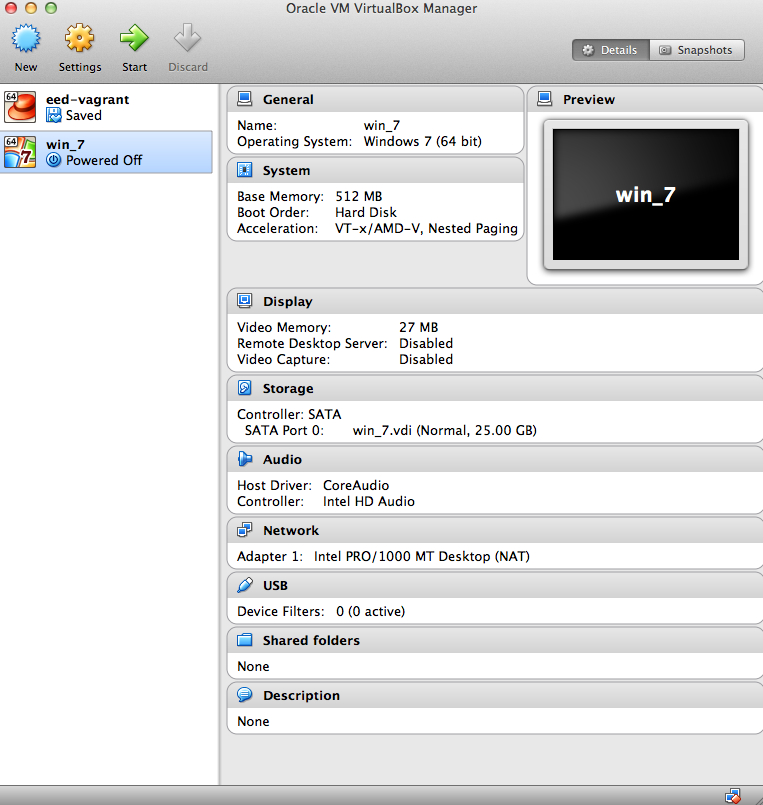
- If you need to start the Virtual Machine again. Open Virtual Box from the Applications folder. Click on the win_7 image, then click "Start" in the top left of the Virtual Box window.
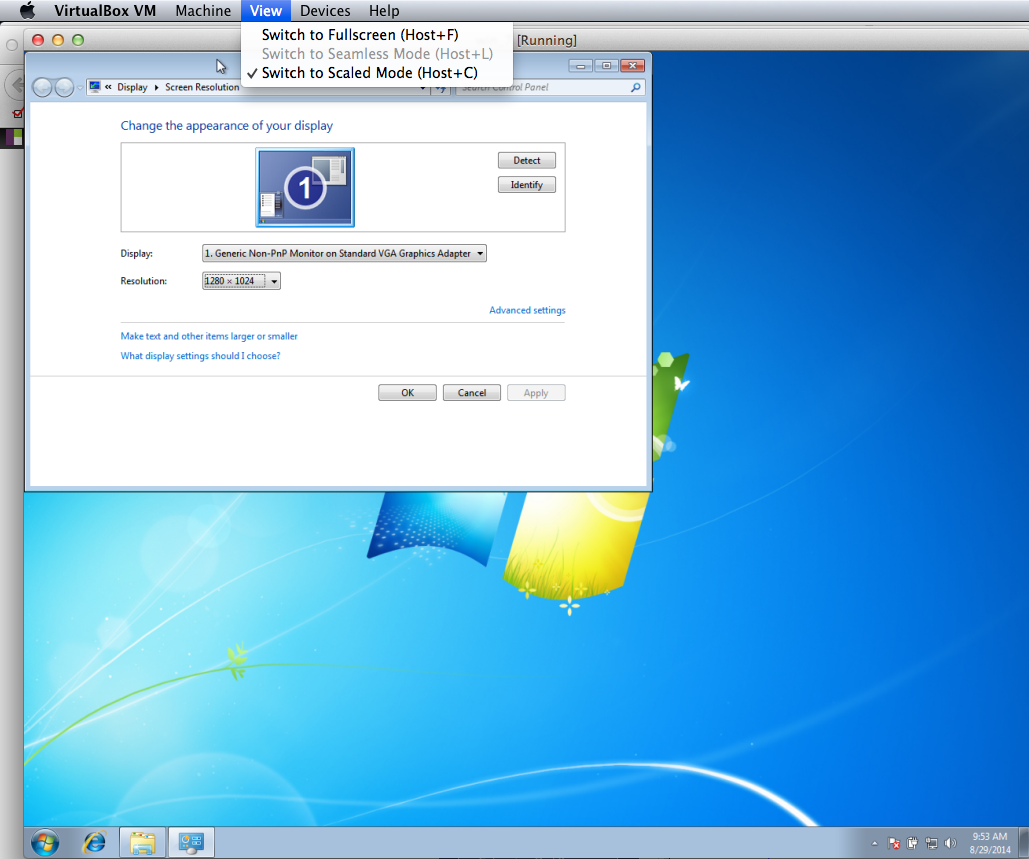
- Start the Windows 7 Virtual Machine. Once it has booted to the desktop, Right click, or command+click on the desktop and open "Screen Resolution"
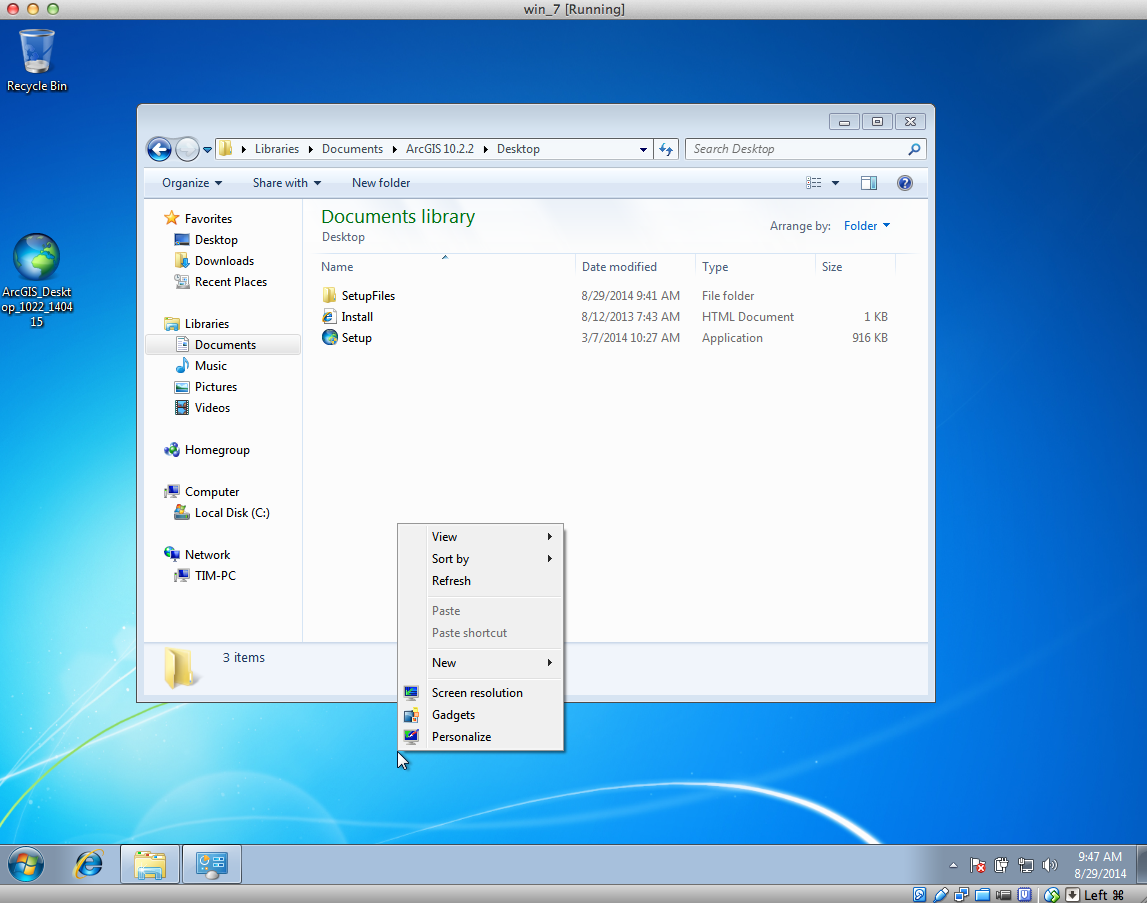
- Set the resolution to at least 1024x768. Then click on "Apply". If you choose to go any higher, you will need to click on "View" in the top menu bar then "Switch to scaled mode" so that the window fits on your screen. If you do not do this, you may have difficulty installing ArcGIS.
- ON THE WINDOWS VIRTUAL MACHINE Follow these instructions on setting up ArcGIS. Once done, you will be able to complete the tasks of this course.
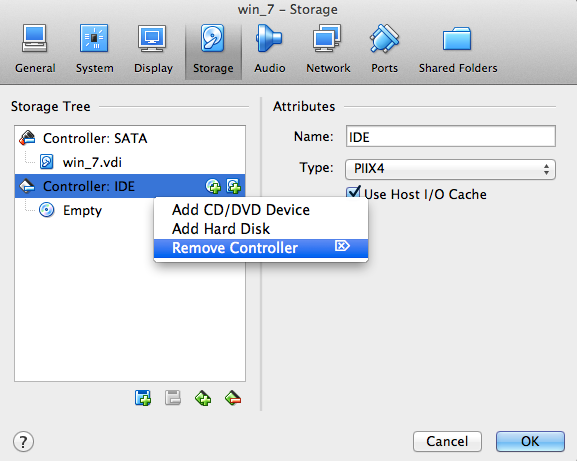
instructions.pdf - Problems can occur if you are using an external CD rom drive, and you remove it and try to start the virtual machine. IF THE FOLLOWING ERROR OCCURS, follow the steps below

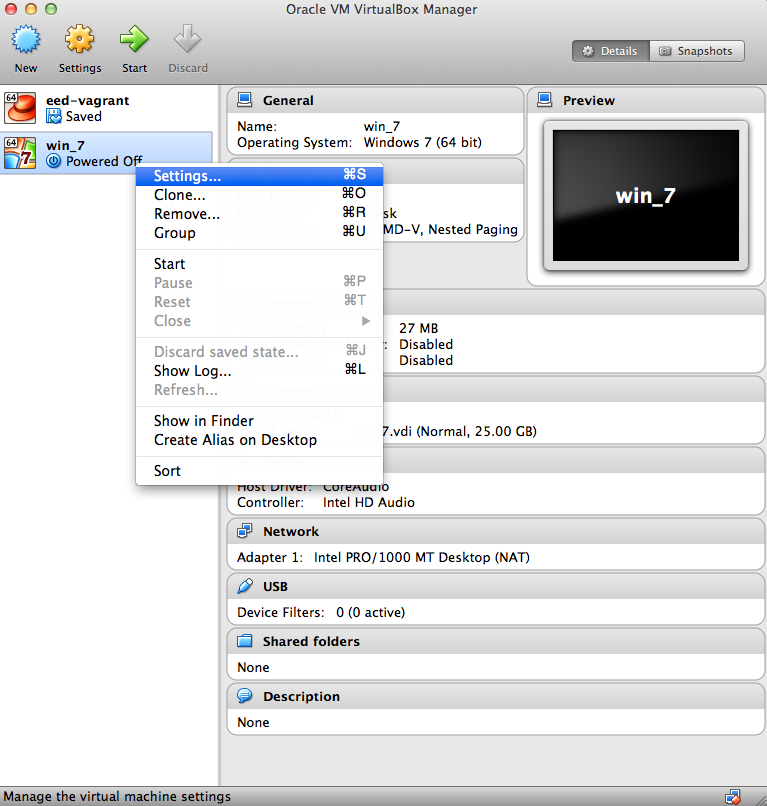
- Ctrl Click and go to "Settings"
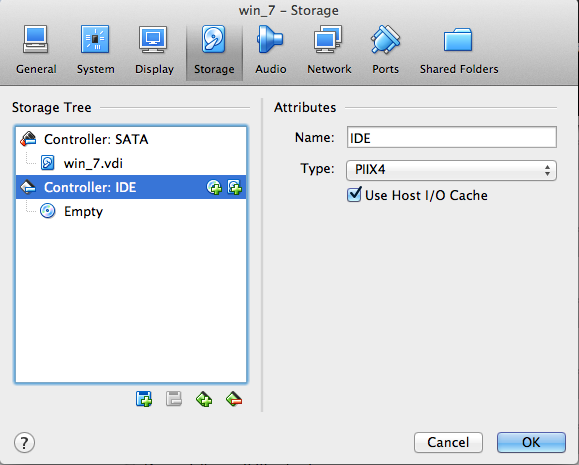
- Click on the "Storage" Button.
- ctrl + Click on the "Controller: IDE" and select "Remove Controller".
- Ctrl Click and go to "Settings"
| GEOG 469 Energy Industry Applications of GIS |