Lesson 3: Hands-On Modeling Using SketchUp
Overview
Overview
SketchUp is one of the most versatile and easiest to learn 3D modeling tools on the market. It offers an excellent balance between functionality and quality on the one hand and ease of use on the other. It allows users with relatively little experience to create exceptional 3D models of almost anything. SketchUp is not tied to a single domain (e.g., architecture) but you will find that every discipline and industry in need of 3D models is using SketchUp: architects, landscape architect, architectural engineers, interior designers, construction professionals, urban planners, woodworkers, artists, sculptors, mapmakers, historians, 3D game designers, and more. SketchUp was part of the Google™ family but is now owned by Trimble™. We will only scratch the surface of this versatile modeling tool that through its warehouse for models (assets) from users and companies might become one of your favorite tools if you are planning to create building models of the past, present, or future, if you want to design room interiors, model your dream car, or, through its large expansion opportunities you might be interested in creating solutions for augmented reality. One of our colleagues said that he treats SketchUp like Minecraft™ but instead of largely using blocks you have every geometric form under the sun at your disposal.
While geographers are only slowly yet steadily entering the world of 3D, certainly one of the biggest trends at recent ESRI user conferences, the results of using SketchUp in our residential courses are quite remarkable. Here are some models that some students have created after a weeklong introduction. More models and more information can be found on our websites (Sketchfab [1]; Sites [2]).
The model below shows Old Main, the landmark building of Penn State, in its historic form (before 1930). The model has been created by Matt Diaz and curated by Niloufar Kiromasi, both interns at ChoroPhronesis (Summer 2016). Modeling has been possible thanks to an ongoing collaboration with the Penn State Library who is offering historic images and floor plans for buildings that do not exist anymore on campus. Our efforts make a contribution to what has come known as cultural heritage research, in our case, we are working toward a strategy to recreate environments long gone. If you would like to know more about Old Main’s history, visit Penn State's Historic Old Main [3].
Click the image below to move the building around using your mouse, stylus, or finger on the screen. If you want to view the building using your Cardboard Viewer, go to Sketchfab Penn State University 1922: Old Main [4].
SketchUp model of Old Main [4]
Learning Outcomes
By the end of this lesson, you should be able to:
- Set up your workspace in SketchUp
- Draw basic 2D shapes such as rectangles, triangles, cylinders in SketchUp
- Turn 2D shapes into 3D objects in SketchUp
- Differentiate between inference, groups, and components
- Use textures in SketchUp
- Optimize your model
- Create your own building models in SketchUp
- Export your model from SketchUp and share it with the world via Sketchfab (optional)
Lesson Roadmap
| To Read |
|
|---|---|
| To Do |
|
Questions?
If you have any questions, please post them to our "General and Technical Questions" discussion (not e-mail). I will check that discussion forum daily to respond. While you are there, feel free to post your own responses if you, too, are able to help out a classmate.
3.1 Start Modeling
3.1 Start Modeling
I would like to offer you a word of caution: not everyone is a modeler. That does not mean and should not mean that you cannot create a beautiful model (or pass this lesson!). It simply means that some people develop a love for creating models while others really do not like it. One piece of advice that works on almost everything in these situations is to practice, practice, and practice. We will start off everyone on the right foot by going through several tutorials; we will encourage you to practice (and practice, and practice). We will also request a two-tier exercise at the end acknowledging that this is a 2-week max exercise and not a course on SketchUp. However, there is also the opportunity to make a contribution to an exciting project we started, that is, we have been creating historic campus models for Penn State. The video below shows a fly-through of part of the campus model for 1922 (slightly outdated as this is an ongoing project). On Sites at Penn State: Penn State Campus - Past, Present, and Future [2], we have collected building models from students who made contributions and if you are interested, there are several buildings yet to be modeled. If you ever have a chance to visit One World Center, they have a tour through the history of New York projected onto their elevator walls, visit World Trade Center Elevator Video [7]. Penn State does not have long enough elevators but it is a feasible way to communicate the dramatic changes Penn State and State College have gone through using 3D models and VR.
Video: World Trade Center elevator video (00:58) This video is not narrated.
The model that we are building can be turned into a VR experience by using a game engine such as Unity (see Modules 8 and 9). Once in Unity, there are numerous options for interacting and experiencing the models: they can be perceived in HMDs such as Oculus Rift or HTC Vive, there are extensions to create mobile phone apps, and, as you will learn, you can create a fly-through using a 360 degree camera and exporting the video, for example, to YouTube. Just to give you an example of the latter, below is a YouTube video taken from our 1922 Campus model. You can also view the video at YouTube Penn State campus in 1922 flythrough (non-360 degree version) [8].
Video: Penn State campus in 1922 flythrough (non-360 degree version) (2:01) This video is not narrated, music only.
One of the best resources to get you started with SketchUp, which covers all essential basics necessary for efficiently creating building models, is the SketchUp: Essential Training course on Lynda.com [9]. If you are new to Lynda.com I can highly recommend its repertoire of courses that are well designed, especially for technical skills. Lynda.com is free for all Penn Staters and as the essential course is perfect for our introduction and ‘only’ three hours long, we will use it and have designed exercises around its content. It is not the idea that you simply watch the videos, but that you work through the exercises. After going through the essential training course you are well set up for your own modeling project (see final assignment).
In addition to the Lynda.com course, the following sites also provide valuable resources for learning SketchUp.
- Lynda, in addition to the essential training course we will be using, offers a number of advanced topics on SketchUp. Just search for SketchUp.
- SketchUp offers a variety of introductory video lessons through their own SketchUp learning website. [10]
- One very useful tool is the SketchUp Quick Reference Card [11].
- Last, but certainly not least there are many devoted users out there who post their solutions on YouTube. Again, just search for SketchUp or more specific topics (e.g., geolocation).
3.2 Installing SketchUp
3.2 Installing SketchUp
SketchUp comes in two versions, Free and Pro. The Free version is now (since 2018) web-based and allows for modeling a variety of objects and offers very decent functionality. The Pro version offers additional functionality and is also more flexible and open for additional plug-ins (e.g., specialized export options or augmented reality).
Some of the tasks that SketchUp Pro will allow you to do are (see also Schreyer 2016):
- Export into a variety of formats such as pdf, eps, 3ds, ifc, fbx, obj, vrml
- IFC import/export
- Component-based report-generation
- Dynamic component authoring
- Solid tools for Boolean modeling
- LayOut software for drawing preparation and presentations
- BIM classifier
As part of this course, we recommend using the free trial of SketchUp Pro. Most of what you learn will be also available in the Free version but the Lynda course we are using is tailored to the pro version (they, too, demo with the trial version). To download SketchUp, go to SketchUp [12], click ‘trysketchUp'. On the next page, under "I use SketchUp for...", choose Higher Education and click Create Account to start your 30-day free trial. Please make sure that your computer meets the minimum requirements and keep in mind that using a 3-button/wheel mouse is kind of essential. In other words, if you are a digital nomad like myself, and work everywhere on your laptop, you might want to invest in a wireless mouse. It will make your modeling life drastically easier. After downloading, simply follow the instructions.
3.3 SketchUp: Essential Training
3.3 SketchUp: Essential Training
Introduction
As a Penn State student, you have access to a catalog of free self-paced courses on a huge variety of both technical and non-technical topics. These courses are high-quality video-based courses presented by professionals. One of those topics happens to be SketchUp, which you will be using in this lesson. Instead of recreating the training for you here, you will need to access the SketchUp Essentials training through Lynda.com via Penn State's subscription.
We strongly encourage you to not simply watch the videos but to practice what you learn immediately as you go through the exercises. To foster practicing, there are several tasks to be solved based on what you will learn in the Lynda course. You will not be using the exercise files provided in Lynda. The data, models that you will need to create the deliverables for the tasks can be downloaded here:
Download Lesson 3 Assignment File [13] now!
The Lynda course offers an introduction to SketchUp for both, Windows and Macintosh systems. Our team primarily uses Windows but we will try to answer questions for Mac users, too (if possible). Read through the tips and the tasks and deliverables below before starting the course. They will make more sense after you get into the course and start learning. Once you begin the Lynda course, go through it at your own pace.
Accessing the SketchUp Course
To access the SketchUp click the link below to access the full course on the Penn State Lynda website. If you aren't logged into a Penn State service like LionPATH, email or Canvas, you may need to log in using your Penn State Access Account user id and password (i.e. abc123). Once you arrive at the course, bookmark the page using your preferred browser to make it easier to return quickly. The course takes over 3 hours to complete but is broken into sections to make it easier to choose a resting point.
SketchUp 2020 Essential Training [14] by Tammy Cody
(You have subscription for courses on Linkedin Learning through Penn State)
Some tips before you get started
- Make your own template and adjust program settings to your liking.
- As always, save early and often.
- Group faces.
- Use components for repeating objects.
- Model as precisely as possible.
- Keep the polygon count low.
- Use proxy components if needed.
- Don't use textures that are too large.
Tasks and Deliverables
Tasks and Deliverables
SketchUp Essential
Concepts AssignmentInstructions
Below are the tasks to solve during or immediately after working through the Lynda course. The deliverables will serve as proof that you completed and understand the task. You will need the files you downloaded on the previous page (not the Lynda exercise files) to complete the tasks correctly. Download the Lesson 3 Sample File [15] to check that you are capturing the correct images. Before uploading your file, check your screen captures with the ones in the file. Note: Your images should be in full color! The file will display in black and while.
- Task 1: Use the eye height tool. Position your avatar in front of the Armory. Positions are at 2 ft and 30 ft. Make screenshots of both views and paste them into your Word document.
- Task 2: Create a foggy version of the Armory. Make a screenshot and paste it into your Word document.
- Task 3: Create four different views of the Armory. Give them each meaningful names. Take screenshots of each, paste them into your Word document.
- Task 4: Create the shape shown in Task 4 of the sample file linked above. Take a screenshot and paste it into your Word document.
- Task 5: Create 1.5’ railings for the Armory. Take a screenshot and paste it into your Word document.
- Task 6: Create a left side view and a right side view of the Armory. Take a screenshot and paste into your Word document.
- Task 7: Create your own component. Note: Components are important. It is up to you to decide what you want to create your component of. Take a screenshot and paste it into your Word document.
- Task 8: Apply ‘funny’ textures to the Armory.
- Task 9: Create a plan Scene of the Armory.
- Task 10: Create a blueprint style of Armory.
Submit Your File:
Compare your Word document containing the screenshots for Tasks 1-10 with the sample file linked above. Once you are happy that your file is similar to the sample file, upload your document to Lesson 3 Essential Training Assignment.
Grading Rubric
| Criteria | Full Credit | No Credit | Possible Points |
|---|---|---|---|
| Task 1: screenshot matches sample | 1 pts | 0 pts | 1 pts |
| Task 2: screenshot matches sample | 1 pts | 0 pts | 1 pts |
| Task 3: screenshot matches sample | 1 pts | 0 pts | 1 pts |
| Task 4: screenshot matches sample | 1 pts | 0 pts | 1 pts |
| Task 5: screenshot matches sample | 1 pts | 0 pts | 1 pts |
| Task 6: screenshot matches sample | 1 pts | 0 pts | 1 pts |
| Task 7: screenshot of component is present | 1 pts | 0 pts | 1 pts |
| Task 8: screenshot matches sample | 1 pts | 0 pts | 1 pts |
| Task 9: screenshot matches sample | 1 pts | 0 pts | 1 pts |
| Task 10: screenshot matches sample | 1 pts | 0 pts | 1 pts |
| Total Points: 10 pts |
3.4 SketchUp Essential Concepts Summary
3.4 SketchUp Essential Concepts Summary
Below are a few concepts that you either have encountered or are worth noticing about SketchUp.
Accurate modeling
While the name contains the word "sketch", it is a bit misleading. If you want to, you can model extremely precisely and accurately in SketchUp.
Object snapping
Like many other programs these days, SketchUp allows for snapping to various locations of/within objects such as endpoints, midpoint, edges, or circle centers.
Inference
This is one of SketchUp's most powerful features. There are several types of inferences that make it easier to create 3D models. Examples are point, line, or shape inferences. Different inferences are indicated by a color code. To learn more about inferencing, check out the SketchUp Help Center [16].
Direct value entry
Being able to enter values for objects characteristics directly is extremely useful, especially if you have measured an object you plan to model outside SketchUp.
Groups and components
This is a crazy important feature of SketchUp. Groups and components are not only making modeling easier and faster, but they are also allowing for improving the performance of 3D models. A group is, as the name implies, is a selection of entities grouped/joined together. Important: if you copy a group, all its contents are copied, too, adding to the required storage space. A component, in contrast, is a set of entities that are centrally stored and each time it is being inserted into a model, it is considered an instance. What this practically means is that the storage space of your model is drastically reduced (just think of hundreds of windows and imagine modeling them individually or as a component).
Geo-based modeling
As SketchUp originally was Google SketchUp it does not come as a surprise that it has rather convenient geo-location capabilities (latitude/longitude coordinates). Georeferencing a model is handy especially for embedding it into larger projects and for further analysis (e.g., shadow analysis). Once a model is georeferenced, other information sources become available such as:
- Ortho-photographs
- Terrain models
- Street view images
3.5 Optimization and Rendering
3.5 Optimization and Rendering
3D modeling allows us to recreate objects or invent new objects using different 3D modeling programs yet; there are limitations to what even modern-day computers can handle in terms of 3D modeling. What exactly does this mean? Essentially, 3D modeling involves lots of information relating to points and lines connected to one another across a coordinate plane. The more points and lines you use in a 3D model, the more work a computer must do to allow you to visualize those points and lines as a 3D model. Aside from the hardware, many software also has limits on the number of points and lines or geometry it can handle. Now think ahead to software such as game engines. Such software can now be used to add information to the geometry you provide in 3D models to produce interactions such as movement. The added information can start to cause lag, slowing the intended interaction so that it is no longer occurring in real-time. So how do you prevent this?
The gaming industry has developed several techniques, termed optimization methods that assist with this issue of too much geometry. Optimization helps you to maintain the highest level of detail (LoD) with as little geometry as possible. So, what exactly is level of detail? Level of detail relates to the amount of realism a 3D model and ultimately a 3D scene can have through geometry and materials. Typically, the more geometry a 3D model has, the more realistic it will appear.

Geometry is generally measured in terms of weight by either Faces (Quads) or Triangles. Some software refers to Faces as Polys or Polygons as they have four sides. Heavy models have more Faces or Triangles while Light models are the opposite. The goal is to maintain the same base shape but have different amounts of detail. For example, curved shapes take up a lot more geometry than square shapes.
Thinking back to our original issue of preventing lag or slow movement, obviously, Light models are best, but are they realistic enough? Level of detail refers to a scale of geometry weight. Some software is capable of handling 3D scenes with a mix of LoD models, where 3D models that are in focus are Heavy models but models out of focus are Light. This suggests that one needs to have both Heavy and Light models of all geometry in a scene. While this is often the case for video game development, it certainly is not good for everyone. So how else can we address this issue?
Rendering is one of the keys to creating realistic models and scenes. It requires you to add Materials (otherwise known as Textures) to your 3D models. Additionally, you introduce Light sources to the scene your 3D model(s) are in to increase the realism. Increasing the realism through materials and light sources offsets the need for detailed geometry. You use a Render Engine, there are many options in SketchUp as Extensions, to calculate the influence of the Light sources and Materials on your geometry in a scene. Keep in mind Rendering in itself only generates a static image. It can be used to render animations as video files as well, but this does not necessarily help with our issue for interactive environments. Rendering in real-time is another option but it will take up even more computer resources when combined with all your geometry and interactions in a scene. So, how do we make static rendering appear as if it were in real-time?
The gaming industry considered another solution to this issue, Texture-Baking, Render-to-Texture or Light-Mapping. This allows your 3D geometry to be associated with a render-generated material that stores all of the render results on each surface or face. This can be a time-consuming process but what it allows you to do is to add detailed information in the form of an image file like a JPEG or PNG instead of having a lot of extra geometry. We will not go into the details of this now but this technique allows you to make sure what you see, in say Sketch Up rendered also shows up in other software where you may want to import your 3D model/3D scene.
What we will introduce here, however, is Face Normals. Face Normals are part of the Material process. Have you ever noticed in SketchUp, before you add materials that some surfaces appear as a different color? This has to do with the Face Normal. Face Normals indicate which direction a material should be facing. If all face normals are correct, all your geometry would have the same color from the same viewpoint. In rendering terms, normal tells the computer where the front side of a surface is so it can show materials and apply the lighting correctly.

Flipping the Face Normals on the Grey geometry in the image will correct the color difference so all normals are facing the same direction. Now, why is this important? There are two main reasons, one of which I mentioned earlier. First, if you use a Rendering Engine, even in SketchUp, you need the computer to know which side is up so the lights work correctly. Second, while not necessarily critical in SketchUp itself but when importing your model to other software, the materials may not show up at all because the other software cannot tell which side of a Face is the front side where a material is applied. This can be challenging to correct in another software that may not be designed to handle this issue, such as a game engine. It is easiest to fix Face Normals before you apply materials but it can be done after materials have been added in your 3D modeling software.
Ultimately, the solution you choose is up to you and based on the needs of your project. However, the best practice is to focus on Lightweight models and if the detail is not enough, to add a little extra geometry to see what will work. Relying on materials is necessary for Lightweight models as the materials can replace details you did not model. Correcting Face Normals is necessary for making sure those materials and also light sources show correctly in other software. Whether you use a Rendering Engine or not, you still need to use materials that help with adding detail to your 3D models.
To learn more about Optimization for SketchUp please check out the Knowledge Base article Making a detailed model in a lightweight way [17].
Tasks and Deliverables
Tasks and Deliverables
Optimization Assignment
Instructions
In this exercise, you will work with different optimization and pre-rendering techniques that are applicable to a number of 3D modeling programs.
Goal: To introduce optimization and the role of rendering SketchUp models.
Software: Sketch Up
Required extentions for this Task:
TT_Lib Extension by ThomThom
CleanUp Extension by ThomThom
Model Info Extension by ThomThom
Probes Extension by ThomThom
Hardware: None
Model: Download Lesson 3.5 Assignment Model [18].
Tasks to Complete
- Task 1: Understand Optimization and Rendering
- Task 2: Optimize provided Example Model
- Task 3: Correct Face Normals of Optimized Model
- Task 4: Document Optimization Methods
Steps
- Install all Extensions from Extension Warehouse. (Note: you will need to sign in with a SketchUp account before it will let you install, alternatively, you can download the extension from the SketchUp Extension Warehouse website and use the Extension Manager to install the downloaded files.)
- Open up Microsoft Word to document each step.
- Download the Example Model Provided and open in SketchUp.
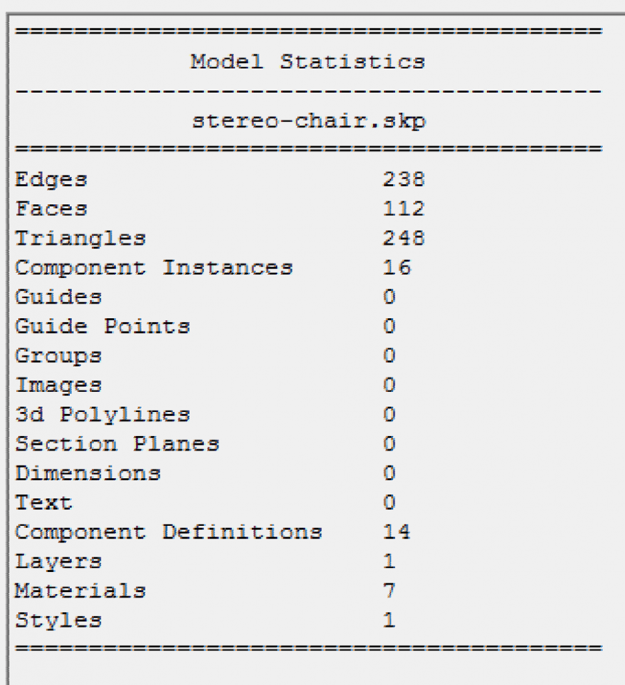
- In the menu bar at the top of the screen, click Extensions -> Model Info -> Statistics to File a. Name the file [file name].txt and choose to save to the Desktop. Click Save.
- Take a screenshot of the model in SketchUp.
- In the Word Document, type ‘Original Model’, copy the screenshot of the model. Then open the text file with your Model Info and copy the contents into the Word document next to the model screenshot.
- Next, we will use an automated tool for optimizing models in SketchUp, the Clean Up extension. Go to Extensions -> CleanUp -> Clean.
- In the window that opens up, you can choose a number of options.
- Use the default settings first. Click CleanUp.
- Take another screenshot of the model.
- Go to Extensions -> Model Info -> Statistics to File a. Name the file with a different name [file name].txt and choose to save to the Desktop. Click Save.
- In the Word document, type ‘CleanUp Model’, copy the screenshot of the model. Then open the next text file and copy the new Model Info into the document. a. Notice the difference in the numbers.
- Manually inspect the model for extra lines and hidden faces and other issues. (Note: this step will take the most time and also has higher points if done thoroughly.)
- Screenshot the model.
- Extensions -> Model Info -> Statistics to File a. Name the file with a different name [file name].txt and choose to save to the Desktop. Click Save.
- In Word, type ‘Manual Clean Up’, copy the screenshot of the model. Then open the newest text file and copy the next Model Info into the document.
- Use the Probes extension to identify Face Normals that are flipped. Extensions -> Probes -> Normals. Keep in mind that this extension will not work on Groups or Components unless you are able to access individual face.
- The three lines produced when hovering over a surface should all be facing out from the direction the surface is facing. If you do not see all three lines (Red, Green, Blue) then your Normal is flipped.
- Take one last screenshot of the model with all corrected Normals.
- In Word, type ‘Normals Flipped’, and copy the screenshot.
- The last step is to use the Position Camera option, Camera -> Position Camera to select a location that will allow you to view the model from a human perspective. If you see the height in the bottom Window that says Eye Height is more than 5’ 6”, you will need to adjust the height by using the Position Camera again.
- Find a good view using the Walk capability with the mouse, Camera -> Walk.
- Add Materials of your choice to the model and turn on Shadows (the default lighting source in SketchUp) View -> Shadows.
- Adjust your view, keep in mind it needs to be from human height, so use the Position Camera option with Walk and Look Around to help you find the best view without changing the height. You can consider a view from inside the model or outside the model, it is up to you.
- Take a screenshot of the final model with materials and lighting.
- In Word, type ‘Final Model’, and copy the screenshot.
Grading Rubric
| Criteria | Full Credit | No Credit | Possible Points |
|---|---|---|---|
| Screenshot of model | 1 pts | 0 pts | 1 pts |
| Screenshot of model statistics | 1 pts | 0 pts | 1 pts |
| Screenshot of model after using clean up | 2 pts | 0 pts | 2 pts |
| Screenshot of model statistics after using clean up | 2 pts | 0 pts | 2 pts |
| Briefly describe the differences, how much optimization has happened | 1 pts | 0 pts | 1 pts |
| Screenshot of the model after manual cleaning | 2 pts | 0 pts | 2 pts |
| Screenshot of the model statistics after manual cleaning (if done thoroughly) | 2 pts | 0 pts | 2 pts |
| Screenshot of face normals flipped | 2 pts | 0 pts | 2 pts |
| Screenshot of Final Model (as described in instructions) | 2 pts | 0 pts | 2 pts |
| Total Points: 15 pts |
Submit your file
Upload your word document and your SketchUp file to Lesson 3 Optimization Assignment.
3.6 Create a Building
3.6 Create a Building
3D Model Assignment
In order to deepen your modeling expertise, we would like you to create your own 3D model of a building. There are a number of options, and while we provide general guidelines, we leave it up to you to choose your route. Modeling is really a rather personal matter and finding your own style is important. We provide more information and some general guidelines below.
Basic Requirements
Now that you are somewhat familiar with SketchUp, your task is to create a model of a building. This model does not need to be an architectural sketch but should be perceptually similar to the original. You should pay attention to things such as windows, roof shape, textures, etc.
These are the basic requirements. If you stick to them and deliver a SketchUp model that meets these criteria, you will receive 90% of the possible points. We have a number of options below that will allow you to receive 100%. Basically, you have to include at least one advanced feature.
Advanced Requirements
Below is a list of things you can do to fulfill advanced requirement criteria. You do not have to choose them all. You can do just one or however many you would like to tackle. Generally speaking, you need to provide a model that shows a higher level of sophistication/complexity, not necessarily for all its features but for some. It is necessary that you provide a brief 1-2 paragraph write-up that explains how you improved the model with added detail. Alternatively (or in addition), there are steps you can perform that would satisfy the advanced requirements. Here is the overview:
- Option 1: Model certain aspects of your building in great detail (e.g., windows, doors) or add other more sophisticated features to your model, such as embedding it in a scene or creating a model that is geo-referenced. Document your efforts in a 1-2 paragraph write-up that explains how you added detail and why you consider this to be beyond the basic requirements.
- Option 2: Create a model of a Penn State campus building. Warning: Most of them are rather complex. Below are a couple of comments on how to use Google Earth / Street View Geolocation in SketchUp to create such a model.
- Option 3: You may have seen our collection of historic Penn State Campus buildings on Sketchfab (Links to an external site.) [1]. The Historic Campus Project evolved out of a collaboration with Penn State's Library. There are a couple of building models missing. We have collected information about the missing buildings. If you are interested, please send me an email and I will share these resources with you and if what you create is of reasonable quality we can integrate your model into our collection.
- Option 4: Create your own Sketchfab account and share your model with us this way. Exporting SketchUp models to Sketchfab is easier in the Sketchfab Pro version, as there is a plug-in for the export created by Alexander C Schreyer. However, you can also export and import the model that you have. It is sometimes a bit tricky as glitches in your model (e.g., messy topology, missing textures) are compensated in SketchUp that start showing up once the model is exported. This document (Links to an external site.) [19] instructs you on how to integrate a Sketchfab model to your website.
Additional Information
As mentioned before, modeling is a rather personal experience, there are many ways to model and in the end, you might find your personal style. Here are three examples of how you can arrive at a building model:
- SketchUp has a feature called Matching a Photo to a Model [20]. What it allows you to do is to use a photo taken of a building and create a 3D model based on this photo with some rather intriguing tools that take into account the perspective found in the photo / identified interactively and adjust it to create a proper/correct 3D model. While this method is intriguing, it does require you to have good photos of buildings and it requires a bit more training to get good results. If the photo is good and you have put in some effort, you will be rewarded with a realistic-looking 3D model.
- You can look for basic or incomplete models in the 3D Warehouse in SketchUp. Please do not submit an existing model from the warehouse or elsewhere as part of your assignment! What is legitimate to do though, is to use an existing model as a basis. One example: If you search for "Old Botany" in the 3D Warehouse, you will find a model of Penn State's Old Botany by a user name 'faith'. This model is not really a model, as it does not have proper geometries (for example, the windows). But, it is possible to use this model as a template and create a proper model around it.
- We frequently use SketchUp's heritage. What this means is that SketchUp was created by Google. There is a feature in SketchUp called "location". It can be added to your interface going through View>>Toolbars>>Location. This feature allows you to select a building that Google has integrated into its Google Earth efforts. The advantage is that your models are instantly geo-referenced. If you combine this feature with other Google products such as Google Earth (which allows for measuring the size and height of a building) and Google Street View, you have a really powerful tool at your fingertips for creating building models of many places on Earth.
Submit your file
Upload your SketchUp file to the Lesson 3 3D Model Assignment.
| Criteria | Full Credit | Half Credit | No Credit | Possible Points |
|---|---|---|---|---|
| The perceptual appeal of the entire model | 6 pts | 3 pts | 0 pts | 6 pts |
| Level of realism of doors | 2 pts | 1 pts | 0 pts | 2 pts |
| Level of realism of windows | 2 pts | 1 pts | 0 pts | 2 pts |
| Detail of the roof and associated features | 2 pts | 1 pts | 0 pts | 2 pts |
| The complexity of the building | 3 pts | 1.5 pts | 0 pts | 3 pts |
| The level of model optimization | 3 pts | 1.5 pts | 0 pts | 3 pts |
| Naturalness of textures | 2 pts | 1 pts | 0 pts | 2 pts |
| Total Points: 20 pts |
3.7 Test Your Knowledge
3.7 Test Your Knowledge
This is an ungraded assignment to test your knowledge.
3.8 SketchUp and Sketchfab
3.8 SketchUp and Sketchfab
Once you have completed your model and would like to proudly share it with the world (non-mandatory), there are again different ways to accomplish that. One of the most prominent platforms for sharing all kinds of 3D models is Sketchfab [21]. The models that you saw earlier in this module, embedded into the course website, are hosted on Sketchfab. Many modelers allow you to use their models in different contexts and Sketchfab is continuously developing ways that will make your models even more accessible such as built-in VR features. We will be using Sketchfab to organize the final submission of this module and to give you an idea of how to share 3D models that you create.
To finalize your modeling assignment, please create a Sketchfab account.
3.9 Resources
3.9 Resources
SketchUp official home page [22]
The official SketchUp YouTube channel [23]
The official SketchUp Community Forum [24]
SketchUp Help Center: Quick Reference Card [11]
In addition to the essential training course we used in this module, there are numerous courses that might be of interest. Simply search for "SketchUp" at Lynda.com [25].
Summary and Tasks Reminder
Summary and Tasks Reminder
You have gone through a hands-on modeling process in this lesson using SketchUp. While there is still a learning curve and every powerful tool requires practice, SketchUp has many, many features that make modeling easier. From its incredible warehouses to its geo-location features, it offers modelers inside and outside the geospatial sciences a lot of options for exploring the third dimension. For many applications, it is important to have a tool like SketchUp as it may be the only option to create a 3D model. It is also a good learning experience to come to appreciate the effort that has gone into designing software such as City Engine, which uses an entirely different approach as we will explore in the next lesson.
Reminder - Complete all of the Lesson 3 tasks!
You have reached the end of Lesson 3! Double-check the to-do list on the Lesson 3 Overview page to make sure you have completed all of the activities listed there before you begin Lesson 4.