In this course, we've talked about the benefits of automating your work through Python scripts. It's nice to be able to run several geoprocessing tools in a row without manually traversing the Esri toolboxes, but what's so automatic about launching PyScripter, opening your script, and clicking the Run button? In this section of the lesson, we'll take automation one step further by discussing how you can make your scripts run automatically.
Scripts and your operating system
Most of the time we've run scripts in this course, it's been through PyScripter. Your operating system (Windows) can run scripts directly. Maybe you've tried to double-click a .py file to run a script. As long as Windows understands that .py files represent a Python script and that it should use the Python interpreter to run the script, the script will launch immediately.
When you try to launch a script automatically by double-clicking it, it's possible you'll get a message saying Windows doesn't know which program to use to open your file. If this happens to you, use the Browse button on the error dialog box to browse to the Python executable, most likely located in C:\Program Files\ArcGIS\Pro\bin\Python\envs\arcgispro-py3\python.exe. Make sure "Always use the selected program to open this kind of file" is checked, and click OK. Windows now understands that .py files should be run using Python.
Double-clicking a .py file gives your operating system the simple command to run that Python script. You can alternatively tell your operating system to run a script using the Windows command line interface. This environment just gives you a blank window with a blinking cursor and allows you to type the path to a script or program, followed by a list of parameters. It's a clean, minimalist way to run a script. In Windows 10, you can open the command line by clicking Start > Windows System > Command Prompt or by searching for Command Prompt in the Search box.
The command line
Advanced use of the command line is outside the scope of this course. For now, it's sufficient to say that you can run a script from the command line by typing the path of the Python executable, followed by the full path to the script, like this:
"C:\Program Files\ArcGIS\Pro\bin\Python\envs\arcgispro-py3\python.exe" C:\PSU\Geog485\Lesson1\Project1.py
Note that:
- The path to the Python executable is enclosed in quotes, since the space in Program Files would otherwise cause the command to be misinterpreted. You would need quotes around other paths in the command if they likewise contained spaces (which was not the case here).
- While text wrapping will probably cause this command to be spread across two lines in your browser, it is important that your commands have all the components -- Python path, script path, and parameters -- on the same line. If you copy/paste the example above, you should see those command components all on the same line.
If the script takes parameters, you must also type each argument separated by a space. Remember that arguments are the values you supply for the script's parameters. Here's an example of a command that runs a script with two arguments, both strings that represent pathnames. Notice that you should use the regular \ in your paths when providing arguments from the command line (not / or \\ as you would use in PyScripter).
"C:\Program Files\ArcGIS\Pro\bin\Python\envs\arcgispro-py3\python.exe" C:\PSU\Geog485\Lesson2\Project2.py C:\PSU\Geog485\Lesson2\ C:\PSU\Geog485\Lesson2\CityBoundaries.shp
If the script executes successfully, you often won't see anything except a new command prompt (remember, this is minimalist!). If your script is designed to print a message, you should see the message. If your script is designed to modify files or data, you can check those files or data (perhaps using the Catalog pane in Pro) to make sure the script ran correctly.
You'll also see messages if your script fails. Sometimes these are the same messages you would see in the PyScripter Python Interpreter Console. At other times, the messages are more helpful than what you would see in PyScripter, making the command line another useful tool for debugging. Unfortunately, at some times the messages are less helpful.
Batch files
Why is the command line so important in a discussion about automation? After all, it still takes work to open the command line and type the commands. The beautiful thing about commands is that they, too, can be scripted. You can list multiple commands in a simple text-based file, called a batch file. Running the batch file runs all the commands in it.
Here's an example of a simple batch file that runs the two scripts above. To make this batch file, you could put the text below inside an empty Notepad file and save it with a .bat extension. Remember that this is not Python; it's command syntax:
@ECHO OFF
REM Runs both my project scripts

"C:\Program Files\ArcGIS\Pro\bin\Python\envs\arcgispro-py3\python.exe" C:\PSU\Geog485\Lesson1\Project1.py
ECHO Ran project 1
"C:\Program Files\ArcGIS\Pro\bin\Python\envs\arcgispro-py3\python.exe" C:\PSU\Geog485\Lesson2\Project2.py C:\PSU\Geog485\Lesson2\ C:\PSU\Geog485\Lesson2\CityBoundaries.shp
ECHO Ran project 2
PAUSE
Here are some notes about the above batch file, starting from the top:
- @ECHO OFF prevents all the lines in your batch file from being printed to the command line window, or console, when you run the file. It's standard procedure to use this as the first line of your batch file, unless you really want to see which line of the file is executing (perhaps for debugging purposes).
- REM is how you put a comment in your batch file, the same way # denotes a comment in Python.
- You put commands in your batch file using the same syntax you used from the command line.
- ECHO prints something to the console. This can be useful for debugging, especially when you've used @ECHO OFF because you don't want to see every line of your batch file printed to the console.
- PAUSE gives a "Press any key to continue..." prompt. If you don't put this at the end of your batch file, the console will immediately close after the file is done executing. When you're writing and debugging the batch file, it's useful to put PAUSE at the end so you can see any error messages that were printed when running the file. Once your batch file is tested and working correctly, you may decide to remove the PAUSE.
Batch files can contain variables, loops, comments, and conditional logic, all of which are beyond the scope of this lesson. However, if you'll be writing and running many scripts for your organization, it's worthwhile to spend some time learning more about batch files. Fortunately, batch files have been around for a long time (they are older than Windows itself), so there's an abundance of good information available on the Internet to help you.
Scheduling tasks
At this point, we've come pretty close to reaching true automation, but there's still that need to launch the Python script or the batch file, either by double-clicking it, invoking it from the command line, or otherwise telling the operating system to run it. To truly automate the running of scripts and batch files, you can use an operating system utility such as Windows Task Scheduler.
Task Scheduler is one of those items hidden in Windows Administrative Tools that you may not have paid any attention to before. It's a relatively simple program that allows you to schedule your scripts and batch files to run on a regular basis. This is helpful if the task needs to run often enough that it would be burdensome to launch the batch file manually, but it's even more helpful if the task takes some of your computing resources, and you want to run it during the night or weekend to minimize impact on others who may be using the computer.
Here's a real-world scenario where Task Scheduler (or a comparable utility if you're running on a Mac, Linux, or UNIX) is very important: Fast Web maps tend to use a server-side cache of pregenerated map images, or tiles, so that the server doesn't have to draw the map each time someone navigates to an area. A Web map administrator who has ArcGIS Server can run the tool Manage Map Server Cache Tiles to make the tiles before he or she deploys the Web map. After deployment, the server quickly sends the appropriate tiles to people as they navigate the Web map. So far, so good.
As the source GIS data for the map changes, however, the cache tiles become out of date. They are just images and do not know how to update themselves automatically. The cache needs to be updated periodically, but cache tile creation is a time consuming and CPU-intensive operation. For this reason, many server administrators use Task Scheduler to update the cache. This usually involves writing a script or batch file that runs Manage Map Server Cache Tiles and other caching tools, then scheduling that script to run on nights or weekends when it would be least disruptive to users of the Web map.
Inside Windows Task Scheduler
Let's take a quick look inside Windows Task Scheduler. The instructions below are for Windows Vista (and probably Windows 7). Other versions of Windows have a very similar Task Scheduler, and with some adaptation, you can also use the instructions below to understand how to schedule a task.
- Open Task Scheduler by navigating the Windows Start menu to Windows Administrative Tools > Task Scheduler.
- In the Actions pane on the right side of the window, click Create Basic Task. This walks you through a simple wizard to set up the task. You can configure advanced options on the task later.
- Give your task a Name that will be easily remembered and optionally, a Description. Then click Next.
- Choose how often you want the task to run. For this example, choose Daily. Then click Next.
- Choose a Start time and a recurrence frequency. If you want, choose a time a few minutes ahead of the current time, so you can see what it looks like when a task runs. Then click Next.
- Choose Start a program, then click Next.
- Here's the moment of truth, where you specify which script or batch file you want to run. Click Browse and navigate to one of the Python scripts you've written during this course. It's going to be easiest here if you pick a script that doesn't take any arguments, such as your project 1 script that makes contour lines from hard-coded datasets, but if you are feeling brave, you can also add arguments in this panel of the wizard. Then click Next.
- Review the information about your task, then click Finish.
- Notice that your task now appears in the list in Task Scheduler. You can highlight the task to see its properties, or right-click the task and click Properties to actually set those properties. You can use the advanced properties to get your script to run even more frequently than daily, for example, every 15 minutes.
- Wait for your scheduled time to occur, or if you don't want to wait, right-click the task and click Run. Either way, you'll see a console window appear when the script begins and disappear once the script has finished. (If you're running a Python script, and you don't want the console window to disappear at the end, you can put a line at the end of the script such as lastline = input(">"). This stops the script until the user presses Enter. Once you're comfortable with the script running on a regular basis, you'll probably want to remove this line to keep open console windows from cluttering your screen. After all, the idea of a scheduled task is that it happens in the background without bothering you.)
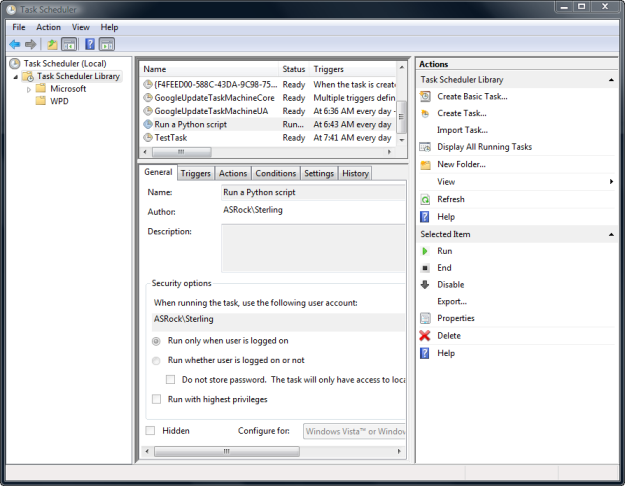 Figure 4.1 The Windows Task Scheduler.
Summary
To make your scripts run automatically, you use Windows Task Scheduler to create a task that the operating system runs at regular intervals. The task can point at either a .py file (for a single script), or a .bat file (for multiple scripts). Using scheduled tasks, you can achieve full automation of your GIS processes.