Create a Cloud-Based Enterprise Geodatabase
Using the Amazon service mentioned above, Esri makes it possible to set up cloud-based installations of ArcGIS Enterprise, software required for implementing an enterprise geodatabase. Because our Cloud and Server GIS course also guides students through putting together an instance of ArcGIS Enterprise, the instructions below are borrowed from that course. While our focus in this course will be on the enterprise geodatabase that we'll implement on the instance with ArcGIS Enterprise, a side benefit is that you'll also be able to experiment with ArcGIS Enterprise functionality if you like.
A. Prepare to work in the Amazon cloud environment
Go to Amazon Web Services and click on "Create an AWS Account."
If prompted to create a Business or Personal account, choose Personal. Please make careful note of the password you select when setting up your account, you will be needing it. It is characteristic of Amazon Web Services that things work the way they are supposed to, but you don't get a lot of hand-holding. So, if you lose your password, I'm not sure it would be easy to recover it, and you will need to fill out a form with personal information.
Second, you will need to provide payment information, including a credit card number. If you are careful and follow the course instructions about explicitly stopping your instance (virtual machine) when you are not using it, you should be able to complete the coursework while incurring charges of $20-$40. The current step of signing up is free, but you should be aware that you will start being charged immediately upon starting to use AWS services. As part of this step, you'll be asked to select a support plan. The Basic (Free) support is all you need for this class.
Third, there is an identity confirmation step during which you will receive a phone call and enter a code. This ensures you are a human. Amazon does not use the phone number provided here for other purposes.
You can monitor your billing status by clicking your user name at the top-right of the AWS screen and choosing "My Billing Dashboard." On the right side of the billing dashboard, you should see a "Month-to-Date Spend by Service" section, from which you can view details about what you're being charged for in the current month or any other month.
If any of these directions are confusing or inaccurate, please post a question or comment to the Lesson 6 discussion forum.
B. Create a VPC and key pair
In a few moments, we'll see that two of the settings involved in launching a new instance in EC2 are the VPC and key pair. A VPC (Virtual Private Cloud) is sort of your own special space carved out of Amazon's cloud. Instances in a VPC can see each other and your own network fairly easily, but they're not immediately accessible from elsewhere without some extra work on your part. That's a good thing for security.
A key pair is another security measure that will come into play when you log in to your instance for the first time. You will be logging in to your instance as a user named Administrator. The password for the Administrator user will be encrypted by AWS. The procedure for getting that password so that you can log in to your instance involves 1) creating a key pair (one key held by Amazon and another key given to you) in the AWS Management Console, 2) providing the name of that key pair when launching the instance, and 3) using the key pair after the instance has been created to decrypt the password.
Note: If you've taken our Cloud and Server GIS course (GEOG 865), you will have already created a VPC and key pair. You may skip over the steps in this section (or do them again if you like) and pick up with section C below.
- Go to the AWS Management Console and click on VPC (under the Services > Networking & Content Delivery heading).
Creating a VPC is potentially a very technical and complex activity, but it's something most people have to do at first. For that reason, Amazon has made a wizard for setting up a real basic VPC. This will suffice for our purposes.
- Click Create VPC.
- Select the VPC and more option, then under the Name tag auto-generation heading confirm that the Auto-generate box is checked and enter a name tag of geog868. These two settings will automatically name some of the AWS resources that are about to be created.
- Set the Number of Availability Zones to 1. In a real-world implementation, you'd probably want at least two, but one should be fine for our classwork.
- Set the Number of public subnets to 1 and Number of private subnets to 0.
- Leave the other settings at their defaults and click Create VPC.
- After a few moments, AWS should be done doing its thing, and you can click the View VPC button.
When we launch our instance in a few moments, we want it to be assigned a public IP address so that we can connect to it using Windows Remote Desktop. Whether the instance is assigned a public IP address or not depends on whether the subnet we just created allows for that. The default setting is for it to not assign one, but that's something we can change. - Under the Virtual Private Cloud heading in the left-hand pane of the console, click on the Subnets link. You'll see just one subnet listed, unless you've created a VPC/subnet before.
- In any case, you want to right-click on the named subnet and choose Edit subnet settings.
- Check the Enable auto-assign public IPv4 address box and click Save.
With a VPC and subnet created and configured, let's turn our attention to the key pair.
- Go to the EC2 Management Console (click the link to the left or select Services > Compute > EC2) and under the Network & Security heading click on the Key Pairs link in the navigation pane on the left side of the page.
- Click Create Key Pair.
- Give it a Name (e.g., geog868_keypair) and change the file format to .pem. Then click Create.
- Save the .pem file produced by AWS to a folder on your machine where you'll be able to find it later. (It will likely be automatically saved to your Downloads folder. You may want to move it to a location where you're less likely to delete it mistakenly.)
C. Create your own cloud-based instance of ArcGIS Enterprise
Esri provides two ways to deploy ArcGIS in AWS: using Amazon's CloudFormation service and Amazon's AWS Management Console. For our purposes, the AWS Management Console is the best option, so we will lead you through the launching of an instance via that route. However, if you decide to deploy ArcGIS in the cloud as part of your job, you may want to explore the CloudFormation option as well. Instructions for both can be found in Esri's documentation [http://server.arcgis.com/en/server/latest/cloud/amazon/use-aws-management-console-with-arcgis-server.htm]. Note that this link opens the Management Console instructions; instructions for the CloudFormation method can be found through the navigation headings on the left side of the page.
The basic idea behind what we're about to do is that Amazon has made it possible for vendors like Esri to create machine images (configurations of operating system, software, data, etc.) that can serve as blueprints for the making of child instances. Esri has created several of these AMIs (Amazon Machine Images): one that runs ArcGIS Enterprise on the Linux OS Ubuntu with Postgres, one that runs ArcGIS Enterprise on Windows with SQL Server, etc. Third parties (like us) can discover and "subscribe" to these AMIs through the AWS Marketplace.
- Browse to the AWS Marketplace description of the ArcGIS Enterprise 10.9.1 AMI [https://aws.amazon.com/marketplace/pp/prodview-rh32a6tw3ju4a?sr=0-3&ref_=beagle&applicationId=AWSMPContessa].
- In the upper right, click the Continue to Subscribe button. You'll be taken to a page of Esri's Terms and Conditions for using their software on AWS.
- Assuming you accept the terms, click the Continue to Configuration button in the upper right.
You'll be taken to a page where you can make settings in the following categories prior to launching your instance: Delivery Method, Software Version, and Region.
- For Fulfillment option, accept the default option of 64-bit Amazon Machine Image (AMI).
- For Software version, accept the default option of 10.9.1.
- For Region, select US East (N. Virginia).
- Click the Continue to Launch button in the upper right.
On this next page, you can make settings in the following categories: Choose Action, EC2 Instance Type, VPC Settings, Subnet Settings, Security Group Settings, and Key Pair Settings.
- Under Choose Action, select Launch from Website.
- For EC2 Instance Type, select m5.xlarge. This is a lower-cost option for running ArcGIS Enterprise at a reasonable speed for this course. At the time of this writing, it costs about 37 cents per hour to run an m5.xlarge instance of Windows in most regions.
In a real-world implementation, you would probably want to use a higher performing instance. Amazon provides pricing info on the various instance types available through EC2. Pricing info for current generation instance types such as m5 can be found here [https://aws.amazon.com/ec2/pricing/on-demand/]. (Scroll down to the On-Demand Pricing section.) - Under VPC (Virtual Private Cloud) Settings, select the VPC you created above (or one that you had created at some other time).
- Under Subnet Settings, accept the default option.
Note: It's not important that you have much understanding of VPCs and subnets for the purpose of this course. However, if you are interested in implementing a real-world cloud solution, it would be smart to read into them further. This overview from Amazon [https://docs.aws.amazon.com/AmazonVPC/latest/UserGuide/VPC_Subnets.html] might be a good starting point.
- Under Security Group, select the Create new based on seller settings option.
- Give your security group a Name and Description, such as geog868_securitygroup and Security rules for my Geog 868 ArcGIS Enterprise instance. Click Save.
- Under Key Pair, you should see the key pair you created in the step above (or one that you had created at some other time).
- Finally, click the Launch button in the lower right.
- On the resulting "Congratulations" page, click on the EC2 Console link. (The terms EC2 Console and AWS Management Console for our purposes refer to the same thing and are used interchangeably.)
On the Console page, you'll be taken to a listing of your Instances. You should see an entry for the instance you just launched. The instance is running (shown under Instance state), but still initializing (shown under Status check).
It should take anywhere from 5-30 minutes for your instance to be ready for use. You'll know it's ready when you see the Status change from Initializing to 2/2 checks. The Status sometimes fails to refresh itself, so you can click the Refresh button (built into the console, not your browser's) every few minutes if you don't see the 2/2 checks status.
Note: If the status check reports a failure (i.e., 0 or 1 passed checks), troubleshooting is often as simple as turning the instance off and on again. Do this by right-clicking on the instance, selecting Stop Instance, waiting until its state changes to Stopped, then right-clicking and selecting Start Instance.
You may have noticed that the instance doesn't have a name. While you wait, you can give it one. - If you hover your mouse over the instance's Name field, you should see a pencil icon appear. Click on this icon to obtain a text box, then enter a suitable name. (Something like geog868 will work.)
Every instance you create has a public-facing address, or Public DNS that can be used to reference the instance from anywhere on the Internet. The challenge is that this address changes every time you stop and then start your instance. To give your machine a more permanent address, you'll set up an Amazon Elastic IP. This is an unchanging address that Amazon allocates to you for your use. You can then associate it with any instance you choose. Every time you stop and start the instance, you'll associate it with this IP address. - Now, in the left-side navigation pane of the Console, under Network & Security, click Elastic IPs.
- Click Allocate New Address, accept all of the default settings in the resulting panel, and click Allocate.
You should see a message in a banner along the top of the page indicating that your request was successful along with the address that was allocated to you, such as 107.20.220.152. You might write down your IP address, but you should be able to easily locate it in the AWS Console when you need to. - As you did with the instance, you may want to assign a name to your new Elastic IP address. Hover your mouse over the Name field and click the pencil icon to assign a name like geog868_elasticip.
- You'll now want to associate the new Elastic IP address with your instance. Performing this step can be initiated by clicking the Associate this Elastic IP address button on the message banner, or by selecting Actions > Associate Elastic IP address.
- Either way, you'll be shown a page with a box for specifying the instance ID. Click in this Instance box, and you should see a list of the instances you've launched. Choose the correct instance and then click the Associate button. You'll now be able to access your instance through a consistent IP address, even after stopping/re-starting it.
There were a lot of steps involved in launching this instance and some of it may have seemed confusing, but the good news is you should not need to go through these steps again. Stopping and re-starting your instance now that it's been created is a much simpler process.
D. Starting and Stopping your Instance via the AWS Management Console
Whether starting or stopping your instance, you'll want to be viewing the Instances page in the AWS Management Console.
When you've finished your coursework for the day, you can Stop your instance as follows:
- Right-click on the instance, and select Stop instance.
When you want to Start your instance:
- Right-click on the instance, and select Start instance.
Note: The biggest benefit to having a consistent IP address associated with an ArcGIS Enterprise/Server instance comes when you're using it to develop map/feature/geoprocessing services to be consumed by an app or a third party. A constantly changing IP address would render such services practically unusable. We won't be authoring such services in this course, though you can check out our Cloud & Server GIS course if you're interested in learning how to do that. In this course, the benefit to the Elastic IP will be avoiding the need to locate the instance's new Public DNS address each time you want to re-start it and connect to it through remote desktop. If you'd rather not bother with associating an Elastic IP with your instance, then you're welcome to skip that step and instead look up the instance's new Public DNS and connect through that address.
If you just completed section B above, then your Enterprise Geodatabase instance is currently running, and we're going to work with it in the next section. If you are going to continue on, you don't need to stop your instance now. But be sure to stop it when you're ready to quit working.
E. Logging in to your Enterprise Geodatabase Instance
Now that your site has been created, you can get ready to log in to the instance and start working with your software.
Your instance needs to be running, so if you did Stop it at the end of the previous section, open the AWS Management Console and Start it again.
Recall that when launching the instance, you created a new Security Group using the default Create new based on seller settings option. This set up the instance so that it would accept http and https connections from any IP address. We now want to log in to the instance using the Windows Remote Desktop Connection app, but to do that, we need to add a rule to the security group allowing that sort of traffic.
- Looking at the Instances page in the AWS Management Console, click on your instance to select it. You should see a few tabs of information about your instance appear in the bottom panel. Click on the Security tab.
- Click on the geog868_securitygroup link (or whatever you named your security group) to view the rules associated with it.
- In the lower panel, under the Inbound rules tab, click the Edit inbound rules button.
- Click the Add rule button and in the row added for the new rule, select RDP (Remote Desktop Protocol) from the Type options.
Next, choose My IP from the Source dropdown list and click Save rules.
Important: You've just specified that your instance should accept remote desktop connections from your current IP address, and you'll shortly make your first remote desktop connection. It's possible that your IP address will change over the rest of the term. For example, your Internet service provider might use dynamic IP address assignment. Or you might be working on a laptop in a different location. If that's the case, then you'll need to come back and edit your RDP rule to accept connections from whatever your new IP address happens to be at that time. Alternatively, you could also choose to set the Source to Anywhere - IPv4, which would allow any IP address to attempt an RDP connection, but eliminate the need to update the RDP rule whenever your connecting-from IP address changes. For a low-stakes instance such as the one you're using in this class, you may decide it's worth the risk. (Anyone wanting access to your instance would still need to supply your password. More on that below.)
Now that the instance is ready to accept remote desktop connections, there are two bits of information we'll need to make a connection: the instance's IP address and the password of the Administrator account. -
Copy and Paste your Elastic IP address into a simple text editor like Notepad.
- Return to your list of EC2 Instances in the AWS Management Console, right-click your instance name, select Security > Get Windows Password, then follow the Browse link to get to and open the key pair file that was created when launching the instance. (It's the .pem file.)
The text box will fill with the key pair information. - Click on Decrypt Password. The Password can be seen at the bottom of the window.
Click the Copy button next to the password and paste the decrypted password into the text document where you pasted the IP address.
Hit the Close button. - Now, open the Windows Remote Desktop Connection app on your machine. (If you're working on a Mac, which you're welcome to do for Lessons 6-8, the Microsoft Remote Desktop app should operate much the same as what's described here.)
- In the Remote Desktop Connection dialog, expand the Show Options list > Local Resources tab > More button and ensure that the box for Drives is checked, then click OK. This will permit you to copy data from your machine on to the remote machine (in this case, your Amazon EC2 instance).
- Under the General tab, type or paste the Elastic IP of your instance into the Computer input box.
In the User name input box, type Administrator, then click the Connect button.
In the Do you trust this Remote connection? Window, click Connect again. -
In the Windows Security dialog, log in with the following credentials:
User name: Administrator
Password: the password you decrypted in the AWS Management Console
Click OK. -
You'll probably receive a warning that "the identity of the remote computer cannot be verified." Go ahead and answer Yes, that you want to connect anyway.
You should see the desktop of your remote instance open up.
F. Disabling IE ESC
As a security precaution, it's usually not a good idea to go around browsing the web from your production server machine. To do so is to invite malware intrusions onto one of your most sensitive computers. The operating system on your instance, Windows Server 2016, enforces this by blocking Internet Explorer from accessing most sites. This is called IE Enhanced Security Configuration (ESC). IE ESC gets burdensome when you're using the server solely for development or testing purposes, like we are. To smooth out the workflows in this course, you'll disable IE ESC right now and leave it off for the duration of the course.
- In your remote instance, go to Start > Server Manager.
- Click Local Server.
- Scroll over to the right and find IE Enhanced Security Configuration. Click the On link to access the options for turning it off.
- Select Off for both Users and Administrators and click OK. (Heads-up – the IE Enhanced Security Configuration will still show “On” until you close the Server Manager.)
- Close the Server Manager.
G. Resetting your instance password
Amazon gave you a pretty strong password for this instance, but it's not one you're liable to remember easily. You should change the administrator password to something you'll remember.
- On the remote instance, click Start > Windows Administrative Tools.
- Click on Computer Management.
- Expand Local Users and Groups and click Users.
- In the list of users, right-click Administrator and click Set Password > Proceed. The password rules are fairly stringent; please see them in the image in Figure 6.1, below.
Type and confirm a new password that you can remember. In the future, you can use this password when logging in to your instance.
Close the Computer Management and Administrative Tools windows.
Do NOT close your Remote Connection desktop.
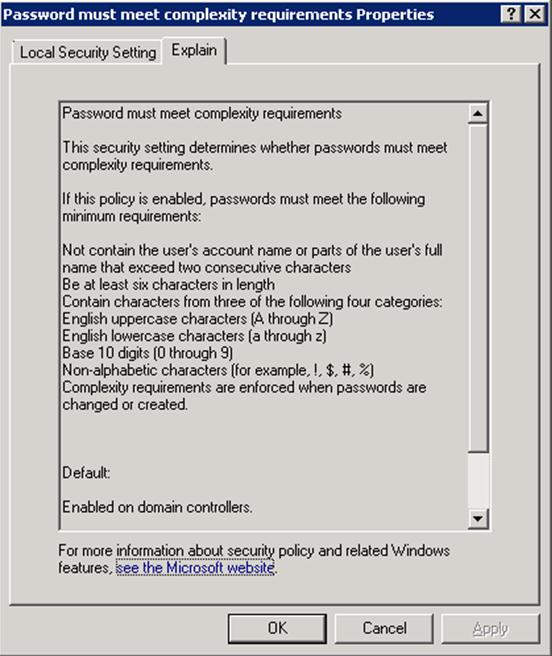
Figure 6.1: Password Security Setting Rules and Restrictions
H. Licensing ArcGIS Server on the Instance
As with the resetting of the instance password, these licensing steps need only be performed once after launching your instance.
- In preparation for completing the software authorization, go into the Lesson 6 module in Canvas and click on the Authorization file for ArcGIS Server link. This file has a .prvc file extension. You can download this authorization file on the instance or on your local machine.
- Run the Software Authorization for ArcGIS Server Authorization app on your instance (found in the ArcGIS folder on the Start menu).
- Select the I have received an authorization file... option, and click Browse. You should see drives from both your instance and your local machine.
- Locate where you stored the .prvc file you downloaded from Canvas, select it, then click Next.
- Select Authorize with Esri now using the Internet, and click Next.
- Accept the filled-in information (for one of the course authors/instructors), and click Next.
- Set Your Organization to Education/Student, Your Industry to Higher Education, Yourself to Student, and click Next.
- The Authorization Number should be filled in. Click Next.
- Authorization numbers may/may not also be filled in for several extensions. We won't need extensions for what we're doing in this class, so just click Next regardless.
- Leave the boxes for other extensions unchecked, and click Next.
- Click Finish.
I. Installing SQL Server Express on the instance
Esri supports the implementation of enterprise geodatabases using a number of relational database management packages (e.g., Oracle, SQL Server, Postgres). To expose you to another RDBMS that's commonly used in the industry, I'm going to ask you to install SQL Server Express. (This is a free, lite version of Microsoft's SQL Server package. For everything we'll do in this class, the two SQL Server packages operate the same.)
- In Canvas, download the SQL Server Express 2017 executable and copy it to your instance.
- Run the executable, choosing the Basic installation type.
After a few minutes, you should see that installation completed successfully. We'll also want to install SQL Server Management Studio, an app that's analogous to pgAdmin from earlier in the course. - Click the Install SSMS button at the bottom of the SQL Server Express installation dialog, which should open a page in your web browser.
- Locate and click on the Free Download for SQL Server Management Studio (SSMS) link.
- Run the SSMS installation executable, clicking Install on the resulting dialog.
With that, we're ready to begin playing with our enterprise geodatabases. First, you'll read a bit about ArcSDE, a technology that enables the ArcGIS products to work with data stored in an RDBMS.