While it’s good and useful to understand how to write Python code to create a GUI directly, it’s obviously a very laborious and time consuming approach that requires writing a lot of code. So together with the advent of early GUI frameworks, people also started to look into more visual approaches in which the GUI of a new software application is clicked and dragged together from predefined building blocks. The typical approach is that first the GUI is created within the graphical GUI building tool and then the tool translates the graphical design into code of the respective programming language that is then included into the main code of the new software application.
The GUI building tool for QT that we are going to use in this lesson is called QT Designer. QT Designer is included in the PyQT5 Python package. The tool itself is platform and programming language independent. Instead of producing code from a particular programming language, it creates a .ui file with an xml description of the QT-based GUI. This .ui file can then be translated into Python code with the pyuic5 GUI compiler tool that also comes with PyQT5. There is also support for directly reading the .ui file from Python code in PyQT5 and then generating the GUI from its content, but we here will use the approach of creating the Python code with pyui5 because it is faster and allows us to see and inspect the Python code for our application. However, you will see an example of reading in the content of the .ui file directly in Lesson 4. In the following, we will take a quick look at how the QT Designer works.
Since you already installed PyQt5 from the ArcGIS Pro package manager, the QT Designer executable will be in your ArcGIS Pro default Python environment folder, either under "C:\Users\<username>\AppData\Local\ESRI\conda\envs\arcgispro-py3-clone\Library\bin\designer.exe" or under “C:\Program Files\ArcGIS\Pro\bin\Python\envs\arcgispro-py3\Library\bin\designer.exe”. It might be good idea to create a shortcut to this .exe file on your desktop for the duration of the course, allowing you to directly start the application. After starting, QT Designer will greet you as shown in the figure below:
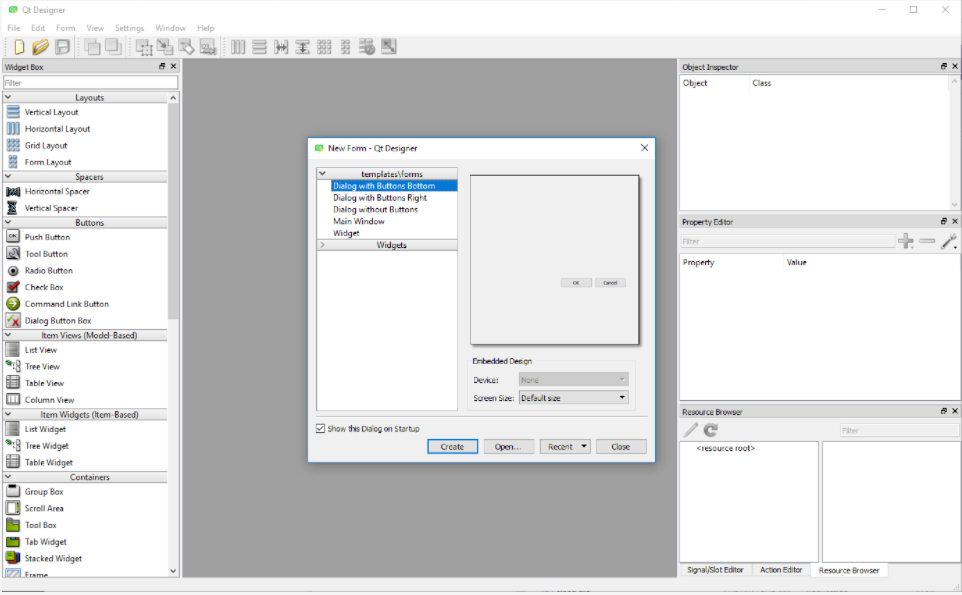
QT Designer allows for creating so-called “forms” which can be the GUI for a dialog box, a main window, or just a simple QWidget. Each form is saved as a single .ui file. To create a new form, you pick one of the templates listed in the “New Form” dialog. Go ahead and double-click the “Main Window” template. As a result, you will now see an empty main window form in the central area of the QT Designer window.
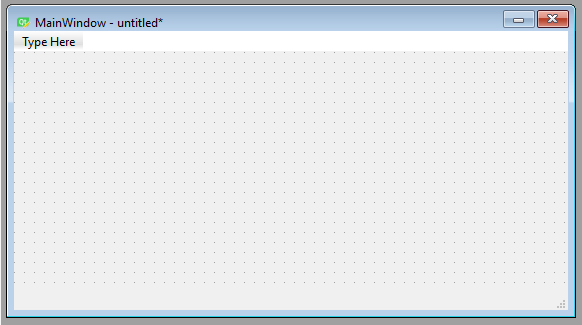
Let’s quickly go through the main windows of QT Designer. On the left side, you see the “Widget Box” pane that lists all the widgets available including layout widgets and spacers. Adding a widget to the current form can be done by simply dragging the widget from the pane and dropping it somewhere on the form. Go ahead and place a few different widgets like push buttons, labels, and line edits somewhere on the main window form. When you do a right-click in an empty part of the central area of the main window form, you can pick “Lay out” in the context menu that pops up to set the layout that should be used to arrange the child widgets. Do this and pick “Lay out horizontally” which should result in all the widgets you added being arranged in a single row. See what happens if you instead change to a grid or vertical layout. You can change the layout of any widget that contains other widgets in this way.
On the right side of QT Designer, there are three different panes. The one at the top called “Object Inspector” shows you the hierarchy of all the widgets of the current form. This currently should show you that you have a QMainWindow widget with a QWidget for its central area, which in turn has several child widgets, namely the widgets you added to it. You can pretty much perform the same set of operations that are available when interacting with a widget in the form (like changing its layout) with the corresponding entry in the “Object Inspector” hierarchy. You can also drag and drop widgets onto entries in the hierarchy to add new child widgets to these entries, which can sometimes be easier than dropping them on widgets in the form, e.g., when the parent widget is rather small.
The “Object” column lists the object name for each widget in the hierarchy. This name is important because when turning a GUI form into Python code, the object name will become the name of the variable containing that widget. So if you need to access the widget from your main code, you need to know that name and it’s a good idea to give these widgets intuitive names. To change the object name to something that is easier to recognize and remember, you can double-click the name to edit it, or you can use “Change objectName” from the context menu when you right-click on the entry in the hierarchy or the widget itself.
Below the “Object Inspector” window is the “Property Editor”. This shows you all the properties of the currently selected widget and allows you to change them. The yellow area lists properties that all widgets have, while the green and blue areas below it (you may have to scroll down to see these) list special properties of that widget class. For instance, if you select a push button you added to your main window form, you will find a property called “text” in the green area. This property specifies the text that will be displayed on the button. Click on the “Value” column for that property, enter “Push me”, and see how the text displayed on the button in the main window form changes accordingly. Some properties can also be changed by double-clicking the widget in the form. For instance, you can also change the text property of a push button or label by double-clicking it.
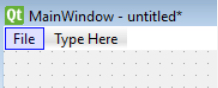
If you double-click where it says “Type Here” at the top, you can add a menu to the menu bar of the main window. Give this a try and call the menu “File”.
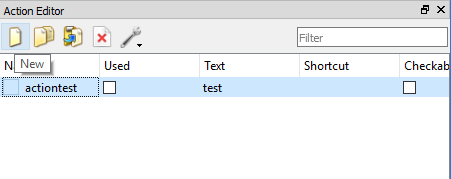
The last pane on the right side has three tabs below it. “Resource browser” allows for managing additional resources, like files containing icons to be used as part of the GUI. “Action editor” allows for creating actions for your GUI. Remember that actions are for things that can be initiated via different GUI elements. If you click the “New” button at the top, a dialog for creating a new action opens up. You can just type in “test” for the “Text” property and then press “OK”. The new action will now appear as actionTest in the list of actions. You can drag it and drop it on the File menu you created to make this action an entry in that menu.
Finally, the “Signal/Slot Editor” tab allows for connecting signals of the widgets and actions created to slots of other widgets. We will mainly connect signals with event handler functions in our own Python code rather than in QT Designer, but if some widgets’ signals should be directly connected to slots of other widgets this can already be done here.
You now know the main components of QT Designer and a bit about how to place and arrange widgets in a form. We cannot teach QT Designer in detail here but we will show you an example of creating a larger GUI in QT Designer as part of the following first walkthrough of this lesson. If you want to learn more, there exist quite a few videos explaining different aspects of how to use QT Designer on the web. For now, here is a short video (12:21min) that we recommend checking out to see a few more basic examples of the interactions we briefly described above before moving on to the walkthrough.
What is goin' on everybody?
Welcome to a tutorial covering the Qtdesigner. So, up until this point, we haven't really covered much in the way of layouts because we've been manually coding everything via pyqt and idol, so we haven't really covered layouts because probably the best way to do layouts is going to be via Qtdesigner. So, it's not so much programming here, as far as the layout is concerned, but this is going to save you tons of time. So it's pretty stupid not to use it, if you ask me.
So, if you have pyqt installed and you did the full installation like I was showing you guys, you should have the Qtdesigner. Now, when you first open up the Qtdesigner, you'll have this choice here - generally, you're going to choose main window or widget.
The main window is like a main window - it comes with the main menu and stuff - so that's kind of what we want most likely but- yeah, so we'll just choose that one. And then what you're given, once it pops up, is just a simple window to work with here. And, just to talk real briefly about how the Qtdesigner is actually laid out itself, on the left hand side here you've got all the widgets, right? So you've got some layout widgets, which we haven't talked about yet, but then a bunch of other stuff like spacers, and push buttons, and checkboxes, and calendar stuff, and labels here- just basically everything, right, that- that is a part of Qt. So, these are all of our options, and it's really as simple as click and drag - bam!: you've got a button. Bam!: you've got a checkbox. Want a horizontal spacer? You got it!
So it’s a nice al-la-cart menus here. And, I don't know… let's add a label, too, while we're at it.
Okay? So, you've got all this kind of stuff- and, so what it's allowing us to do is really just do the layout aspect. So, the functionality and the code of, you know, what happens when I push a button - we still have to handle that, but the layout we do with Qtdesigner, and this is really really great because, especially when we talk about layouts here in a moment, you'll see that, if you want to deal with those, it's going take so much longer to do it manually, especially if you change your mind.
So once you have like a window kind of set up, what you can do is- obviously, like- you can kind of- I mean, this is basically the window- but if you really want to see the window - right? - like your horizontal spacer isn't going to look like that. So, what you can do is you can come to Form, and then Preview - either Preview, which is control r, or you can Preview in, and you can preview, like, the basic styles that you have access to- so you can preview like these specific things like this, or you can just control r and preview it, you know, like this. So we have this window, and, if we resize this window, though, we'll see kind of the same problem that we had had initially- is that the window- the stuff within the window doesn't resize as it ought to. So, that's what we use layouts for. So, you can apply a layout to the entire window itself by just right-clicking somewhere in open space and then coming down to layout and just choose a layout.
So you got- let's do let's do a horizontal layout, so then it’ll just give us, like, columns; so this would be column 1, column 2, 3, and 4. So let's- this divider is basically worthless, so I’m going to delete it... at least I thought I was going to delete it- Get over here! I can't- I can't seem to- there- Oh my goodness- there we go. Okay, deleted it.
Okay, so, we've got those, and then another example here is- actually let's do a layout- let's break that initial layout, and let's give this a grid layout, actually. There we go - layout and grid. Okay? So then we can, like, move things all around and it kind of shows us the valid places that we could stuff stuff.
Now, the other nice thing is you can have the entire window as a grid layout, but then you can throw in another layout like, okay, we want one of the grid spots to be a vertical layout, right, and then we can kind of- well this one isn't going to let us change the size- but then we can, okay, throw in- let's throw in a push button in there, and then let's try to stuff something else in there - see if we get away with it. Yeah. So, as you can see, this is part of that grid layout that we just built, but, then, within that grid layer- layout, we have a vertical layout as well.
So now, though, let's do control r, and we can see here, now, we can resize this, and everything resizes with it, right? And, so, that's pretty nice. So, some of the other things that we might have a problem with is, like, for example, this says text label, and this is push button, and checkbox, and all this stuff. Well, to change that, it's pretty simple - you just double-click on it, and you can put whatever you want. So we'll put 'hello there,' and then ‘push me,’ and then ‘or me,’ and then, 'but not me’ - okay? - something like that, and 'check here.' That's good enough. So, then, on this- that's kind of like this, the stuff that we have on the left-hand side here.
But, now, looking on the right-hand side, we have Object Inspector, we've got a Property Editor, which I didn't mean to move, and then we have Resource Browser. Now, I don't really use Resource Browser - not really sure what its purpose is - but Object Inspector and Property Editor are pretty useful. So, the Object Enspector - this is like for your entire window - you know, what's going on here? You've got the main window, then you've got the central widget, which is this grid layout, you've got the stuff that is within the grid layout, and they've got this new vertical layout and the stuff that's contained within it - so that's kind of the structure of the application. Then, down here, you've got the Property Editor. Depending on what you select, will show up in this Property Editor. So we could click on this button, and we get- oh it's this 'push button'- and, mainly, these are just kind of the settings. You probably won't change these very- very often, but one thing you should definitely always change is the object name. So, the object name - here's 'push-button' - this is the object name, like, in your code, so this button is defined by 'push button.' This, one 'push-button three,' this one, 'push-button two'- that's not very useful, so, before we push this to python code, we definitely want to rename these. So, maybe this one would be, you know, 'but not mel’ right, to be kind of... going along with the name of the button itself, and then we could name this one, you know, ‘push me,’ and then this one could be ‘or me,’ right? Whoops - highlighted a little too much there. ‘or me.’ Okay? So you can do stuff like that. Also, if you ever wanted to change, like, the window's title, you can't- like, you can't really click on the window and it pop-up, but you can come over to the Object Inspector, click on main window, and then you come down here to window title, and you can change the window title. So, I don't know, 'Qt type' - that's what I’ll call it. So there's that. Also, if you want to add, like, a menu, you can totally do that - just double click there, start typing stuff, right? File, open, save, let's add a separator, bam, and then ‘exit.’ Okay? Instantly done. Right? That would have taken us, like, you know, I don't know, three or four minutes to do; we just did it, like, instantly.
And then here, luckily for us, we've got Action Open, this one says Action Save, this one's Action at- Exit, so this one actually makes a little more sense automatically - you don't have to change the name - but you can if you want. So there's that.
And then, obviously, if you wanted to add more items as you, kind of, do stuff here, right, if I added 'edit' here, it gives us a new option later, you know- So, as you add more to this menu bar, it just automatically adds stuff, you know? So, if you wanted to, you could. Now how do we actually get this to python code? So, if you're on windows and you go, say, Form, View Code, you might get this error. This is, like, a known error - it makes no sense to me why this error still is in existence, but it is. So, what we want to do, if that didn't work for you, is you can go File, Save As, and we can save this. I'm going to save it in this really deep directory, in testing, and we're going to call this pyqtdesigner, and it'll be a .ui file - that's just what it's being saved as. We'll go ahead and save that, no problem. So I have that file now - it's just right in here - and, what we want to do now is open up a console in there. So, open command window into there. So, make sure you're in the actual directory of that file, right? So that's where the file is - that's the path to this file. So, if you don't know how to do that, you can always hold shift, and right-click the directory, and you can open a command window there.
So, once you've done that, now we have to enter in some code to get this to convert. So, if you- if you can, you could sometimes get away with just doing py uic - x for executable, and then we can change- we can say pyqtdesigner.ui- that's what I saved it as- yeah, and then dash O for the output file, and we're just- we'll say pyqtdesigner.py, but I don't think this will end up working for me. But it might work for you - we'll try it. Right. So, it's probably gonna come up and say it's not recognized as a command. So now we need to reference that py.uic file - it's like a batch file - so now let's reference that. So, it would be c colon slash python 34, or whatever version you're using, and then lib/ site -packages / pyqt4, or 5, or 6, or whatever is at the time that you're watching this, /piyuic4, or 5, or whatever .bat and then - same thing as before – x for executable - if you don't use the x it won't, like, actually create a window, it'll just be a bunch of definitions - you can run it but, it's not going to do anything, and then we want to do this pyqtdesigner.ui, and then we want to do the -o, and then we'll do the output to pyqtdesigner.py.
Okay? So we'll do that, hit enter, and you should now have a new file there, right? It should be pyqtdesigner. We can open it- edit with idol. Here's all that code. Again, there's no real functionality to it - it's just the layout and just the ui only - but let's go ahead and run that. And,sure enough, here's our window. And that's that. So, you've got all the python code there, you did it in the designer, obviously this isn't really any advanced code, but, hey we built that in, like, 10 minutes, so- that would have taken us a lot longer than ten minutes to build all of that including- especially thinking about, like, the layouts that are involved here- and then, like, what happens when you're like, 'hmm, I want to change layouts' - well, that's a really- kind of a challenge, especially if you have, like, a lot of stuff inside your layouts - to kind of mentally go through what objects need to be moved to what place in your code - that's pretty hard. And, so, having the Qtdesigner there just- it makes it so much simpler. So, anyways, that's just a really quick introduction to Qtdesigner. Obviously there's a whole lot more to - it this was kind of a silly application, but, from here, all we really need to do is, you know, use connect to connect functions to these buttons, but we've already covered how to do that, so I’m not going to waste any time and do these simple connections to the buttons. But, hopefully you can see, now, how powerful just Qtdesigner is, because, really, as far as I know, there's no tk designer - but maybe I’m wrong. If I’m wrong, let me know. But Qtdesigner just makes things so much easier. So, anyways, that's it for this tutorial. If you have any questions or comments, go ahead and leave them below. Otherwise, as always, thanks for watching, thanks for all the support and subscriptions, and until next time.
Once you have created the form(s) for the GUI of your program and saved them as .ui file(s), you can translate them into Python code with the help of the pyuic5 tool, e.g. by running a command like the following from the command line using the tool directly with Python :
"C:\Users\<username>\AppData\Local\ESRI\conda\envs\arcgispro-py3-clone\python.exe" –m PyQt5.uic.pyuic mainwindow.ui –o mainwindow.py
or
"C:\Program Files\ArcGIS\Pro\bin\Python\envs\arcgispro-py3\python.exe" –m PyQt5.uic.pyuic mainwindow.ui –o mainwindow.py
, depending on where your default Python environment is located (don't forget to replace <username> with your actual user name in the first version and if you get an error with this command try typing it in, not copying/pasting). mainwindow.ui, here, is the name of the file produced with QT Designer, and what follows the -o is the name of the output file that should be produced with the Python version of the GUI. If you want, you can do this for your own .ui file now and have a quick look at the produced .py file and see whether or not you understand some of the things happening in it. We will demonstrate how to use the produced .py file to create the GUI from your Python code as part of the walkthrough in the next section.