Common Mechanics Used in VR Development
Most of the mechanics used in desktop experiences can also be used in VR. However, not all of them are best choices for VR experiences. Two of the most prominent examples are locomotion and interaction mechanics. In this section, we will briefly explore the different locomotion and interaction mechanics that are designed specifically for VR experience.
Locomotion in VR
Locomotion can be defined as the ability to move from one place to another. There are many ways in which locomotion can be implemented in games and other virtual experiences. Depending on the employed camera perspective and movement mechanics, the users can move their viewpoint within the virtual space in different ways. Obviously, there are fundamental differences in locomotion possibilities when comparing 2D, 2.5D, and 3D experiences. Even within the category of 3D experiences, locomotion can take many different forms. To give you a very general comparison, consider the following:
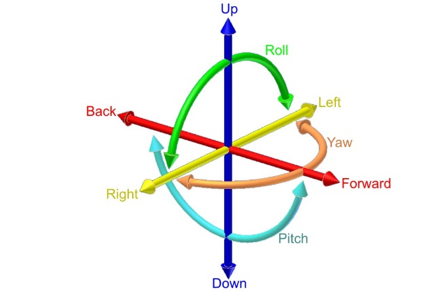
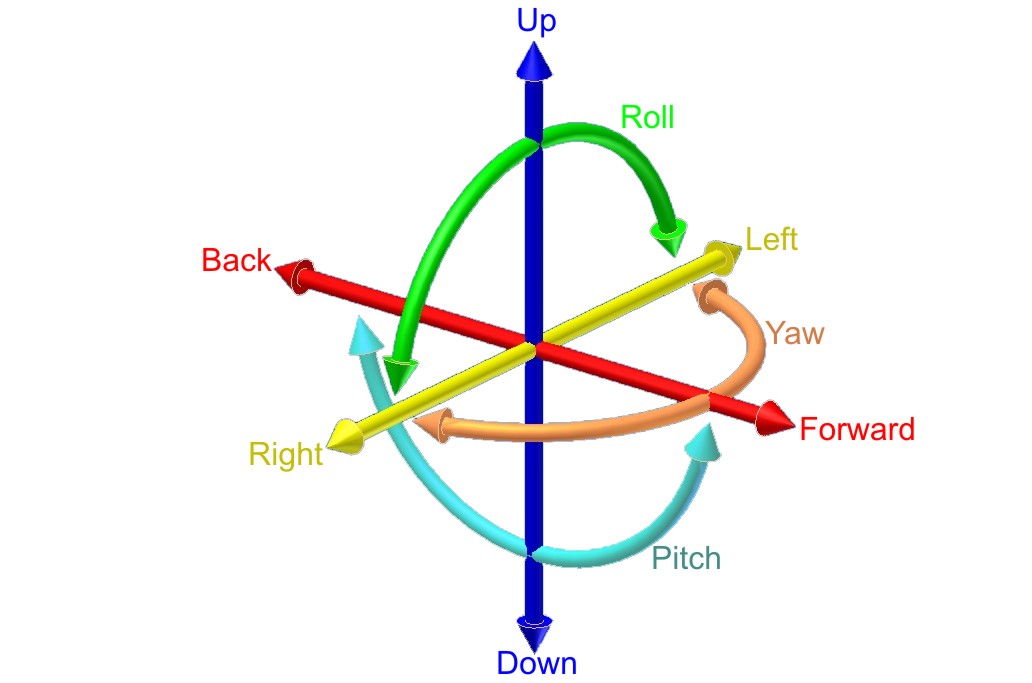
Locomotion in 2D games is limited to the confines of the 2D space (X and Y axes). The camera used in 2D games employs an orthogonal projection. Therefore, the game space is seen as “flat”. In these experiences, users can move a character using mechanics such as “point and click” (as is the case in the most 2D real-time strategy games) or using keystrokes on a keyboard or other types of controllers. The movements of the orthogonal camera in these experiences is also limited to the confines of the 2D space. Consequently, the users will not experience the illusion of perceiving the game through the eyes of the character (e.g. Cuphead, Super Mario Bros, etc.). Evidently, the same type of locomotion can be employed in the 3D space as well. For instance, in the City Builder game, we have seen in this lesson, the camera uses a perspective projection. However, the locomotion of the user is limited to the two axes of X and Z. The three-dimensional perspective of the camera (viewpoint of the user), however, creates an illusion of depth and a feeling of existing “in the sky”. In more sophisticated 3D games, such as First-person shooters (FPS) where it is desired that the players experience the game through the eyes of their character, the feeling of movement is entirely different. We stress the word “feeling” since the logic behind translating (moving) an object within a 2D space compared to a 3D space from one point to another is not that different. However, the differences in the resulting feeling of camera movements are vast (unattached distant orthogonal vs. perspective projection through the eyes of the character). In many modern games (not necessarily shooters) with a first-person camera perspective, the players can be given six degrees of freedom for movement and rotation.
Video: Making an FPS Game with Unity using the Asset Store (3:32)
In this video, we've created a first-person shooter game in unity by using content from the unity asset store. Our goal in this video is to show the assets from the unity asset store that we've used to build this game from the ground up. The assets used in this project are all available on the unity asset store with links in the description below. Let's take a look at our first-person shooter game and see what assets are used to create it. This is a first-person game where you are armed with a single pistol and must fight the evil robots around the environment. The enemy robots are fully textured and animated and react to being damaged by the player. The environment is filled with dynamic physics props and reacts to being pushed around or shot by the player. The first-person controller functionality is provided by the ultimate first-person shooter package. We move around with the WASD keys and click the left mouse button to shoot. The UFPS package provides our game with the player movement controls and a shootable and reloadable pistol. The environment in our game is provided by the snaps prototype pack. The snaps prototype asset pack is a set of themed 3d models built using pro builder. We have set up various levels using the walls, ceilings, and floors included in the snaps asset. We then use Unity's built-in enlightened light mapper to add both precomputed and baked global illumination for additional shadowing. The props in our game are also provided by the snaps prototype pack. We've attached both the rigidbody and a mesh Collider, set to convex, to each dynamic prop, which allows the player and the enemy robots to crash through the environment in a dynamic way. Lastly, our environment is topped off with a skybox from the all-sky asset. The skybox is a nice background in our level for the player to see off in the distance and outside the windows. In addition, unity standard lighting system and built-in light mapper use the scene skybox for additional detail and more even lighting on our meshes. We've used the robot warriors asset for a robot enemies. The robot warriors asset comes with three fully textured, rigged, and animated robots. We've set up two robot enemies using the models and animations from robot warriors. To integrate our enemy robots into our game, we've hooked it up to the damage system in the UFPS so that the robot enemies take damage when we fire our pistol at them and die once they take enough damage. We've use Unity's standard built-in nav mesh agent component to allow our robot enemies to walk around the map without hitting the walls of the level. We have also used the volumetric lighting solution Aura2, to provide atmosphere. Volumetric lighting can help us simulate an environment in which light shafts can be seen. By using Aura2's volumetric lighting system, we were able to attach a red spotlight to each robots eye, giving them a menacing red cone of light wherever they look. Finally, we've used Unity's post-processing stack to provide color grading, tone mapping, bloom, and anti-aliasing over the final image. This brings our final render together visually. As you can see, by using assets from the Unity asset store, we can quickly create an environment, integrate believable characters, and also implement gameplay functionality. All of the assets shown are available now on the unity asset store. To learn more click the link in the description below. Thanks for watching.
The FPS Controller we used in the previous lessons is an example of providing such freedom (except for rotation along the Z-axis). The mechanics for the movement in such games, however, are almost all the time through a smooth transition from one point to another. For instance, in the two different locomotion mechanics we used in this course (FPS Controller, and camera movement) you have seen that we gradually increase or decrease the Position and Rotation properties of the Transform component attached to GameObjects. This gradual change of values over time (for as long as we hold down a button for instance) creates the illusion of smoothly moving from one point to another.
As was previously mentioned, there are many ways in which locomotion can be realized in virtual environments, depending on the type and genre of the experience, and the projection of the used camera. Explaining all the different varieties would be outside the scope of this course. Therefore, we will focus on the one that is most applicable in VR.
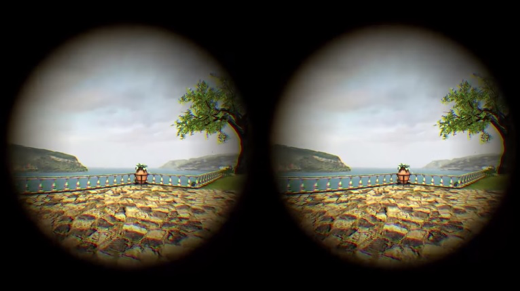
The experience of Virtual Reality closely resembles a first-person perspective. This is the most effective way of using VR to create an immersive feeling of perceiving a virtual world from a viewpoint natural to us. It does not come as a surprise that in the early days of mainstream VR development, many employed the same locomotion techniques used in conventional first-person desktop experiences in VR. Although we can most definitely use locomotion mechanics such as “smooth transition” in VR, the resulting user-experiences will not be the same. As a matter of fact, doing so will cause a well-known negative effect associated with feelings such as disorientation, eyestrain, dizziness, and even nausea, generally referred to as simulator sickness.
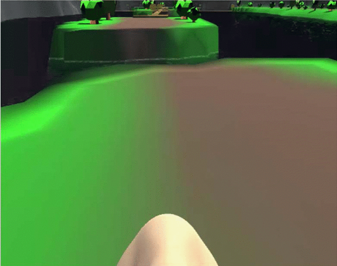
According to Wienrich et al. “Motion sickness usually occurs when a person feels movement but does not necessarily see it. In contrast, simulator sickness can occur without any actual movement of the subject” [1]. One way to interpret this is that simulator sickness is a form of physical-psychological paradox that people experience when they see themselves move in a virtual environment (in this case through VR HMDs) but do not physically feel it. The most widely accepted theory as to why this happens is the “sensory conflict theory” [2]. There are, however, several other theories that try to model or predict simulator sickness (e.g. the poison theory [3], the model of negative reinforcement [4], [5], the eye movement theory [4-5], and the and the postural instability theory [6]). Simulator sickness in VR is more severe in cases where the users must locomote, particularly using smooth transition, over a long distance. As such, different approaches have been researched to reduce this negative experience. One approach suggested by [1] is to include a virtual nose in the experience so the users would have a “rest frame” (a static point that does not move) when they put on the HMD.
Other approaches such as dynamic field of view (FOV) reduction when moving or rotating have also shown to be an effective way to reduce simulator sickness.
In addition to these approaches, novel and tailored mechanics for implementing locomotion, specifically in VR, have also been proposed. Here we will list some of the most popular ones:
- Physical movement: In the earlier version of VR HMDs, no external sensors were used for tracking the position of the users. As such, physically moving around a room and experiencing translation (movement) inside the virtual environment was not easily achievable (in few examples other forms of sensors such as Microsoft Kinect were used for this purpose to some extent). In the newer models of HMDs however, external sensors were added to resolve this shortcoming by providing room-scaled tracking. For instance, Oculus Rift, and HTC Vive both have sensors that can track the position of the user within a specific boundary in a physical space. This allows the users to freely and naturally walk around (as well as rotate, sit, and jump) within that boundary and experience the movement of their perspective in VR. As we have already seen in Lesson 1, the latest generations of HMDs such as Oculus Quest employ the inside out tracking technology which eliminates the need for external sensors. Using these HMDs, the users are not bound to a specified physical confine, and they can freely move around in a much larger physical space. This method of locomotion is the most natural one we can use in VR.
Video: Oculus Insight VR Positional Tracking System (Sep 2018) (02:39)
Over the last three years, the Occulus team has built revolutionary inside-out tracking technology. That's what we call Oculus insight. Insight uses four ultra wide-angle sensors and advanced computer vision algorithms to track your exact position in real-time without any external sensors. It's thanks to this technology that you can move around freely, fluidly, and fast. It's really cool. Now let's take a look at how insight works. First of all, it uses the four wide-angle sensors on the headset to look for edges, corners, and pretty much any distinct feature in the environment. It then builds a three-dimensional map that looks like a sparse point cloud. These are the green and blue dots that you see here. The system combines this map with gyroscope and accelerometer input and generates a very precise estimate of your head position every millisecond. Insight is a very flexible and robust system. It relies on all the different features in the environment for tracking. So floors and ceiling, walls, rugs, art on the wall, window fixtures, curtains, you name it, and even furniture. Now, this flexibility is important particularly in more challenging environments, like for example, a room with a super shiny floor or with bare white walls with no texture, with nothing on them. And we've tested Oculus Insight in hundreds of different home spaces and we're gonna continue to do that to fine-tune it over time. Now many of you have built room-scale experiences for Oculus Rift. Oculus Insight goes beyond room-scale and it works in much larger spaces without any external sensors. Oculus Insight also powers the Guardian system in Oculus Quest. Just like on Rift, Guardian is what helps keep you safer while you're in VR. And Oculus Insight supports multi-room guardian, so, I love this guy, so you can easily take your headset to different parts of your home, your friend's home, or your office, and it will remember the Guardian setup for each of those spaces.
- Teleportation: teleportation is still considered the most popular locomotion system in VR (although this may change soon due to the emergence of inside out tracking technology). It allows users to jump (teleport) from one location to another inside a virtual environment. There are different types of teleportation as well. The most basic form is instant teleportation where the perspective of the user is jumped from one location to another instantaneously when they point to a location and click on their controller.
Other forms of teleportation include adding effects when moving the user’s perspective from one location to another (e.g. fading, sounds, seeing a project of the avatar move, etc.), or providing a preview of the destination point before actually teleporting to that location:
Another interesting and yet different example of teleportation is the “thrown object teleported”, where instead of pointing at a specific location, the user throws an object (using natural gestures for grabbing and throwing objects in VR as we will discuss in the next section) and then teleport to the location where the object rests.
- Arm swing: this is a semi-natural way to locomote in VR. Users must swing their arms while holding the controllers, and the swinging gesture will translate their perspective in the virtual environment. The general implementation of this mechanic is in such a way that the faster users swing their arms, the fast their viewing perspective moves in the virtual environment. This is a rather useful locomotion mechanic when the users are required to travel a relatively long distance, and you do not want them to miss anything along the way by jumping from point to point.
- Grabbing and locomoting: Imagine a rock-climbing experience in VR, where the user must climb a surface. An arm swing gesture is probably not the best locomotion mechanic in this case to translate the perspective of the user along the Y-axis (as the user climbs up). By colliding with and grabbing GameObjects such as rocks however, the user can locomote on the X, Y, or Z axes in a more natural way. This locomotion mechanic is used in many different VR experiences for climbing ladders, using zip-lines, etc.
- Dragging: this is a particularly interesting and useful locomotion technique, specifically for situations where the user a top-down (overview) perspective of the virtual environment. Consider a virtual experience where the size of the user is disproportionate to the environment (i.e. they are a giant) and they need to navigate over a large terrain. One way to implement locomotion in such a scenario is to enable users to grab the “world” and drag their perspective along the X or Z axes.
There are many other locomotion mechanics for VR (e.g. mixing teleportation and smooth movement, run in-place locomotion, re-orientation of the world and teleportation together, etc.) that we did not cover in this section. However, the most popular and widely used ones were briefly mentioned.
References
[1] C. Wienrich, CK. Weidner, C. Schatto, D. Obremski, JH. Israel. A Virtual Nose as a Rest-Frame-The Impact on Simulator Sickness and Game Experience. 2018, pp. 1-8
[2] J. T. Reason, I. J. Brand, Motion sickness, London: Academic, 1975.
[3] M. Treisman, Motion Sickness: An Evolutionary Hypothesis” Science, vol. 197, pp. 493-495, 1977.
[4] B. Lewis-Evans, Simulation Sickness and VR-What is it and what can developers and players do to reduce it?
[5] J. J. La Viola, "A Discussion of Cybersickness in Virtual Environments", ACM SIGCHI Bulletin, vol. 32, no. 1, pp. 47-56, 2000.
[6] G. E. Riccio, T. A. Stoffregen, "An ecological theory of motion sickness and postural instability", Ecological Psychology, vol. 3, pp. 195-240, 1991.