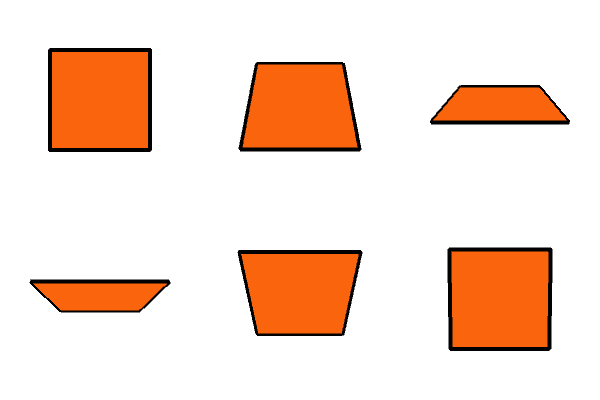
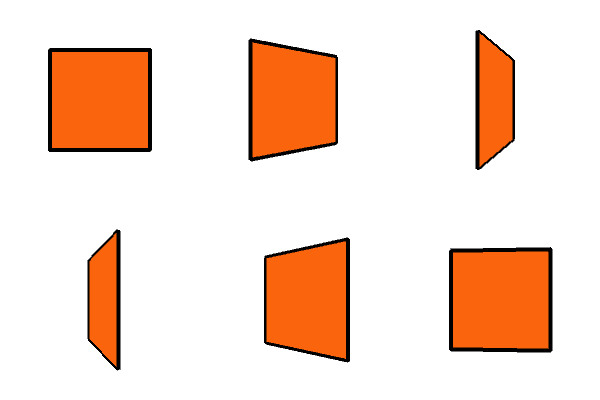
New syntax discussed: P3D, rotateX, rotateY, sphere, box, beginShape(QUADS), beginShape(TRIANGLES)
Rotation around X or Y
Last week when we rotated shapes, all the rotations were in the plane of the computer screen, meaning that the rotation was happening around the Z axis, if you think of the Z axis as a line drawn poking straight through your screen. Processing has a 3D renderer to allow you to work in a three-dimensional coordinate system. The default is that the positive Z direction is out of the screen towards you and the negative Z direction is into the screen away from you. In order to let Processing know that you want to have a 3D coordinate system, you have to specify the renderer when you call size(). We are going to work with the P3D renderer but there are other ones, such as OpenGL. You can look up the other ones at the Processing website if you want to.
Example 6.0
Here are a series of three simple programs to demonstrate rotations in 3D. First, start with the rotation we know about from last week: rotation around the Z axis.
//rotating orange square

float rotAngle = 0;

void setup(){
   size(400, 400);
}

void  draw(){
   background(255);
   translate(width/2, height/2);

   rotate(rotAngle);
   rotAngle+=0.01;
      fill(250, 100, 13);
   rectMode(CENTER);
   rect(0, 0, 200, 200);
}

Example 6.1
Now let’s take that same square and rotate it around the X axis. That program looks like this:
//rotating orange square
//rotates around X axis

float  rotAngle = 0;

void setup(){
   size(400, 400, P3D);
}

void  draw(){
   background(255);
   translate(width/2, height/2,0);
   rotateX(rotAngle);
   rotAngle+=0.01;
   fill(250, 100, 13);
   strokeWeight(4);
   rectMode(CENTER);
   rect(0, 0, 200, 200);
}

Notice the different things in this program: When I called size(), I specified P3D after I gave the dimensions of the window. When I called translate(), I used three arguments. The third one is for translation in Z. I used the command rotateX instead of just rotate.
Example 6.2
Here’s the same program again except with rotation around the Y axis:
//rotating orange square
//rotates around Y axis

float rotAngle = 0;

void setup(){
   size(400, 400, P3D);
}

void draw(){
   background(255);
   translate(width/2, height/2,0);
   rotate(rotAngle);
   rotAngle+=0.01;
   fill(250, 100, 13);
   strokeWeight(4);
   rectMode(CENTER);
   rect(0, 0, 200, 200);
}

The only thing different between the program in Example 6.2 and the program in Example 6.1 is the use of rotateY instead of rotateX.
 Here's