Knowing how to rotate a flat shape in space is the first step to drawing an actual shape in three dimensions. There is a little bit of a trick to drawing in three dimensions and that is that the usual shape primitives, such as rect() and ellipse() don’t accept Z coordinates as arguments. If you want to build a three-dimensional object, you have to use beginShape() and endShape() because the vertex() command does accept Z coordinates.
If you have ever taken a drawing class, then you probably have learned how to draw 3D shapes on paper using perspective techniques, like in my sketch of a make believe city street:
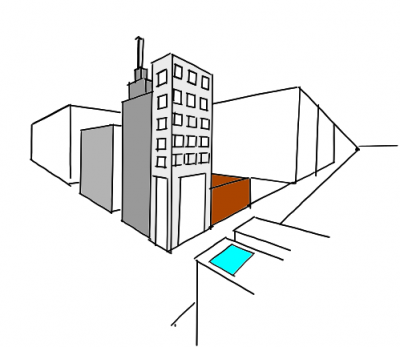
Even with no formal training, most people I've ever met can draw a cube in perspective by drawing two overlapping squares and then connecting up all the corners.
Those techniques are great for visualizing a three-dimensional world on a flat canvas, but when we want to use computer graphics, we won't use these techniques. Instead we have to imagine where the vertices of our three dimensional shape really are with respect to each other, set those vertices, and then if we want the shape to be seen in perspective, we let the computer create the viewing angle.
So in the program examples below where we are going to draw a cube that rotates about its own center, we have to imagine where the 8 vertices are with respect to the center of a cube:

Example 6.4
Let’s draw a cube that will rotate about its center. We’ll start by drawing one face of the cube, like this:
float theta=0;
float d = 100; //length of an edge of the cube

void setup(){
   size(600, 400, P3D);
}

void draw(){
   background(255);
   stroke(0);
//make the origin the center of the cube
   translate(width/2,height/2,0);
   rotate(theta);
   theta+=.01;
   beginShape(QUADS);
//back face of the cube
   fill(255, 0, 0);
   vertex(-d/2, -d/2, -d/2);
   vertex(d/2, -d/2, -d/2);
   vertex(d/2, d/2, -d/2);
   vertex(-d/2, d/2, -d/2);
   endShape();
}
Notice that I used the argument QUADS with beginShape(). That lets Processing know that I’m trying to draw something with four sides. This will become useful later because if we want to draw several four-sided shapes in a row, we don’t have to use separate beginShape()/endShape() pairs. You’ll see what I mean with the next step for this project when we add the front face of the cube:
float theta=0;
float d = 100; //length of an edge of the cube

void setup(){
   size(600, 400, P3D);
}

void draw(){
   background(255);
   stroke(s);
//make the origin the center of the cube
   translate(width/2,height/2,0);
   rotateY(theta);
   theta+=.01;
   beginShape(QUADS);
//back face of the cube is red
   fill(255, 0, 0);
   vertex(-d/2, -d/2, -d/2);
   vertex(d/2, -d/2, -d/2);
   vertex(d/2, d/2, -d/2);
   vertex(-d/2, d/2, -d/2);
//front face of the cube is yellow
   fill(255, 255, 0);
   vertex(-d/2, -d/2, d/2);
   vertex(d/2, -d/2, d/2);
   vertex(d/2, d/2, d/2);
   vertex(-d/2, d/2, d/2);
   endShape();
}
See how there is only one beginShape() / endShape() pair. That is how putting QUADS as the argument to beginShape() saves us some work. When you put QUADS in as the argument to beginShape(), Processing expects you to write down a list of vertices in groups of 4 and it will make each group of 4 into a closed quadrilateral. That way you only have to do beginShape() / endShape() one time, just enclose all the vertices in there. You can do this in 2D also if you want to make a series of quadrilaterals.
OK, now to add a side face:
float theta=0;
float  d = 100; //length of an edge of the cube

void setup(){
   size(600, 400, P3D);
}

void  draw(){
   background(255);
   stroke(0);
//make the origin the center of the cube
   translate(width/2,height/2,0);
   rotateY(theta);
   theta+=.01;
   beginShape(QUADS);
   //back face of the cube is red
   fill(255, 0, 0);
   vertex(-d/2, -d/2, -d/2);
   vertex(d/2, -d/2, -d/2);
   vertex(d/2, d/2, -d/2);
   vertex(-d/2, d/2, -d/2);
//front face of the cube is yellow
   fill(255, 255, 0);
   vertex(-d/2, -d/2, d/2);
   vertex(d/2, -d/2, d/2);
   vertex(d/2, d/2, d/2);
   vertex(-d/2, d/2, d/2);
   //a green side face
   fill(0, 255, 0);
   vertex(-d/2, -d/2, -d/2);
   vertex(-d/2, -d/2, d/2);
   vertex(-d/2, d/2, d/2);
   vertex(-d/2, d/2, -d/2);
   endShape();
}

It’s an exercise for you to finish the cube. Note that since we are looking at this cube with a straight-on perspective, you can just draw the four side faces and forget about the top and bottom because you'll never see them. It is a common trick in computer graphics not to draw anything that won't be seen. If we were going to allow rotation around the x axis, then you'd probably want to draw the top and bottom faces.
In fact, Processing does have two intrinsic functions called box() and sphere(). For real, you’d probably want to use the box() function to draw a 3D cube. I made you do it the hard way so you’d see how to draw other less regular shapes.
Export a stand-alone app
Wouldn’t it be great to show your pals what you’ve been up to without making them download Processing and compile your program?! I’m sure you’ve been wanting to do this. Well, you can. All you have to do is choose “Export Application . . .” from Processing's File drop-down menu. Processing will pop up a dialog box asking you what kind of platform (mac, windows, or linux) you are intending to run it on. Then it will make a new folder inside your sketch folder with the app in it. Try it out!
Exercises
6.1 Draw three shapes to the screen all at once. Have each of them rotate about their own centers: one rotates around the z axis, one rotates around the x axis, and the other rotates around the y axis.
6.2 Finish the 4th side of the cube. Change the program to rotate the cube with the mouse.
6.3 Use beginShape(TRIANGLES) to draw a four-sided pyramid with mouse-controlled rotation in 3D space.
6.4 Export an app so you or someone else can run one of your programs.
Turning in your work
Turn in either 6.1 OR 6.3 to its assignment dropbox in Canvas