New syntax discussed: image, Image, loadImage, tint, save
Import an image and display it
You can use Processing to import an image and display it in the display window. The procedure is somewhat similar to the procedure to load a font and display text. You first need to put the image you want into the sketch’s data folder, or else in your program you need to specify the entire pathname to locate the image in your computer’s file system. There are several ways to put an image in your folder. The easiest is to drag the icon for the image from wherever it lives on your computer and then drop it onto your open Processing editing window. You will get a message in the console saying “1 file added to sketch” or something similar. In order to interact with your image in your program, you declare the variable type PImage, you use loadImage() to get it into the program and then you use image() to display it. Here is a simple example:
Example 6.4
// display an image of Massimo's head

PImage img;
size(400, 400);
img = loadImage("massimo_head.egg_e5137.png");
image(img, 0, 0);
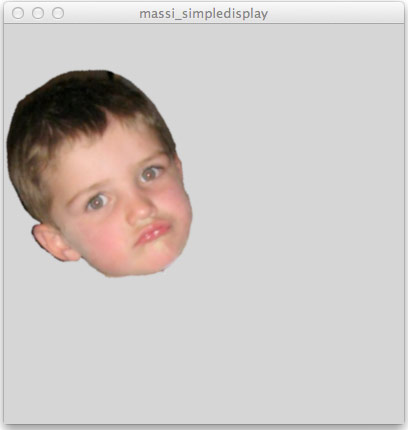
 In this program, I declared a variable called img of type PImage, then I loaded the image file and assigned it to that variable, then I plotted the image at the point (0,0). Note: if you want to follow my examples with the picture of Massimo, I attached the image file to this page, directly below this paragraph. If you right-click (control-click on a mac) the image below and then save it to your computer, you can use it. As I said before, in order to make your program "see" the file, the file has to be in the data folder of your program, much like a font. The easiest way to do this, is to drag the file from wherever you saved it to on your computer, and drop it onto your sketch environment. Processing will make a copy of the file and put it in the data folder of your sketch for you. Another point to bring up here: The image of Massimo's head was cut out from a larger snapshot. There are many commercial (and some free) programs for image manipulation or vector graphics editing, such as Adobe Photoshop or Inkscape. Learning to be proficient with those is probably worth a whole 'nother course, and one not necessarily taught by me.
Change attributes of the image, interactivity with images
Images are treated just like any other object, so using all the skills we know already, we can plot this image to the screen multiple times, or have it move or twirl it around, or plot it to the screen with a mouse click, or change its size, and so forth. Here are a couple of examples of that:
Example 6.5
// display three images of Massimo's head
// they move across the screen

PImage img;
float x = 0;

void setup(){
size(800, 800, P3D);
img = loadlmage("massimo_head.egg_e5137.png");
}

void  draw(){
   background(200);
   for  (int i=0;i<550;i=i+250){
      image(img,x,i);
   }
   x++;
   if (x>=width) {
      x=0;
   }
}
In the program above, I use a for loop to draw three of the images to the screen. They move across the screen from left to right and when they get to the right side they start over again on the left side.
You can change the overall color and opacity of an image with tint(). The tint() command takes 3 rgb color arguments -- or one argument for greyscale -- and an optional fourth argument to specify opacity. If you want to change the opacity of an image without changing its colors, use white (255) as the tint color, and use the desired opacity as the second argument, so in that case you’d just have two arguments in tint(). Here is an example of tint():
Example 6.6
// display images of Massimo's head with a mouse click
// images are tinted green and have some transparency

Plmage img;

void setup(){
size(800, 800);
img = loadlmage("massimo_head.egg_e5137.png");
}

void  draw(){
}

void  mouseClicked(){
   tint(59, 98, 5, 128);
   scale(random(0.5, 2.5));
   image(img,mouseX,mouseY);
}

Notice anything unusual about the program in Example 6.6? Look at the draw() block. There's nothing there! The deal is that if there is a setup() block, then there has to be a draw() block as well. However, it doesn't have to do anything, it can just be a place holder. You want to do all your file input in setup() so that it only has to happen once. This goes for images and fonts and other data files. In the program I wrote, all I wanted was for the image to display when I clicked the mouse inside the display window. So, I used the mouseClicked() function to do all the action in the program. But since I was importing an image, I had to use setup(), and since there was a setup(), there had to be a draw(). I made draw() empty since I didn't need it for anything.
Export an image
You can save a snapshot of your creation with the save() command. You can specify TIFF, TARGA, JPEG, or PNG files. The default if you don’t specify a file extension is TIFF. The default place your exported image file will go is into the same folder where your sketch lives. Here’s an example in which a key press saves a file called testimage.jpg:
// display an image of Massimo's head
// save it with a key press

PImage img;

void setup(){
size(400, 400);
img = loadImage("massimo_head.egg_e5137.png");
}

void  draw(){
image(img, 0, 0);
if (keyPressed  ==  true && key == 's'){
   save("testimage.jpg");
   println("Your image has been saved! Yay!");
}
}
Importing an image, plotting it, and saving the resulting composition back out to another file are all explained in this screencast! (and the usual captioned version).Exercises
6.5 Find or create a smallish snapshot to play around with images.
6.6 Using a head shot of you or a friend, make an animated person that walks across the screen (or jumps up and down or says something with a speech bubble) by importing an image of the face and drawing the rest of the body by hand.
Turning in your work
Submit 6.6 to its assignment dropbox in Canvas. Please zip your whole folder and submit that, or else make sure you also submit your image file(s) along with your pde file so I can run your program!