Since in contrast to tkinter, PyQt5 is not part of the Python standard library, we may need to install the PyQt5 package before we can use it from our code. We are currently using the Python installation that comes with ArcGIS Pro. Therefore, we will use the conda installation manager from within ArcGIS Pro to check whether PyQt5 is installed and if not, install it with all the packages it depends on. This will also automatically install the binary QT5 library that the PyQt5 package is a wrapper for.
Go ahead and open the package manager in Pro (Project -> Python) and check the Installed Packages list to see if "pyqt" is installed. If not, go to Add Packages and install "pyqt"; the process is identical to our installation of spyder back in Lesson 1.
You probably will now have version 5.9.2 or later of pyqt installed. Next, try to run the test code on the next page. If this code gives you an error of...
This application failed to start because it could not find or load the Qt platform plugin "windows".
...then you will need to come back to this page and set the QT_QPA_PLATFORM_PLUGIN_PATH environmental variable to the path of the plugin folder of PyQt5 (as explained in the blog post Developing Python GUI in ArcGIS Pro with PyQt). This can be done with the Windows tool for setting environmental variables by following the instructions below:
- Go to the Windows "Settings" and type “environmental” into the "Find a setting" search field and then pick “Edit the system environment variables”.
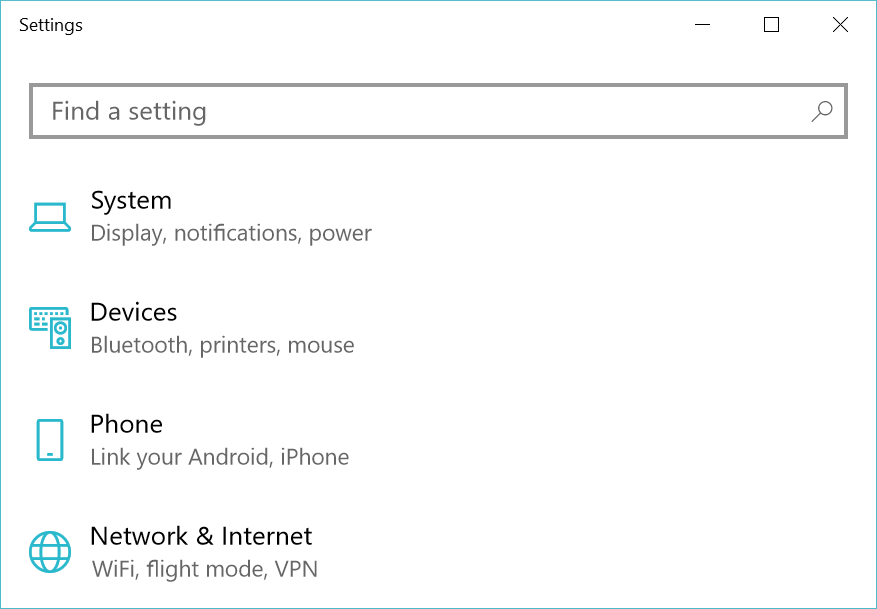 Figure 2.8 Windows "Settings" dialog
 - Click on “Environment variables…” at the bottom.
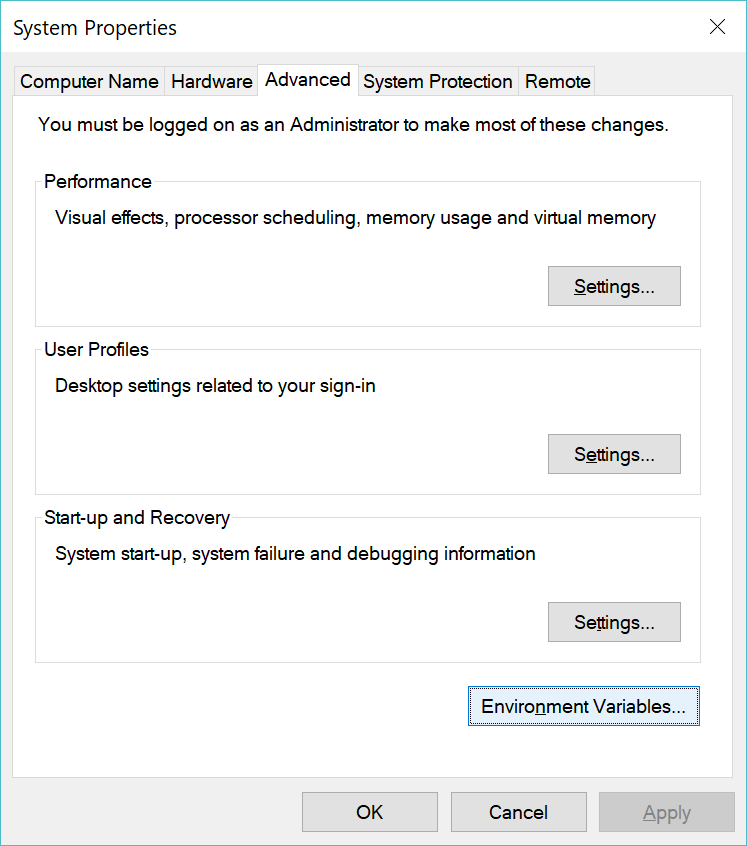 Figure 2.9 System Properties dialog with "Environment Variables..." button at the bottom right
 - Click on "New..." to add the environment variable at the bottom for "System variables".
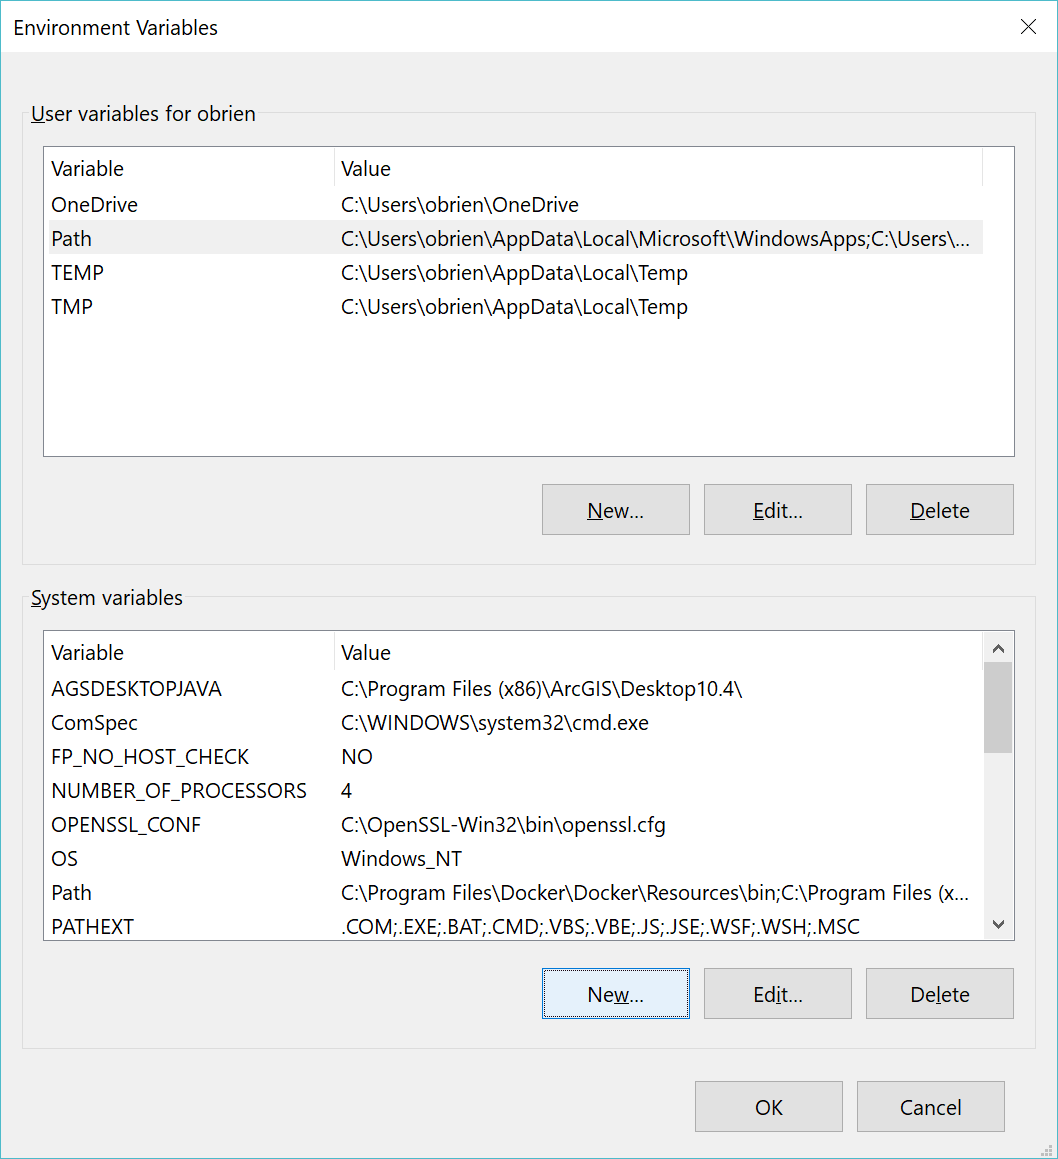 Figure 2.10 Variables dialog with "New..." button at the bottom
 - Fill out the dialog for adding a new variable. If the folder for your cloned ArcGIS Pro Python environment is something like "C:\Users\<username>\AppData\Local\ESRI\conda\envs\arcgispro-py3-clone", then use this to fill out the "Variable value" as shown in the figure below (see Section 1.5 explaining how opening Python Command Prompt will show the default folder). If you are using an older version of Pro and the default Python environment at "C:\Program Files\ArcGIS\Pro\bin\Python\envs\arcgispro-py3", then use this for the Variable value instead. Then press Ok and you are done.
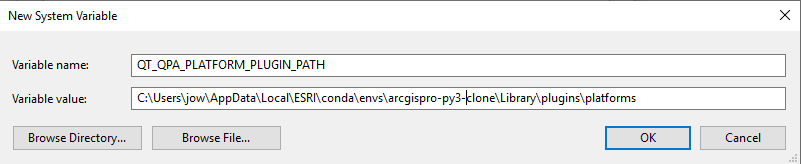 Figure 2.11 System Environment Variables dialog shown with variable name and variable value populated