GeoServer is free and open source software (FOSS) that exposes your data as geospatial web services. You'll be using GeoServer later in this course and possibly in your term project if you choose. This week, we'll take some time to get GeoServer installed and configured. This is a detour from our discussion of web map elements, but you'll soon revisit that topic in the weekly assignment.
Again, the lesson materials provide instructions for Windows. You are welcome to install on another platform, but you are on your own for instructions and troubleshooting.
- If you do not already have Java 8 on your computer, visit the Java download page and install the latest version of Java 8. Make note of the file system location where you install it. You will need this when you set up GeoServer. In case that a new Java version will be released during the course and your computer asks you whether it should install the update. Be warned that if you decide to do so, GeoServer may stop working until you adapt the Java path in the GeoServer startup .bat file. Also, it is important that this is a version of Java 8; GeoServer most likely won't run with Java 9 or higher.
- Visit the GeoServer home page at www.geoserver.org and click the Download link. From here you can download different versions of GeoServer including the most current stable and maintenance releases. You are free to check out these newer versions (it's pretty easy to work with multiple version of GeoServer on the same computer). If you want to play it safe and use the latest version we tested the course materials with, then follow the instructions in the next step to download version 2.19.6. The differences between these versions are minimal in the context of this class. If you decide to use a different version, make sure that you download the "Platform Independent Binary".
- To download GeoServer 2.19.6, click on this direct link to start the download of the "Platform Independent Binary" from SourceForge.
- After the download has finished, you will have a .zip file called geoserver-x-y-z-bin.zip on your computer. Extract the content of this file to a new subfolder somewhere on your computer where you have read/write access, for instance in your user's home directory. The result should look similar to the screenshot below.
 Figure 2.1b GeoServer installation folder after extracting the .zip file.
 - Now look in the subfolder called "bin". There you will find two .bat files for starting and shutting down GeoServer on Windows. These scripts will look for three important environment variables on your system: JAVA_HOME, GEOSERVER_HOME, and GEOSERVER_DATA_DIR. JAVA_HOME should point to your Java installation from step 1 above and should be set automatically. The other two need to refer to the new folder to which you just extracted the GeoServer file tree and to the subfolder called data_dir in it, which is meant for storing the spatial and other data to use with GeoServer. We could now go to the Windows Settings and define these environmental variables there, but instead we are going to define them in the script files themselves. This way, there won't be any issues with older GeoServer installations you may already have on your computer, and you will be able to simply delete the GeoServer folder at the end of the class if you want. So please open the file "startup.bat" in a text editor (make sure it is startup.bat, not startup.sh!) and add the following two lines at the very beginning. Adapt the path to the right of the equal sign in the first line to refer to your GeoServer folder.
set GEOSERVER_HOME=C:\Users\jow\GeoServer 2.19.6
set GEOSERVER_DATA_DIR=%GEOSERVER_HOME%\data_dir
Now do the same for the file called "shutdown.bat". - Now double-click startup.bat to start Geoserver.
You'll see a bunch of status messages appearing in a black and white console, like the following.
Wait a second for the messages to stop appearing, then go on to the next step. (If you keep this window open, you'll see messages appear as you interact with GeoServer. This is okay, and may even help you with troubleshooting.)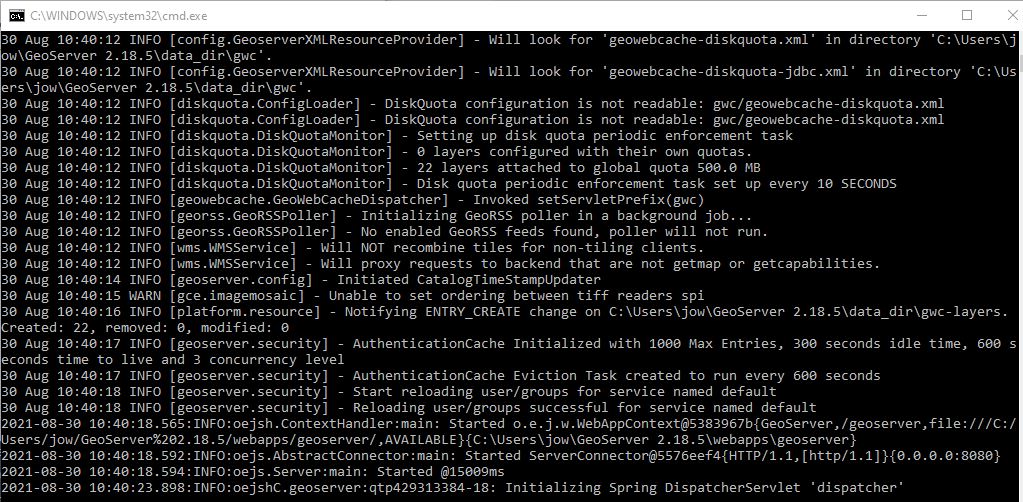 Figure 2.2 Status messages during GeoServer startup.
If you get a Windows Security Alert that Windows Firewall has blocked some features of the program, check the top box to allow it to run on private networks and click Allow access. Uncheck the bottom box, as public access will not be needed in this course. - Next, go to your browser and enter the address localhost:8080/geoserver/web.
This is a web page that you can use to administer GeoServer from this or any other computer in your network. You might be wondering, "How did my machine get the ability to serve out web pages?" This is possible because GeoServer includes a servlet called Jetty, which allows your machine to respond to web service and web page requests without having a full-blown web server software package installed.
In an enterprise environment, you would install GeoServer onto your existing web server such as Apache Tomcat, and it is very possible that you will need to do this sometime in the future. The process is straightforward enough that I was able to do it following this instructional YouTube video even though the video is not in English; however, for the assignments in this class, please use the Jetty server and only attempt the Tomcat install if Jetty is not working. My intent is to keep everyone on as close to the same environment as possible, so that I can be more helpful with troubleshooting if needed. - Log into GeoServer by using the username admin and the password geoserver in the upper boxes and click Login. These are the default username and password for the administrator account. You must use this the first time you log in.
You will see a welcome page similar to the following:
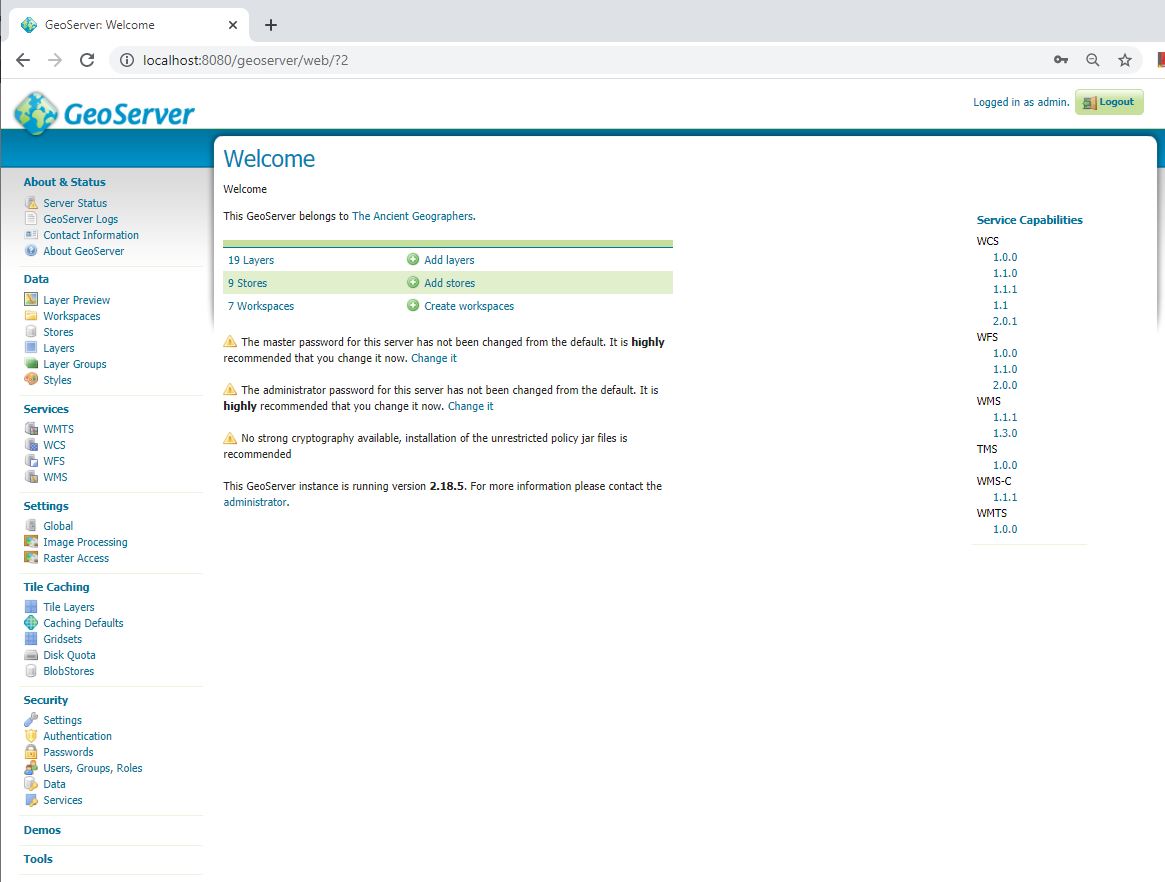 Figure 2.3 Geoserver startup webpage
 - Rather than working with files that represent an entire map, like .mxd or .qgs, GeoServer works with the concept of layers and layer groups. You define a set of datasets that you want to have exposed on your server, and then you define what characteristics they'll exhibit when brought into web maps as web service layers.
GeoServer comes with a bunch of sample layers already loaded. Let's take a look at those. - In the left-hand menu, click Layer Preview.
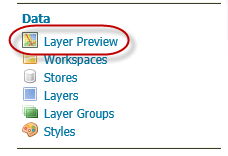 Figure 2.4 Layer Preview
 - Scroll down to the Tasmania state boundaries layer and click the OpenLayers link.
This displays your map as a web service that you can navigate. The web service was delivered through the Open Geospatial Consortium (OGC) Web Map Service (WMS) specification, an openly documented way of serving web maps that you'll learn more about in Lesson 4. The map frame and navigation buttons were created through the OpenLayers JavaScript framework.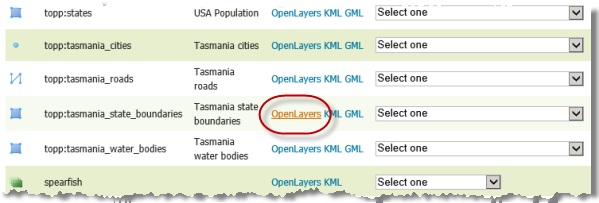 Figure 2.5 Find Tasmania in the list of layers
It's important to understand that you also could have done this by clicking the dropdown list and choosing WMS > OpenLayers 3 (or just OpenLayers on older versions of GeoSever). Looking at this list, you get a better idea of the many different output formats supported by GeoServer.Let's try one of these other options.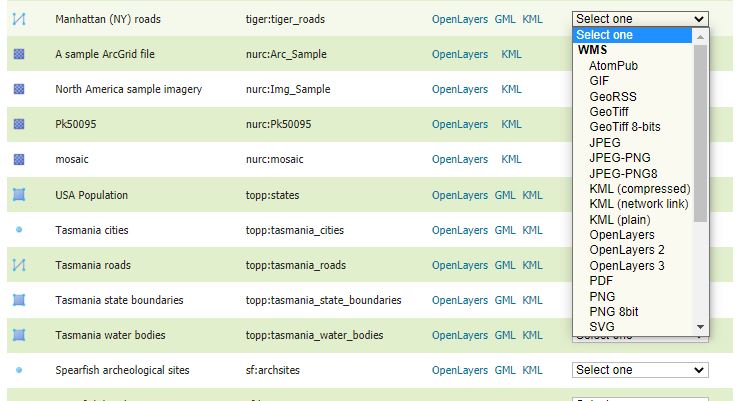 Figure 2.6 OpenLayers selection in GeoServer
 - Close the map preview window and return to the GeoServer layer preview list. This time, click the KML link to get the layer as KML and XML-based open specification for geographic data, often used by Google. If you have Google Earth installed, the layer should open there. If you don't have Google Earth, you can open the downloaded .kml file in Notepad and just examine the raw KML.
In addition to requesting many layer formats, you can request groups of layers together if they have been configured as a group layer. GeoServer comes with a few preconfigured group layers. - In the GeoServer layer preview list, scroll down to the Tasmania group layer (symbolized by green squares). Using the techniques you have learned, preview this in OpenLayers.
Here, you see three layers that have been delivered together as one map.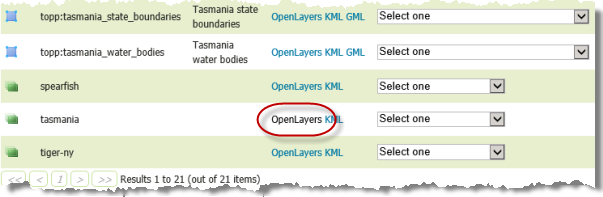 Figure 2.7 Layer preview in GeoServer
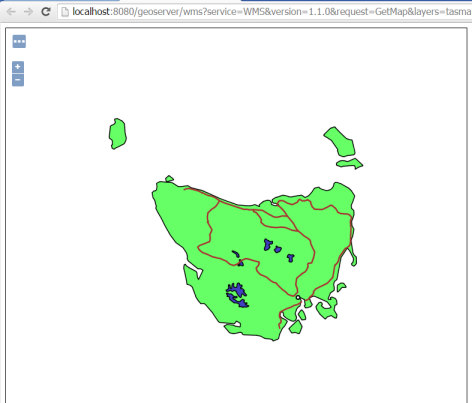 Figure 2.8 Preview of Tasmania from GeoServer
You'll return to GeoServer later in this course. This walkthrough just ensures you have it up and running correctly. If technical difficulties prevented you from getting to this point, please alert your instructor.