Downloading and Installing Unity
Before providing an overview of Unity’s main concepts and interface, let us start by downloading and installing Unity so that you can follow along and immediately start to experiment with the things you will learn about. Unity comes in three different versions: the “Personal” is completely free, while the “Professional” comes at a monthly fee ($125 at the time of this writing), and the “Plus” at a monthly fee (25$ at the time of this writing). For our purposes, the Personal Edition is completely sufficient. If you are interested in knowing more about the differences between the versions, an overview is provided at unity Store.
Please follow the instructions below to download and install the Personal Edition of Unity:
-
Go to Download Unity and click on “Download Unity Hub“. The Hub is a new mechanism for managing the different versions of the Unity editor you want to install on your machine.
-
Execute the downloaded file (UnityHubSetup.exe) and go through the installation dialog. Once the installation is finished, if you have checked the “Run Unity Hub” option at the end of the installation process, when you click on Finish, the Unity Hub will open. Alternatively, you can also navigate to your desktop and double click on the newly created Unity icon named “Unity Hub” to start it.
-
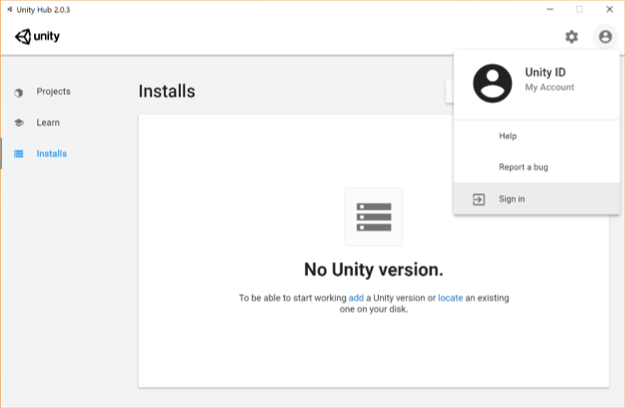
You should be able to see a window as depicted below. Locate the profile icon on the top right corner of this window, click on it, and then select “Sign in”. A new window will pop up asking for your login information. Sign in with your unity account. If you do not have a unity account, go ahead and create one using the “create one” link on the pop-up window, and then sign in.
 Credit: Unity
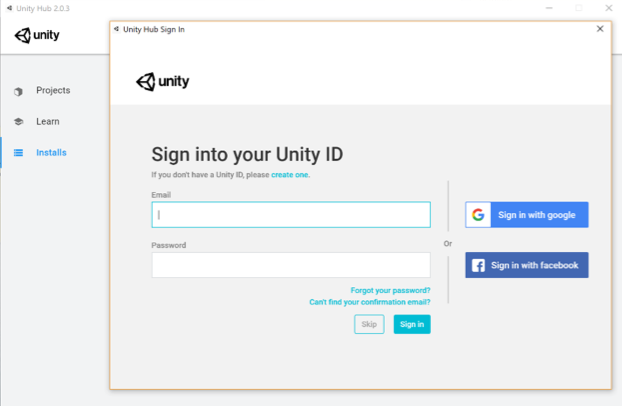 Credit: Unity
 -
Once you are signed in, make sure the “Installs” category is selected on the left panel (the one highlighted with the red area in the figure below) and click on the blue “Add” button. A new window with pop up where you can select which version of unity you want to install. At the time of writing this, the latest stable version is 2019.1.10f1. Please download this version as it is compatible with the rest of the instructions given in the course (if you choose to install a new version of the editor, you might need to change some of the c# codes we will be using). To do so either click on the "Download archive" on the window that has poped up, or follow this link (https://unity3d.com/get-unity/download/archive). This action will open a new tab in your default web browser. On that web page, select the Unity 2019.X, navigate to almost the end of the page and then click on the green button next to "Unity 2019.1.1" that says "Unity Hub". This will open this version of Unity editor in the Unity Hub for you to download and install.
This action will automatically proceed to the next dialog window in the Unity Hub, where you can select which extra modules to install. If you do not have Microsoft Visual Studio, it will be automatically selected for you on this list. Moreover, if you are developing on Linux or Mac, make sure to select the relevant “Build” module for your OS, so can deploy your virtual experience as a desktop application later. Click “Next” and wait until the installation is finished (This could be a lengthy process, so be patient).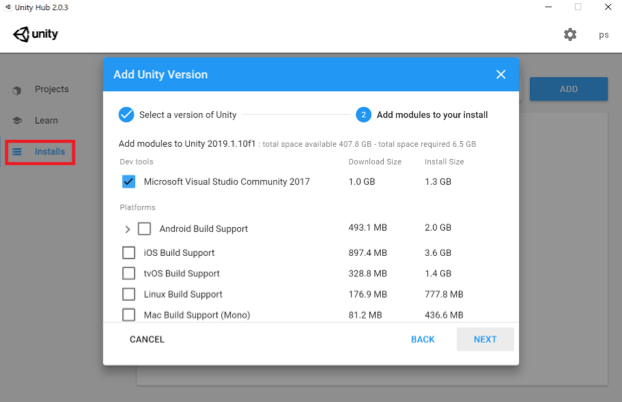 Credit: Unity
 -
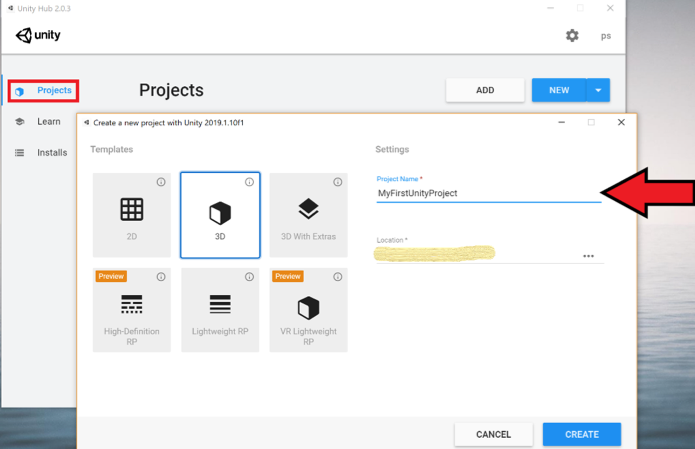
Once the installation is complete, you should have a Unity icon (with a specific version) on your Desktop and “Unity” in your Start Menu. Before Starting Unity, we need to create a project. To do this, make sure the “Projects” category is selected in the Unity Hub (the one highlighted with the red area in the figure below) and click on the blue “New button”. Unity provides several templates for us to choose from (depending on the purpose of the project, e.g. 2D, 3D, VR lightweight RP, etc.). For the purpose of this lesson, we will use the default 3D template. Change the name of your project to “MyFirstUnityProject”. You can also change the location where the project will be saved to another address if you want (this is optional and solely based on your preference). Press “Create”, and after a few minutes the unity editor will be ready for us to use.
 Credit: Unity