1.3 Extract Campus Area from FLD_HAZ_FEMA
- Before creating flood plains, it would be better to select part of FLD_HAZ_FEMA layer that only contains the campus area.
-
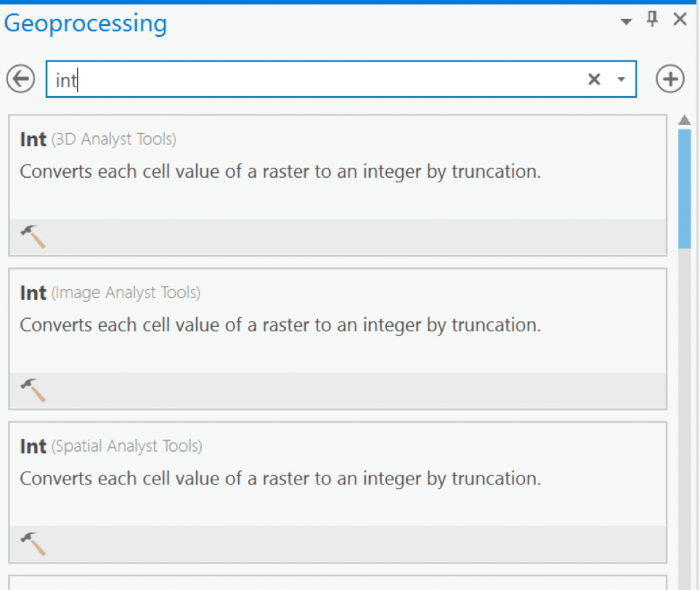
The best way to create a boundary is to use Smoothed_DEM layer as the extent of the campus area. To be able to create a polygon out of a raster, you will need a raster with integer values. The current raster values are float. On the ribbon, on the Analysis tab, click Tools under Geoprocessing and search Int. Click Int (Spatial Analysis). The input layer is Smoothed_DEM and rename the output raster to DEM_int. Click Run.
 Credit: 2019 ArcGIS
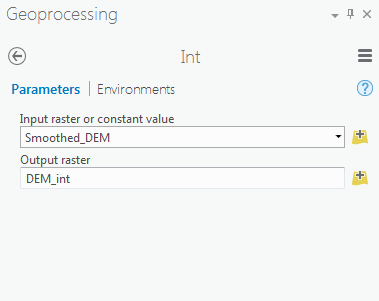 Credit: 2019 ArcGIS
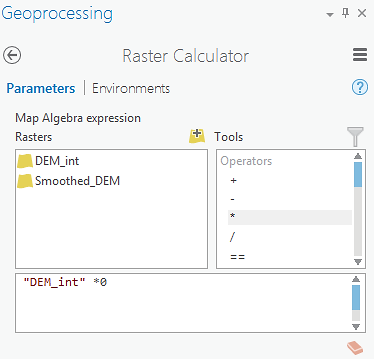
 - Go back to geoprocessing tool and search raster calculator. To create a polygon without values, you need a raster with pixel value of 0.
-
Select Raster Calculator (Spatial Analyst Tools). Using Raster calculator, multiply DEM_int by 0 to create a constant value raster.
 Credit: 2019 ArcGIS
Name the output raster as rasterzero. Click run. Now you have a raster with value of 0.
 Credit: ChoroPhronesis Lab
 -
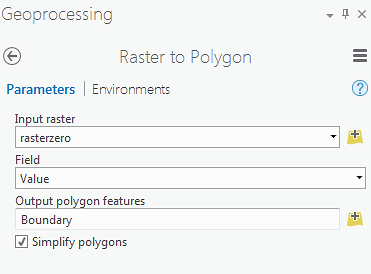
Go back to Geoprocessing Tools tab. Search or raster to polygon tool. Click Raster to Polygon (Conversion Tools). Convert rasterzero layer. Save the output polygon as Boundary. Click Run.
 Credit: 2019 ArcGIS
 -
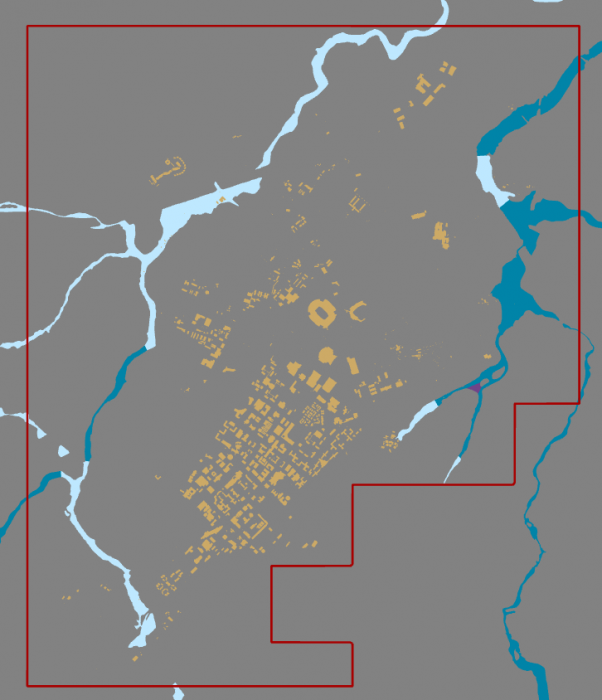
Remove rasterzero from Contents pane. You don’t need it anymore. Change the symbology of the Boundary layer to no fill, color with Tuscan Red, outline with the width of 2pt.
 Credit: ChoroPhronesis Lab
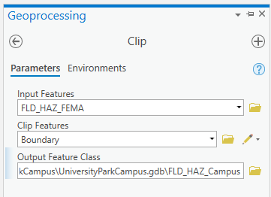
 - Now that you have created the campus boundary, you will clip FLD_HAZ_FEMA layer. Go back to Geoprocessing Tools. Search clip. Click Clip (Analysis Tools). The input layer is the flood layer from FEMA (FLD_HAZ_FEMA). The Clip Feature is Boundary. Rename the out feature class to FLD_HAZ_Campus. Click Run.
 Credit: ChoroPhronesis Lab
 -
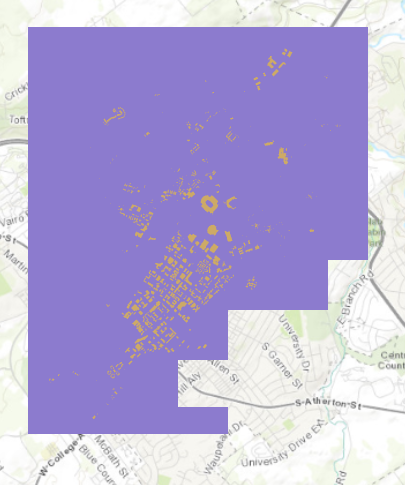
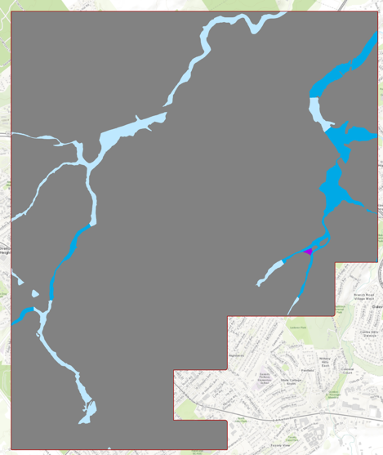
Turn off FLD_HAZ_FEMA. And make sure that FLD_HAZ_Campus is located under UP_Buildiing. This will be the result.
 Credit: ChoroPhronesis Lab