1.4 Buffer the Floodways and Examine Potential Flood Extent
For this study, you are going to consider all three A, AE, and AO layers as one floodway category.
-
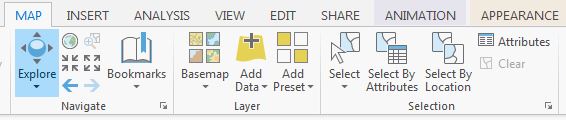
On the ribbon, on the map tab, click select by attribute.
 Credit: 2016 ArcGIS
 -
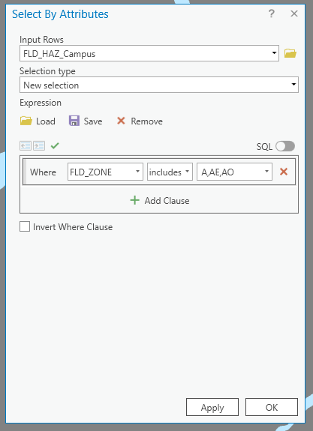
Under expression, add the following clause to select all three floodway categories:
 Credit: ArcGIS, 2021
Click Apply, then OK. All three floodway categories will be selected.
 Credit: ChrorPhronesis Lab
Check Your Understanding
You have selected all the floodways on campus. Open the attribute table. Can you figure out how much the area of selected floodways are?
Click for the answer.15522969.81 square feet or 356.35 acre
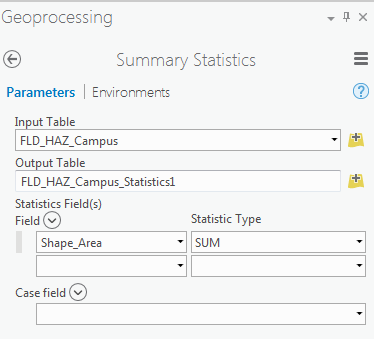
This is how you can calculate the sum of the area:- Right-click on Shape_Area. Click Summarize.
- In the Geoprocessing tab, you can see the input and output tables. For Statistic Field, select Shape_Area. For the statistic Type select SUM. Click Run.
 Credit: 2016 ArcGIS
 -
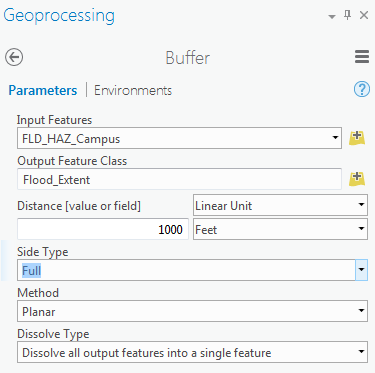
In Geoprocessing Tools, search buffer. Click Buffer (Analysis Tools).
Note: When you have selected features in a layer, the analysis will run only on selected parts. -
The input feature is FLD_HAZ_Campus. Name the output feature class as Flood_Extent. For the distance consider 1000 feet. This distance is just an example to teach you how the analysis works. It does not mean that the flood plain in this area is truly 1000 feet.
Set Side Type as ‘Full’, meaning that the buffer will be from both sides of floodways. Click Run.
 Credit: 2016 ArcGIS
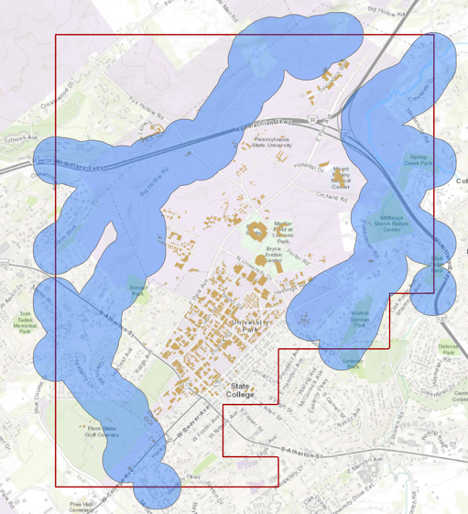 Credit: ChoroPhronesis Lab
 -
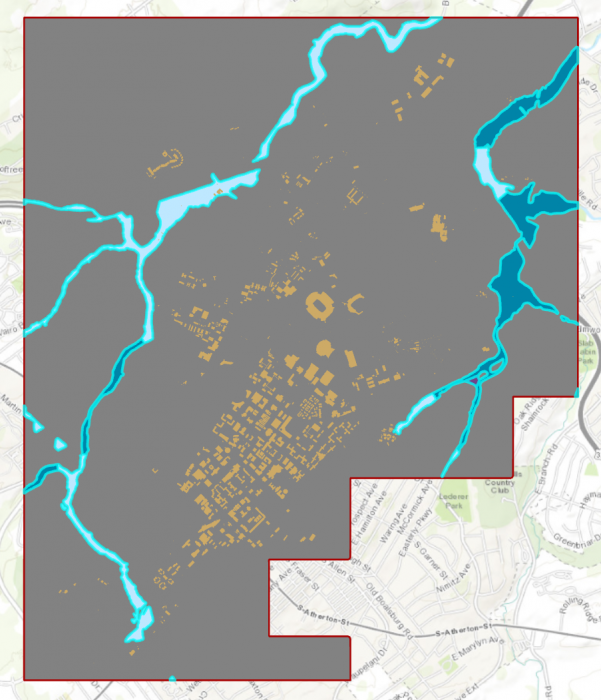
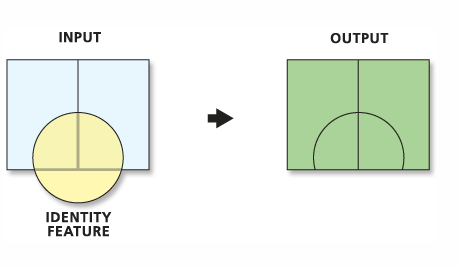
We are interested in the flood extent areas inside the boundary. The green areas are more affected than the rest of the campus. Now, you will create a polygon layer that has both areas: flood extent (1000 feet) and the rest of the campus. The proper tool to add the flood extent to the campus area is ‘Identity’. This tool computes geometric intersections of campus areas and flood plains. Those parts of campus overlapping with flood extent will get the attributes of identity features (flood extent).
 Credit: ArcGIS Pro
 -
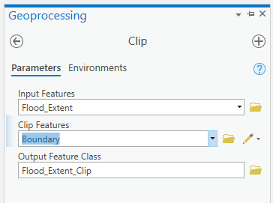
Before updating the flood zones of campus area, you need to clip the Flood_Extent, to extract areas inside the boundary. Go to Analysis tab, geoprocessing tools. Search Clip. Select Clip (Analysis Tools). Input feature is Flood_Extent. Clip Feature is Boundary. Name the output as Flood_Extent_Clip.
 Credit: ArcGIS, 2021
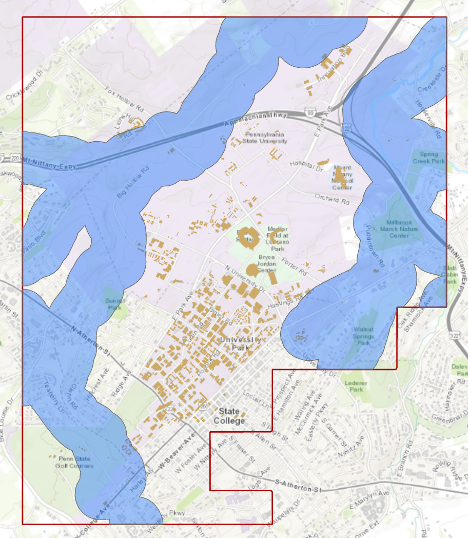 Credit: ChoroPhronesis Lab
 -
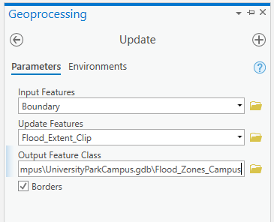
Turn off all layers. Go back to geoprocessing tools. Search update. Select Update (Analysis Tools). Input feature is Boundary, Update feature is Flood_Extent_Clip. Name the output feature class Flood_Zones_Campus. Click Run.
 Credit: ArcGIS, 2021
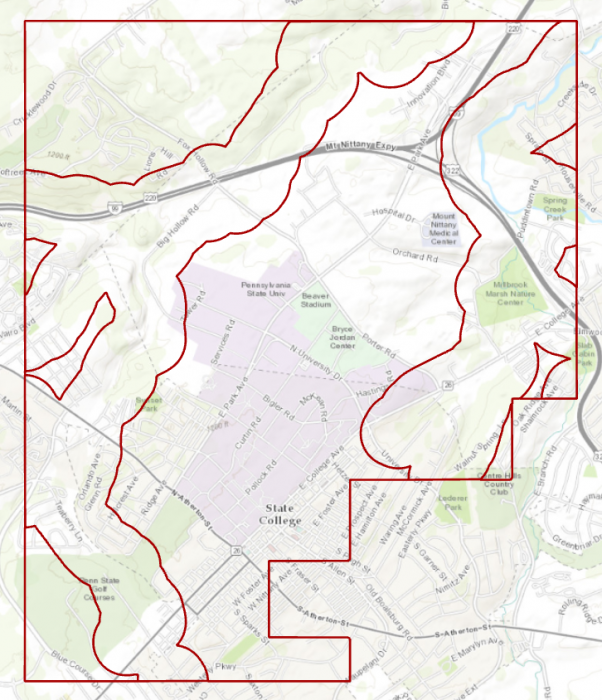 Credit: ChoroPhronesis Lab
 -
Right-click on Flood_Zones_Campus in Contents pane. Open Attribute Table. You can see there are two features in this layer with id categories 0 and 1. Select the row with id=0.
Check Your Understanding
What is the area of flood plain with higher risk (id=0) in acres?
Click for the answer.Approximately 2933.0 acres. Each square foot is approximately 2.295 acres.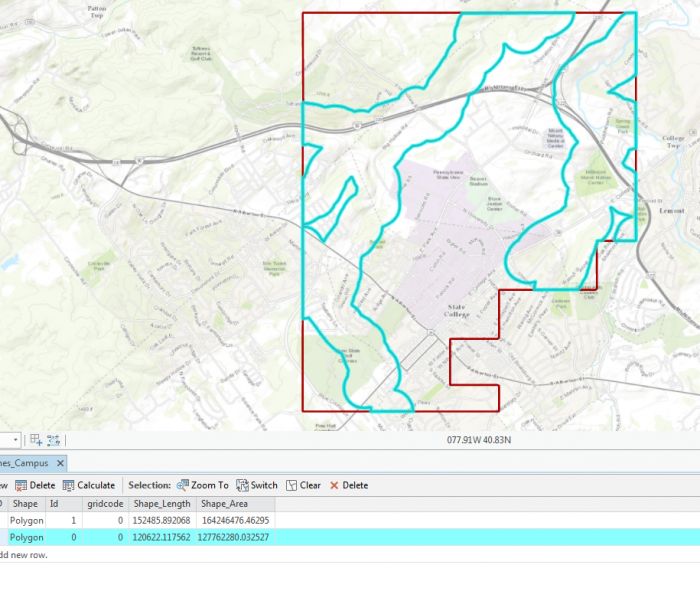 Credit: ChoroPhronesis Lab
The selected area is the 1000 feet extent from floodways and the rest is campus area with less flood risk in square feet.
- On the ribbon, on the Map tab, under selection category, click Clear.