User input variables that you retrieve through GetParameterAsText() make your script very easy to convert into a tool in ArcGIS. A few people know how to alter Python code, a few more can run a Python script and supply user input variables, but almost all ArcGIS users know how to run a tool. To finish off this lesson, we’ll take the previous script and make it into a tool that can easily be run in ArcGIS.
Before you begin this exercise, I strongly recommend that you scan the ArcGIS help topic Adding a script tool. You likely will not understand all the parts of this topic yet, but it will give you some familiarity with script tools that will be helpful during the exercise.
Follow these steps to make a script tool:
- Copy the code from Lesson 1.6.4 "Example: Creating Buffers" into a new PyScripter script and save it as buffer_user_input.py.
- Open your Lesson1Practice.aprx Pro project and display the Catalog window.
- Expand the nodes Toolboxes > Lesson1Practice.atbx.
- Right-click Lesson1Practice.atbx and click New > Script.
- Fill in the Name and Label properties for your Script tool as shown below, depending on your version of ArcGIS Pro: The first image below shows the interface and the information you have to enter under General in this and the next step if you have a version earlier than version 2.9. The other two images show the interface and information that needs to be entered in this and the next step under General and under Execution if you have version 2.9 or higher.
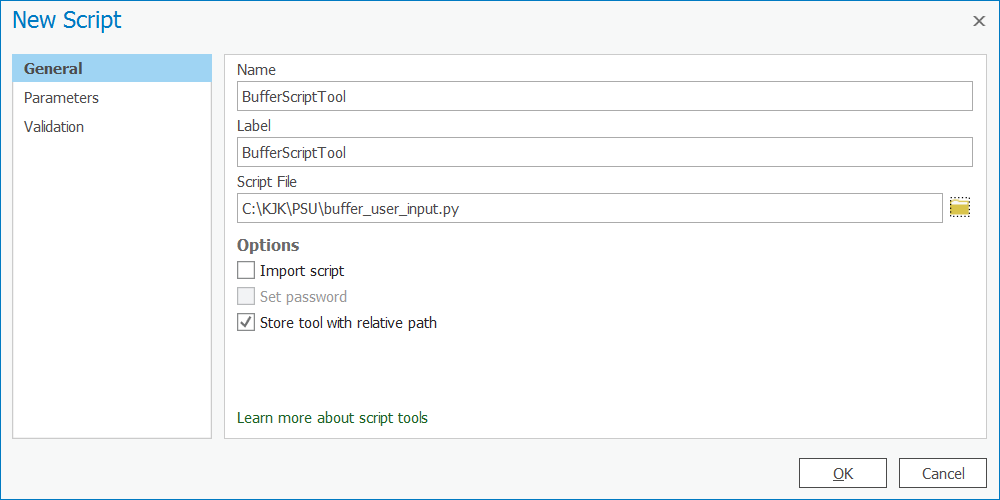 Figure 1.10a Entering information for your script tool if you have a version < 2.9.
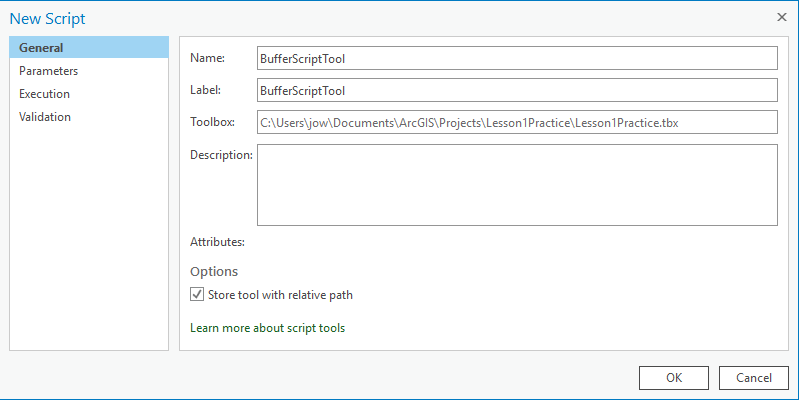 Figure 1.10b Entering information for your script tool if you have a version ≥ 2.9: General tab.
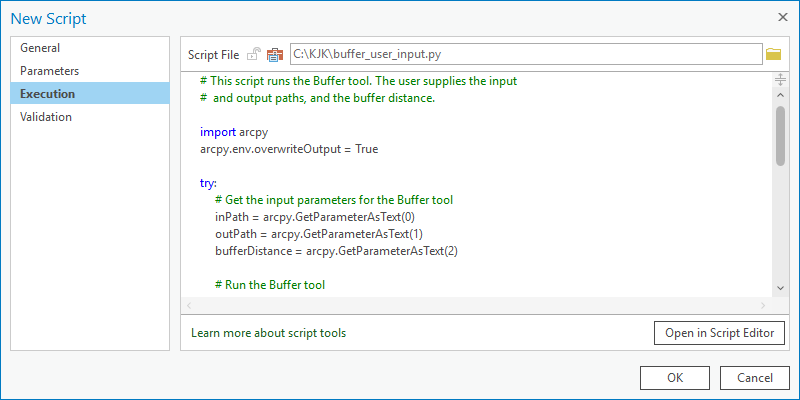 Figure 1.10c Entering information for your script tool if you have a version ≥ 2.9: Execution tab.
 - For version <2.9, click the folder icon for Script File on the General tab and browse to your buffer_user_input.py file. For version 2.9 or higher, do the same on the Execution tab; the code from the script file will be shown in the window below.
- All versions: On the left side of the dialog, click on Parameters. You will now enter the parameters needed for this tool to do its job, namely inPath, outPath, and bufferMiles. You will specify the parameters in the same order, except you can give the parameters names that are easier to understand.
- Working in the first row of the table, enter Input Feature Class in the Label column, then Tab out of that cell. Note that the Name column is automatically filled in with the same text, except that the spaces are replaced by spaces.
- Next, click in the Data Type column and choose Feature Class from the subsequent dialog. Here is one of the huge advantages of making a script tool. Instead of accepting any string as input (which could contain an error), your tool will now enforce the requirement that a feature class be used as input. ArcGIS will help you by confirming that the value entered is a path to a valid feature class. It will even supply the users of your tool with a browse button, so they can browse to the feature class.
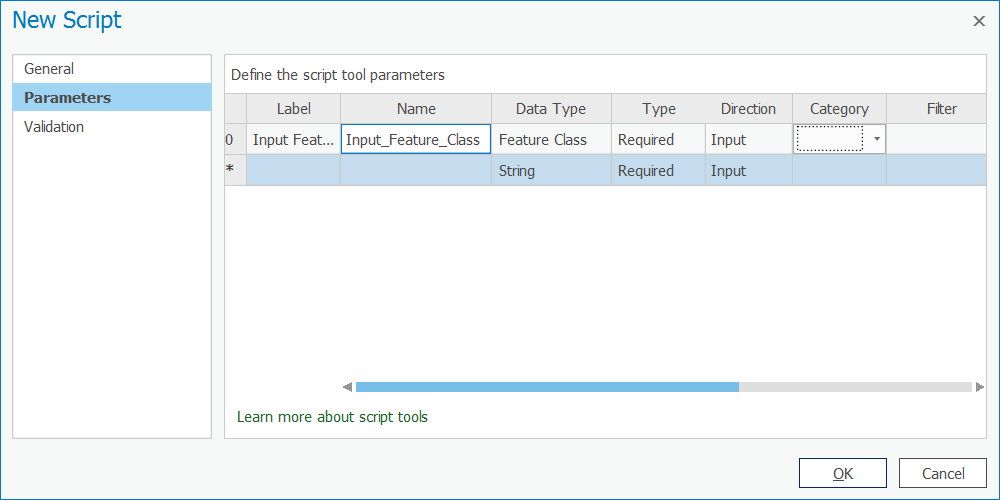 Figure 1.11 Choosing "Feature Class."
 - Just as you did in the previous steps, add a second parameter labeled Output Feature Class. The data type should again be Feature Class.
- For the Output Feature Class parameter, change the Direction property to Output.
- Add a third parameter named Buffer Distance. Choose Linear Unit as the data type. This data type will allow the user of the tool to select both the distance value and the units (for example, miles, kilometers, etc.).
- Set the Buffer Distance parameter's Default property to 5 Miles. (You may need to scroll to the right to see the Default column.) Your dialog should look like what you see below:
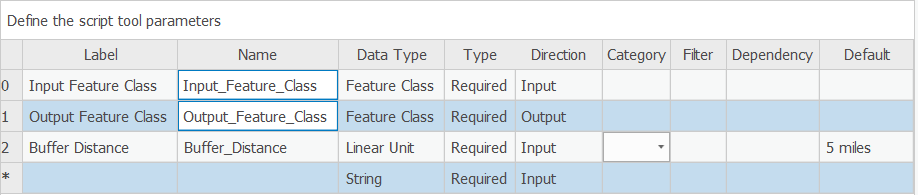 Figure 1.12 Setting the Default property to "5 Miles."
 - Click OK to finish creation of the new script tool and open it by double-clicking it.
- Try out your tool by buffering any feature class on your computer. Notice that once you supply the input feature class, an output feature class path is suggested for you. This is because you specifically set Output Feature Class as an output parameter. Also, when the tool is complete, examine the Details box (visible if you hover your mouse over the tool's "Completed successfully" message) for the custom message "All done!" that you added in your code.
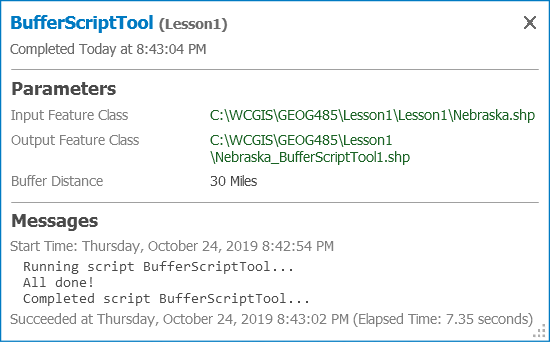 Figure 1.13 The tool is complete.
This is a very simple example, and obviously, you could just run the out-of-the-box Buffer tool with similar results. Normally, when you create a script tool, it will be backed with a script that runs a combination of tools and applies some logic that makes those tools uniquely useful.
There’s another benefit to this example, though. Notice the simplicity of our script tool dialog compared to the main Buffer tool:
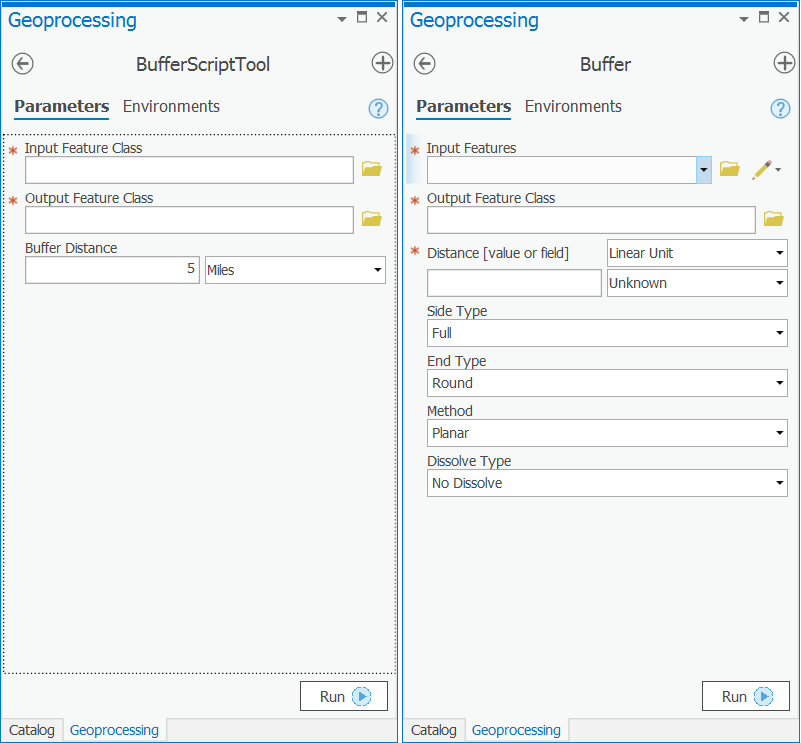
At some point, you may need to design a set of tools for beginning GIS users where only the most necessary parameters are exposed. You may also do this to enforce quality control if you know that some of the parameters must always be set to certain defaults, and you want to avoid the scenario where a beginning user (or a rogue user) might change the required values. A simple script tool is effective for simplifying the tool dialog in this way.
Readings
ArcGIS Pro edition:
Read Zandbergen 3.9- 3.10 to reinforce what you learned during this lesson about scripts and script tools.