Print
5.2 Apply a Rule Package to the UP_Roof_Segments Layer
In this section, you’ll add special 3D textures and models to your scene to give it a more realistic appearance. The symbology of the structures is presentable in 3D but doesn't give the impression of a realistic city model. For instance, types of roofs, roof textures or façade textures, are not defined in this type of 3D presentation. To make the campus look more realistic, you can set the layer's symbology with a rule package created in CityEngine (see Lesson 2). Rule packages contain a series of design settings that create more complex symbology. Although you cannot create rule packages in ArcGIS Pro, you can apply and modify them from an external file (more in the next lessons).
- Download Building_From_Footprint rule package.
- Locate the compressed file in your Downloads folder. Save the file in the project folder you have created earlier in this Module. It is a single file named Building_From_Footprint.rpk.
- If necessary, open the University Park Campus project in ArcGIS Pro.
- In the Contents pane, click the symbol under UP_Roof_Segments to open the Symbology pane.
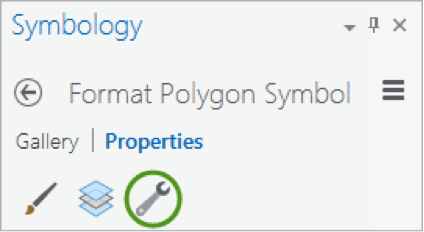
- In the Symbology pane, click Properties and click the Structure button.
Structure presents symbol layers, or graphical components, that create a symbol.
 Credit: 2016, ArcGIS
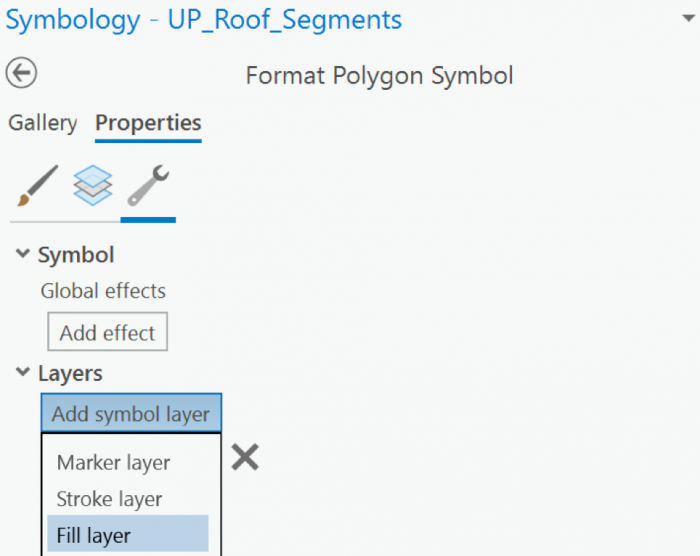
For the UP_Roof_Segments, the only symbol layer is the light green solid color you have used. To add a rule package to the Symbology, you will create a new symbol layer to which a rule can be applied. - In the drop-down menu in the heading of the symbol layer, choose fill layer
 Credit: 2019, ArcGIS
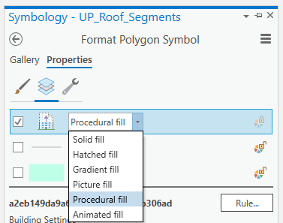
 - Next, you will apply the rules to the Fill symbol layer using the file you downloaded. Under Properties, click the Layers button. Then, select the Procedural fill. Uncheck the line and green color.
 Credit: 2021, ArcGIS
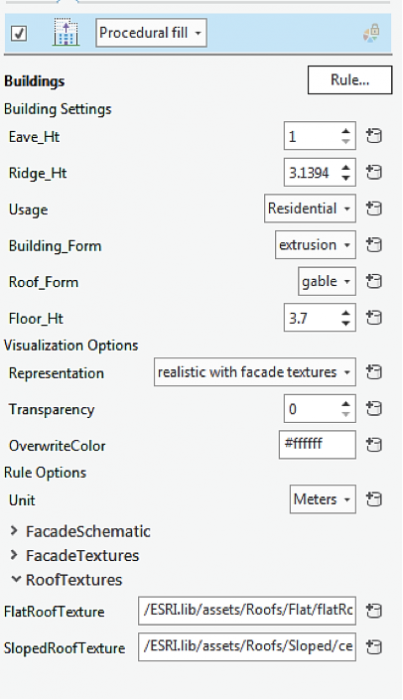
 - The icon from a gray solid color would be changed to an icon indicating a rule assignment. Click the Rule button and Browse to the location of the extracted Building_From_Footprint.rpk file and double-click it. The Symbology pane populates with several symbology settings or rules, that can be adjusted.
- Click apply.
- On the Symbology pane, you need to set rules. Because the rules that are created in CityEngine are based on metric parameters, we have created fields with metric values in the Up_Roof_Segments attribute table.
 Credit: 2016, ArcGIS
 - As you can see, next to each parameter is a ‘set attribute driven properties’ sign. Click to set values from the attribute table.
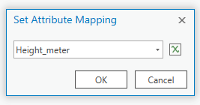 Credit: 2021, ArcGIS
 - Eva_Ht is the distance from the ground to the bottom of the roof. Select Height_Meter from the attribute table.
- Ridge_Ht is the distance from the ground to the top of the roof. Select Ridge_Height_Meter. It is mostly applicable to the slopped roof.
- For Usage select educational. You can see switching from another usage like residential to educational, the thumbnail on the bottom of the pane will change.
- Building_From, select extrusion.
- Change the Floor_Ht to 4.
- You will have three options for visualization: (1) realistic with façade textures, (2) schematic facades, (3) solid colors. For now, choose the first option and you will explore the rest later. Click Apply.
 Credit: 2016, ArcGIS
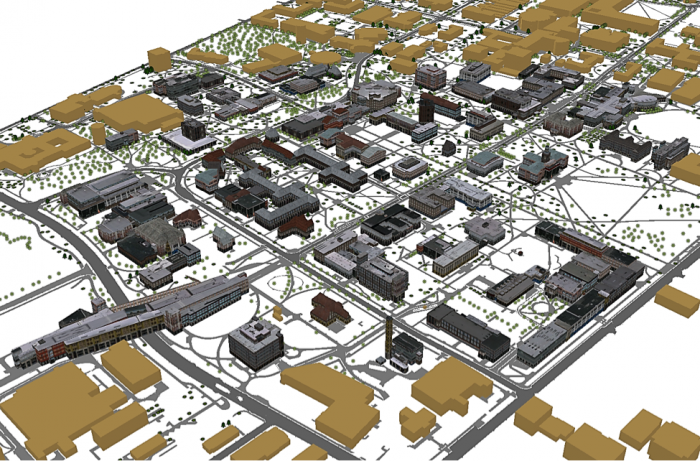
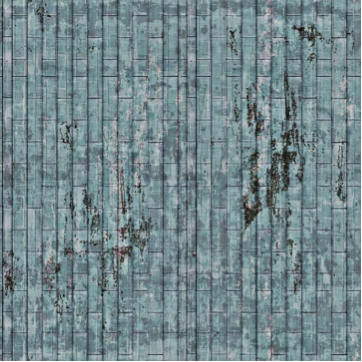
 - Explore the map to get a closer look at the symbology. Roof symbols and Façade symbols. As you see the façade material does not match the actual buildings you can see on Google Earth. That’s because real images of buildings of campus have not been taken. These images are from ESRI library for an international city which is a sample library with different building size and usage textures. The roofs are texturized base on some categories: flat, hip, shed, or pyramid. There is an asset folder of different roof textures and façade textures that are used in setting these rules. For instance, one of the Hip roof colors that you see in the following image. It has been assigned to Hip roofs along with a few more textures.
 Credit: 2016, ArcGIS
 - Save your project.