Print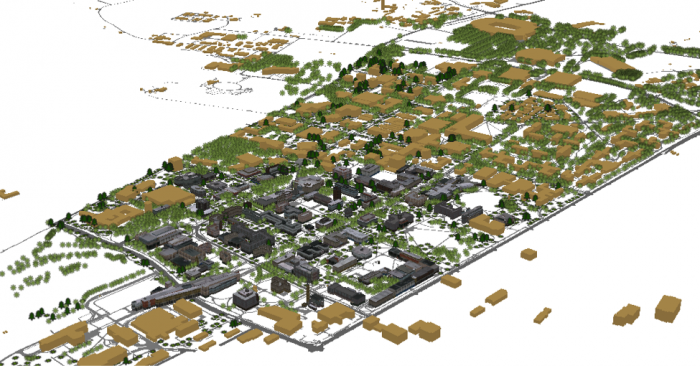
5.3 Apply a Rule Package to UP_TREES Layer
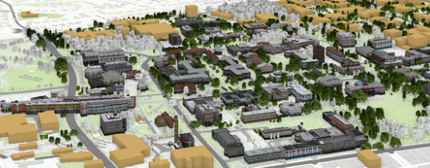
In this section, you will insert a 3D model of trees with assigned rules. In your 3D Scene, you can see that 2D symbols of trees are presented in 3D. One of the ways to show your trees in 3D is to use LiDAR information such as crown diameter and tree height along with CityEngine procedural rules. However, ArcGIS Pro does not support assigning rule packages to point layers on the Symbology pane, yet. ArcGIS Pro is under constant development and will offer this functionality in the future. A workaround is to export the tree point layer as Polygons with Z information. Then the polygons can be converted to points. The point feature class with Z information and inherited rules can be added to your map as a preset.
Credit: ChoroPhronesis Lab
- Uncheck the Up_TREES layer in the 3D Layers list.
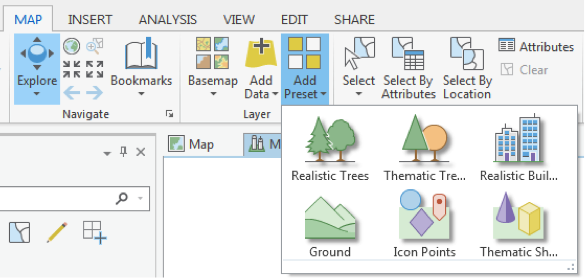
- Under the Map tab, click Add Preset and select Realistic Trees.
 Credit: 2016, ArcGIS
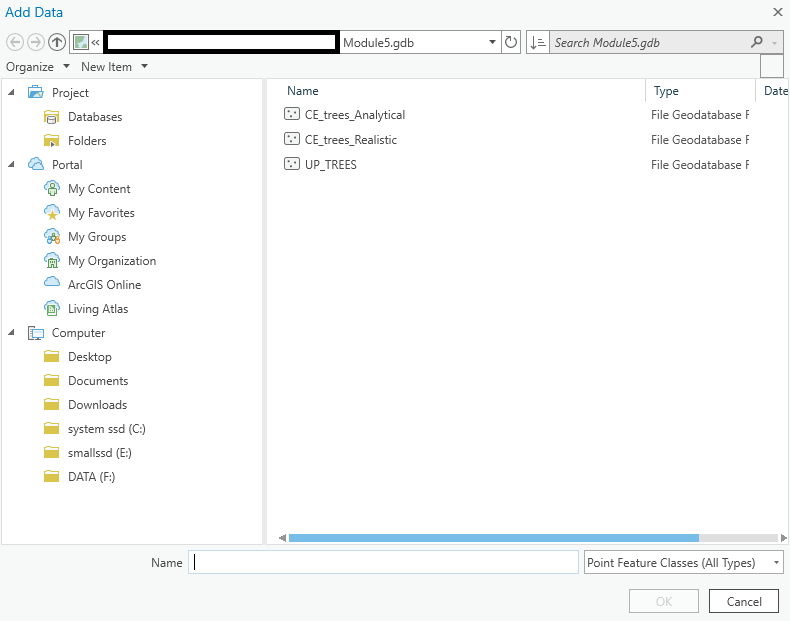
 - From the Geodatabase that you have downloaded, select CE_trees_Realistic. Click Select.
 Credit: 2016, ArcGIS
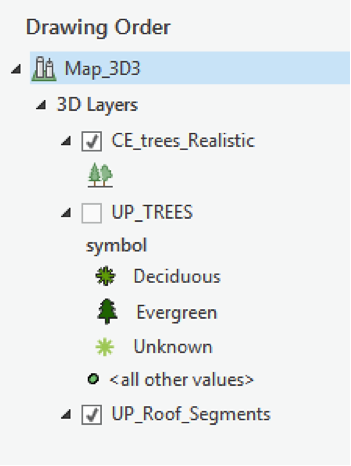
 - The layer will be added to your 3Dlayers list.
 Credit: 2016, ArcGIS
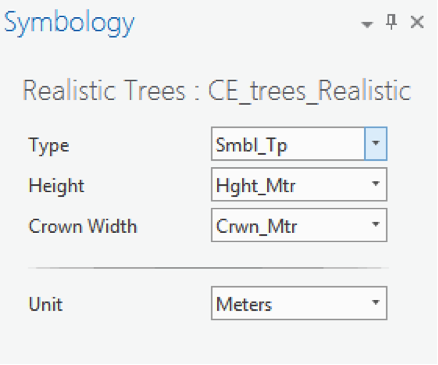
 - As you see on the map, the scale of trees is not right. Click on the symbol under the layer to modify it. Change the parameters as shown below.
 Credit: 2016, ArcGIS
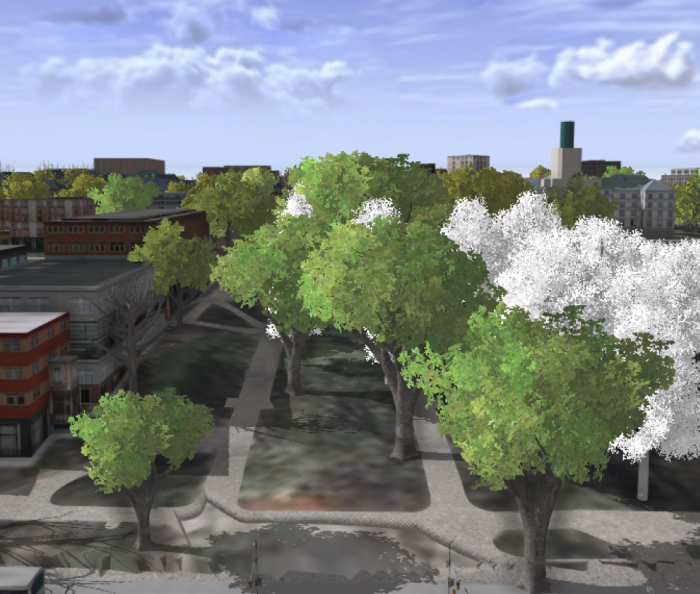
 - As you can see the trees height and crown diameter are now more realistic. You have three tree types under Smbl_TP: Deciduous, Evergreen, and Unknown. The unknown trees should be symbolized white as ghost trees. Unfortunately, both evergreens and unknown trees are colored white, although you can see that evergreen trees have a different shape than deciduous ones. If you change the type from Smbl_TP to Ash, for instance, you can see all trees are changing. You can try different tree types. We will update this section when the feature becomes available in ArcGIS Pro.
 Credit: ChoroPhronesis Lab
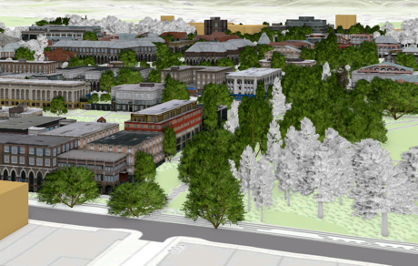 Credit: ChoroPhronesis Lab
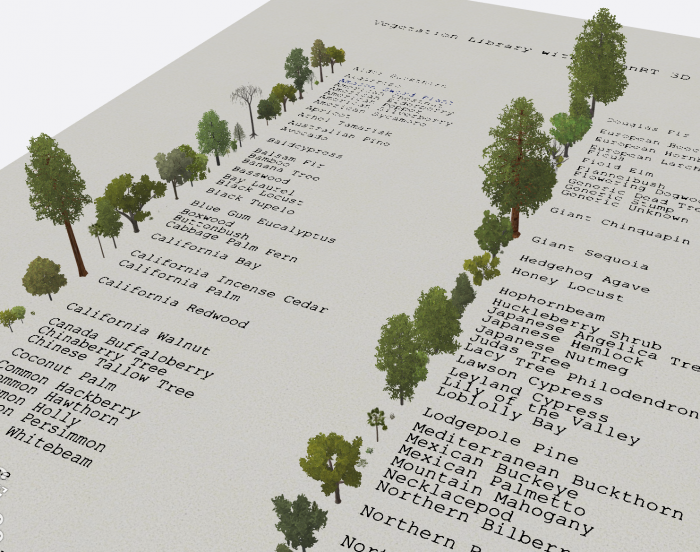
 - In the image above, you can see how the trees are symbolized in GIS. In CityEngine (as an example shown below), you can see that not only deciduous and evergreen trees are different but also various tree types under each category are symbolized differently. ESRI is continuously moving functionality from CityEngine to ArcGIS Pro so that it is hopefully only a matter of time that this function becomes available. We are not focusing on CityEngine in this course but will offer you an overview of how it works using the campus data as an example.
You can see the example of tree symbols used in CityEngine to symbolize trees. This vegetation library is imported from LumenRT 3D Plants to CityEngine.
 Credit: ChoroPhronesis Lab
 - Create a PDF map (like the end of Section 3) or take a screenshot of your UP Campus realistic 3D model for the final assignment. This is labeled Task 3 on the Tasks and Deliverables of your graded assignment.
- Now you will save your project with a relevant name.
- Click the Project tab. Select Save As.
 Credit: 2016, ArcGIS
 - In the Projects Folder (C:\Users\YOURUSER\Documents\ArcGIS\Projects\UniversityParkCampus), Save Project as UniversityParkCampus_Lesson5. This way you will create a new project for the next lesson.