Facade, Trees, Plants
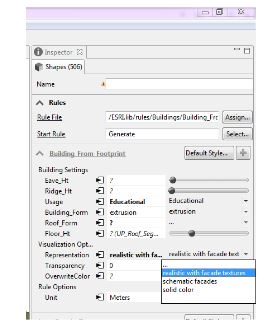
CityEngine rule file of ‘Building_From_Footprint.cga’ has three options for generating façade textures: (1) realistic, (2) Schematic, and (3) solid color. In the Figure below, you can see the three options for façade representation. You are going to explore these options in ArcGIS Pro. ESRI has a library of façade textures for different building types which we have used to texturize campus model. However, for a more realistic view of campus, images from building facades can be captured and used in this model.
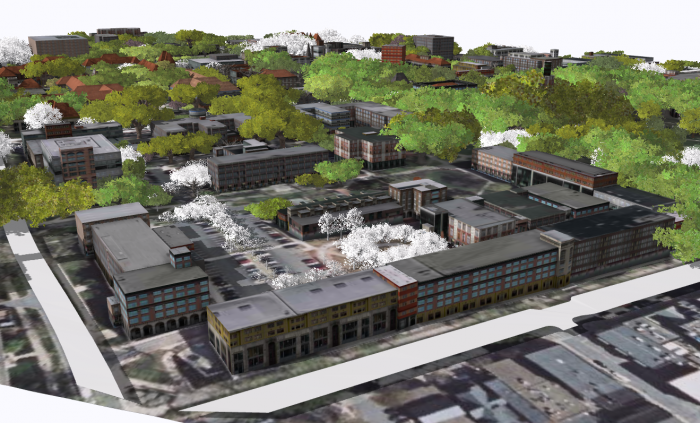
In the images above, you can see that trees have been generated for the campus model. These trees are based on a tree dataset in GIS which has been linked to tree models using “3D Vegetation with LumenRT Models”.This rule covers a lot of common trees found in North America. the models can be previewed in this Link.
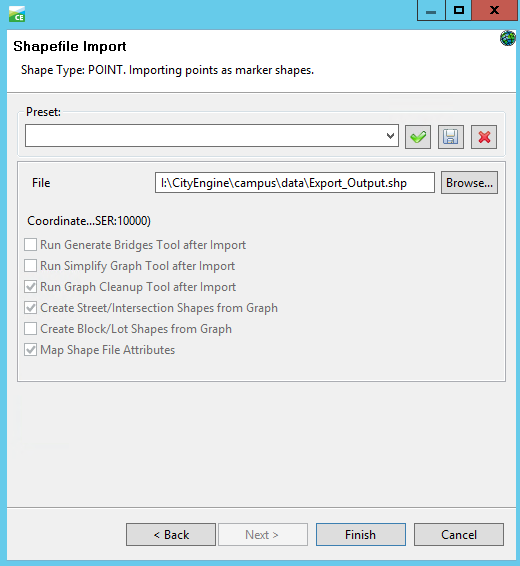
The first step in creating tree models is to Match LumenRT model names with your tree names. This rule file uses the common name of tree species as the identifier of each model. Therefore, it is very important to keep your tree name in accordance with the name in the rule file. You can achieve this by adding a field in ArcGIS and filled it with the corresponding LumenRT names using Python or create an excel file where you match LumenRT tree name with your own dataset, and then link this file with your original dataset in ArcGIS. The second step is to import the tree dataset to CityEngine and align shapes to the terrain.
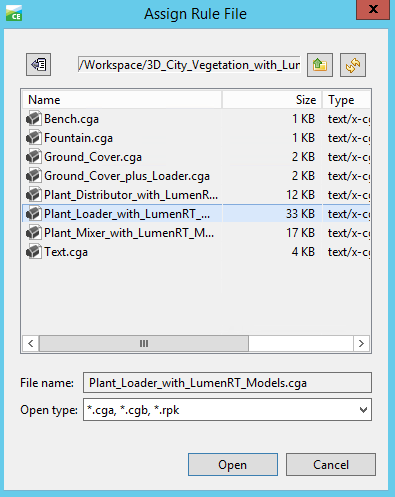
Selecting the tree shapes, you can assign the rule file and generate the rule.
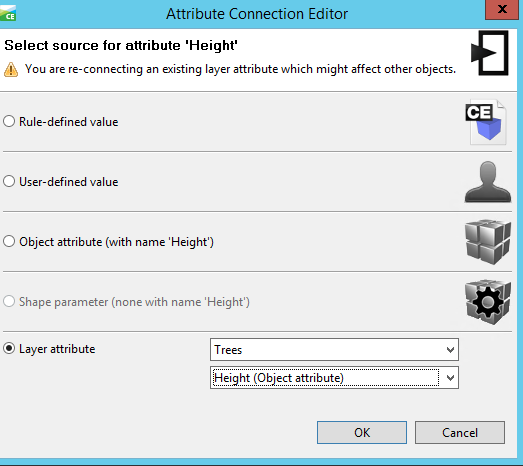
After generating the rule, you may find that the tree models generated are not right. In this step, you need to assign the attributes from the dataset to rule parameters. To do this, simply click on the Attribute Connection Editor near the Name, select layer attribute, and find the field you add to your tree dataset.
To use the created models, you have two options: (1) export it to other formats, and (2) share it. The model can be exported to different formats such as Autodesk FBX, Collada, KML, and OBJ. For sharing the model, one option is to share the whole scene in the CityEngine Web Viewer. Another option is to share the rules as a rule package that can be used locally on your machine. Having the rule package (RPK), you can share it with others using ArcGIS Pro or ArcGIS Online. In Lesson 5, you will learn how to apply a rule package exported from CityEngine as a symbol layer to your database.