Part III: Building a Web App on the Penn State AGO Website
Now that we have created individual maps for each dataset, we can combine them into one using a template web application provided by Esri. You can use these templates to share your data in an easy-to-use format. Note: You need to be a member of the GEOG487 group to complete this section.
-
Share the Display Map
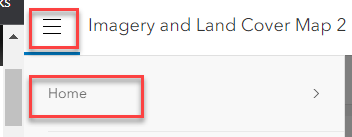
- Click on Home > Content to view the list of maps you created. The map list is found under the My Content tab.

- Share your maps with the class by using the visual guides below.

- Select “Geography 487 - Semester”


-
If necessary, click Update to synchronize sharing of the dependent items you have permission to update (e.g., Lesson2Data).
- You should see the Group listed as the Shared Status as shown below.


We will be sharing our work with the class throughout this course in ArcGIS Online. Please follow Penn State’s Academic Integrity guidelines covered in the Syllabus. (As a group administrator, I will be able to see if you created your own maps or made a copy of another student’s work).I encourage you to view other students' work to learn and be inspired. If you incorporate any of their ideas in your own work, please list their name and map URL in your sources.
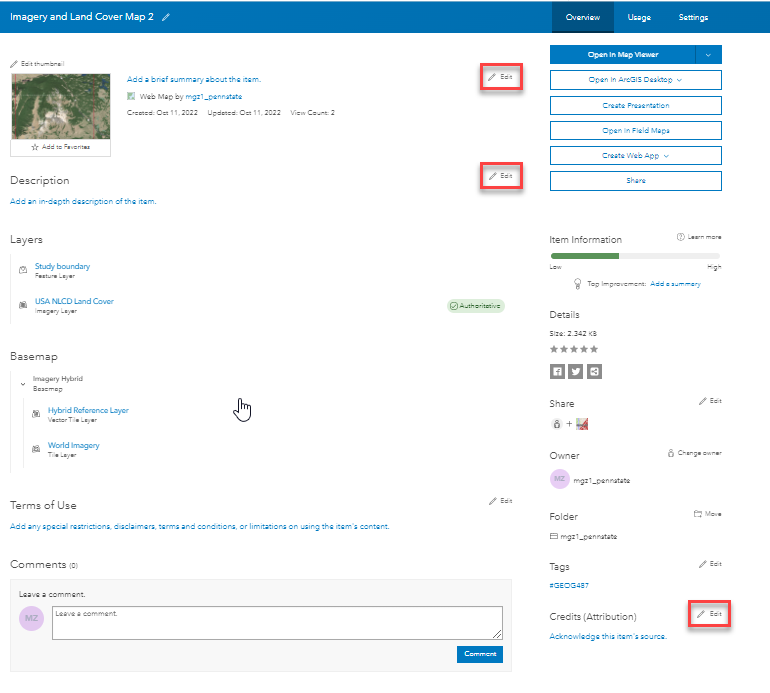
- Edit the descriptions for a map by clicking on the title. Your text should be short and to the point. What do map viewers need to know about this dataset to use it quickly?
- Include the citation information requested by the data provider (see metadata) in the credits section.

When designing maps and applications, it is best to assume that your end users don’t know where the study area is and are not familiar with the data – where it came from, what it is supposed to be used for, etc.
It is your job to point them in the right direction by crafting descriptive titles, useful captions, and helpful legends. Be nice to your audience! A good rule of thumb is to show your map to a non-geospatial friend. If they look confused, you need to revise it.
Good captions describe what a map shows AND why the reader should care.
Bad Caption – “This map shows the study area in red.”
Good Caption – “The study area (shown in red) is located near Yellowstone National Park along the border of Montana and Wyoming. The terrain consists of steep mountains and valleys, making transportation by car difficult.
- Click on Home > Content to view the list of maps you created. The map list is found under the My Content tab.
-
Create Web Application
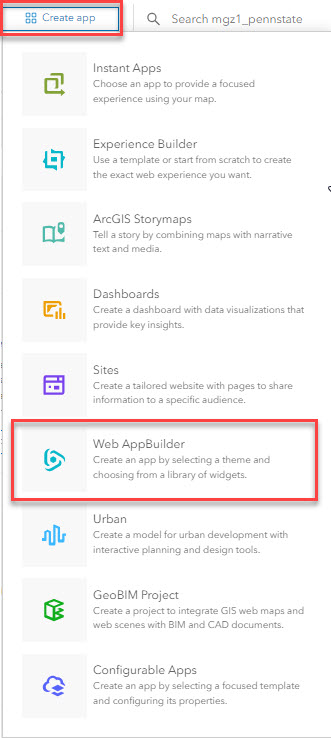
- Click on the Content tab to once again view a list of the maps you have created.
- Click on the + Create app menu. Select Web AppBuilder.
- Specify the Title: and Tags: for your web app. Make the title meaningful but succinct. The Summary: is optional and folder location will default to your My Content folder.

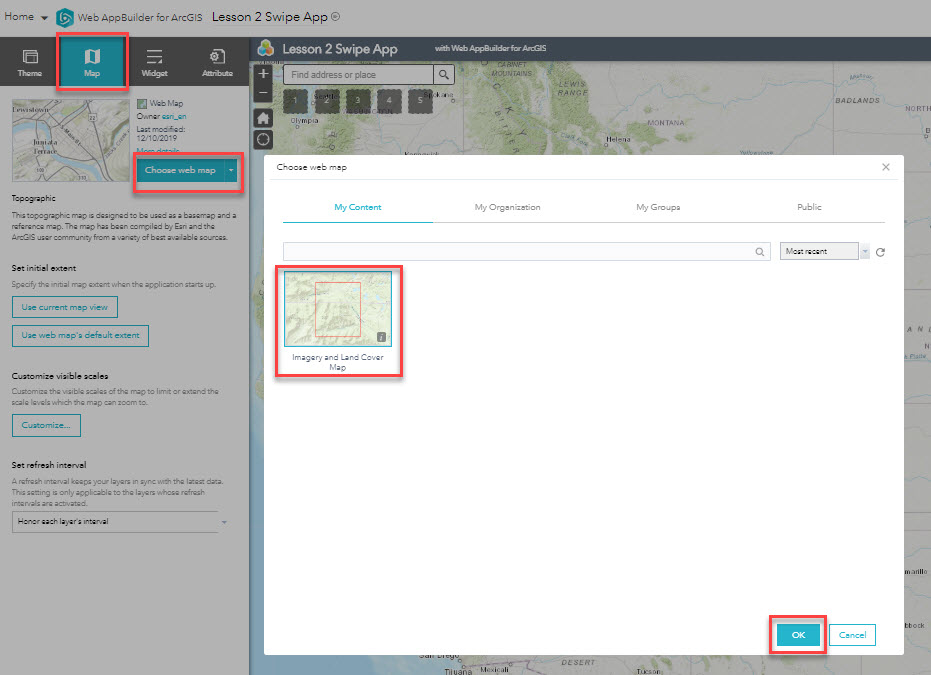
- The Web AppBuilder for ArcGIS will open. Click on the Map tab and select Choose web map.
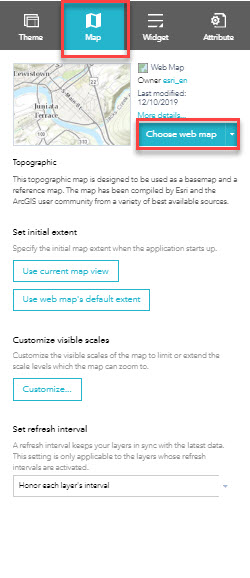
- Under Choose web map, select the "Imagery and Land Cover Map"
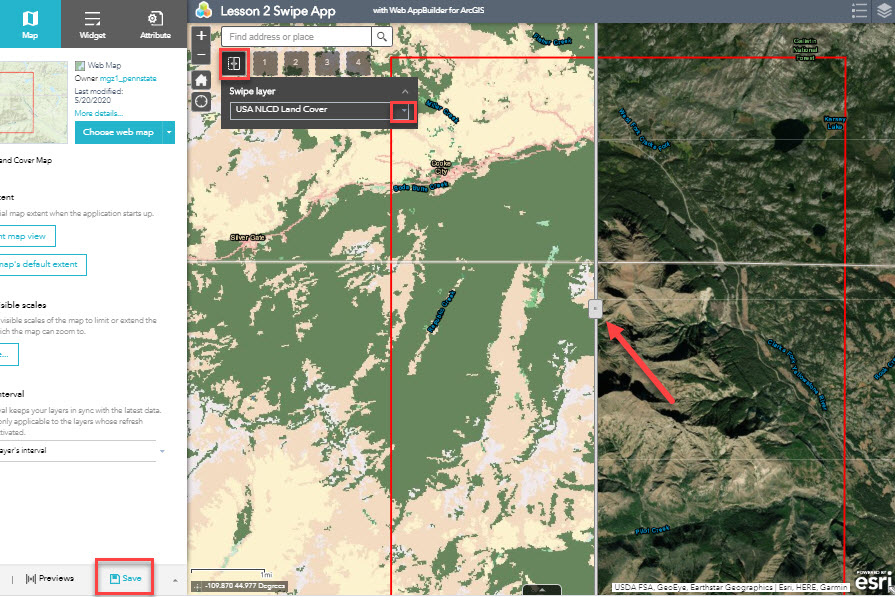
- Click on the Widget tab, and select click on a widget placeholder.
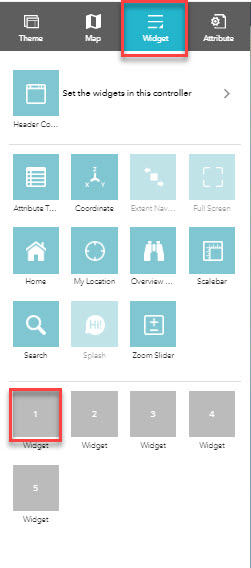
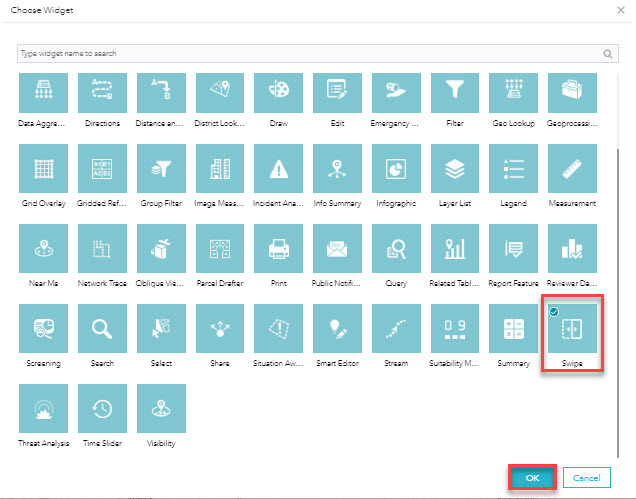
- The Choose Widget window will open. Select the Swipe widget.
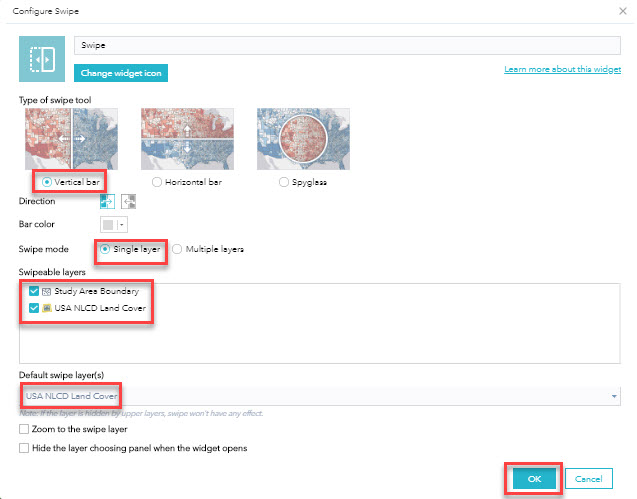
- Configure the Swipe widget based on the following options. The type of swipe tool will be a Vertical bar, the swipe mode is Single layer, the swipeable layers are "Study Area Boundary" and "USA NLCD Land Cover," and the default swipe layer is "USA NLCD Land Cover."
- To open the Swipe widget automatically when the app starts, hover over the bottom left of the Swipe icon under the Widget tab and click the circle.

- Select the Map tab. You should see the Swipe widget icon on the upper left corner of the map. Click on this widget icon to turn the widget on and off. Take some time to explore the functionality of the widget. Click on the Vertical bar to move it right or left. Be sure to Save your work.
- Navigate back to the Content tab within the Penn State AGO Organization and notice that the new App has been added to your My Content list.
- Be sure that your App is shared with the GEOG 487 Group.

- Click on the Title of your App to open it. Review your final web application to make sure the titles, descriptions, and other information are correct. You may need to edit the individual maps for the information to update in the web application (legend titles, colors, extent, etc.). Double-check that you listed your map sources.
That’s it for the required portion of the Lesson 2 Step-by-Step Activity. Please consult the Lesson Checklist for instructions on what to do next.
Try This!
Review some of the other configurable web application templates at ArcGIS> Gallery > Apps. Do you think the Swipe/Spyglass WebApp widget is the best choice to present the two datasets from our lesson? Post your thoughts in Canvas Lesson 2 Discussion.
Try This! Activities are voluntary and are not graded, though I encourage you to complete the activity and share comments about your experience on the lesson discussion board.