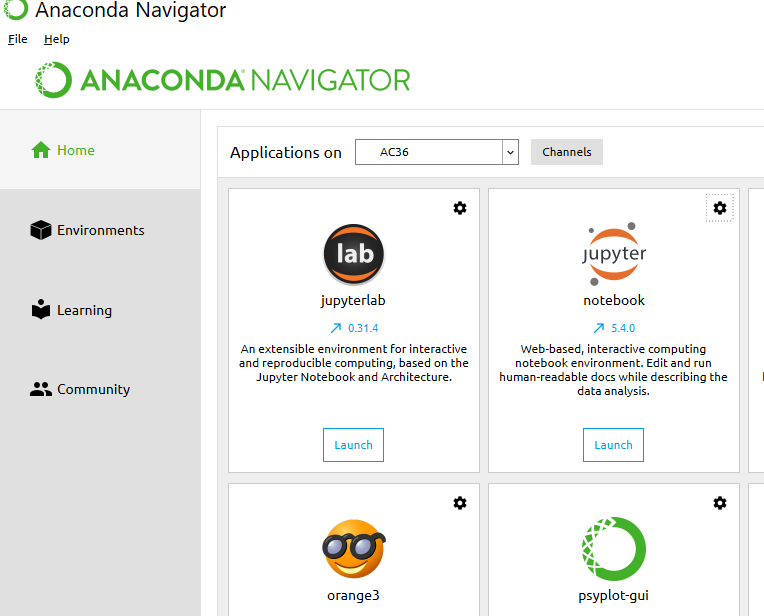
Juypter Notebook is already installed in the Anaconda environment AC36 or AC37 we created in Section 3.2. If you have the Anaconda Navigator running, make sure it shows the “Home” page and that our AC36 or AC37 environment is selected. Then you should see an entry for Juypter Notebook with a Launch button (Figure 3.3). Click the ‘Launch’ button to start up the application. This will ensure that your notebook starts with the correct environment. Starting Jupyter Notebook this way will create the link to shortcuts for a Jupyter Notebook to that conda environment so you can use it in the way we describe below.
Alternatively, you can start up Jupyter directly without having to open Anaconda first: You will find the Juypter Notebook application in your Windows application list as a subentry of Anaconda. Be sure that you start the Jupyter Notebook for the recently created conda environment (which will only be created if you change the dropdown in Anaconda Navigator above). Alternatively, simply press the Windows key and then type in the first few characters of Jupyter until Jupyter (with the correct conda environment) shows up in the search results.
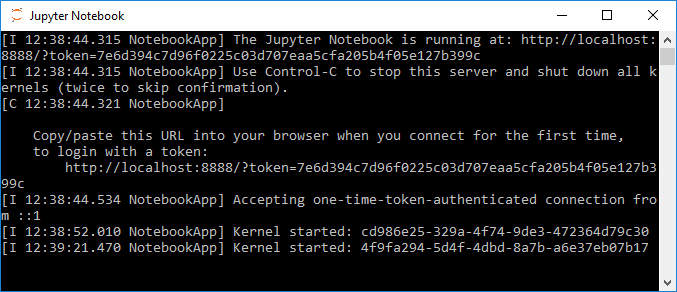
When you start up Jupyter, two things will happen: The server component of the Jupyter application will start up in a Windows command line window showing log messages, e.g. that the server is running locally under the address http://localhost:8888/ (see Figure 3.4 (a)). When you start Jupyter from the Anaconda Navigator, this will actually happen in the background and you won't get to see the command line window with the server messages. In addition, the web-based client application part of Jupyter will open up in your standard web browser showing you the so-called Dashboard, the interface for managing your notebooks, creating new ones, and also managing the kernels. Right now it will show you the content of the default Jupyter home folder, which is your user’s home folder, in a file browser-like interface (Figure 3.4 (b)).

The file tree view allows you to navigate to existing notebooks on your disk, to open them, and to create new ones. Notebook files will have the file extension .ipynb . Let’s start by creating a new notebook file to try out the things shown in the next sections. Click the ‘New…’ button at the top right, then choose the ‘Python 3’ option. A new tab will open up in your browser showing an empty notebook page as in Figure 3.5.
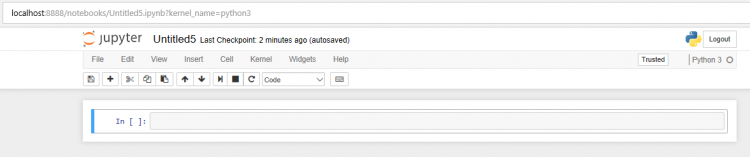
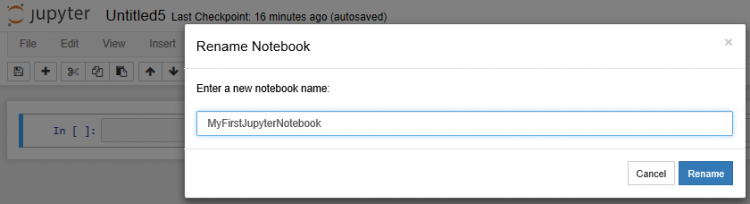
Before we are going to explain how to edit and use the notebook page, please note that the page shows the title of the notebook above a menu bar and a toolbar that provide access to the main operations and settings. Right now, the notebook is still called ‘Untitled...’, so, as a last preparation step, let’s rename the notebook by clicking on the title at the top and typing in ‘MyFirstJupyterNotebook’ as the new title and then clicking the ‘Rename’ button (Figure 3.6).
If you go back to the still open ‘Home’ tab with the file tree view in your browser, you can see your new notebook listed as MyFirstJupyterNotebook.ipynb and with a green ‘Running’ tag indicating that this notebook is currently open. You can also click on the ‘Running’ tab at the top to only see the currently opened notebooks (the ‘Clusters’ tab is not of interest for us at the moment). Since we created this notebook in the Juypter root folder, it will be located directly in your user’s home directory. However, you can move notebook files around in the Windows File Explorer if, for instance, you want the notebook to be in your Documents folder instead. To create a new notebook directly in a subfolder, you would first move to that folder in the file tree view before you click the ‘New…’ button.
