When you saved your map in the previous section of the lesson, your trail features got saved with it. If you want your uploaded dataset to be accessible outside the map as a service to anyone who uses your ArcGIS Online organization, or the public in general, you must publish it separately as a “hosted feature service”. Let’s do that with a different shapefile.
Switch your mentality now to that of a park ranger who wants to share information with co-workers deployed in other stations around the park. You have a point dataset representing maintenance issues reported on the trail. You want your colleagues to be able to load this whenever they’re logged in to your organization.
- In arcgis.com, open your Hiking Conditions map from the previous section of the lesson.
- In the upper left of your map, click Home > Content.
- Click New Item > Your Device.
- Click Browse, and select the trail_issues.zip file included with this lesson’s data. This is a zipped point shapefile with a few points in it.
- Complete the Item from my computer dialog box, being sure to select the option to Publish this file as a hosted layer, and click Next to give your layer a name and save it to your ArcGIS Online content.
- When your service has finished publishing, examine the overview page that appears for your new trail_issues service.
- Click the Settings tab, and note that you can control editing and export functionality on this service.
- Click the Share button on the Overview page, and note that you can open access to the public or just people within your ArcGIS Online organization. Check the box for the organization, but not for the public (we don’t want the public to stumble across this practice service and think there are real issues on the trail).
- At the bottom of the Overview page, notice the Service URL. Clicking the View button will open the Services Directory page for your service where you can see that it is a bona fide feature service like the ones you’ve worked with elsewhere in this course. The URL has a token appended to it that shows you have entered the requisite ArcGIS Online credentials for viewing this service (i.e., you are logged in to your account).
Think about security for a minute. There are a variety of situations where you’d want to make this service public, and other situations where you’d only want it visible within your organization. If you make this service private to your organization, it won’t be visible in any web map that you share with the public.
In some cases, you might want to make the service publicly visible, but only allow internal people to edit it. Esri provides for this with something called feature layer views. - Let’s move ahead now and add this service to our web map.
- Copy the URL from your own Services Directory page up to and including the FeatureService part (so that it looks something like .../arcgis/server/services/trail_issues/FeatureServer)
- Remember to specify your customized "trail_issues" service title.
- Return to your Hiking Conditions web map, and click Add > Web Service and paste the URL to your trail_issues feature service.
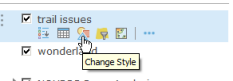
- Your trail_issues layer should appear symbolized by the default dots. Let’s symbolize it based on whether the issue has been resolved or not.
- Use the Properties pane for this layer to change the color and/or symbol for the issues points and save your changes.
- Experiement with any other options for layer symbology or funcationality, and when your web map looks awesome, go ahead and save it.