Building a Project
The last thing we want to quickly mention here is how you actually build a stand-alone application from your Unity project, so basically how to create a stand-alone program for a platform of your choice that does the same thing that you get in the Unity editor when in Play Mode. This is done by going "File -> Build Settings…", which opens a new dialog:
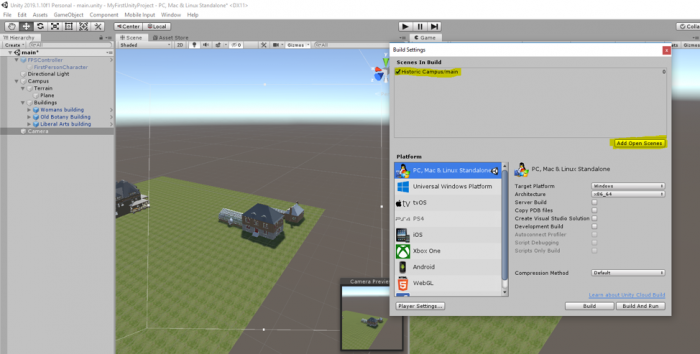
In the pane at the top, you can select the Scenes that should be included in the build. Click on the “Add Open Scenes” button to add the current scene to the build window. At the bottom left, you select the target platform for your build. It is possible to install extensions to build applications for other platforms than you currently see here. The one relevant for this course is “PC, Mac & Linux Standalone” and you then have to select “Windows” as the Target Platform on the right. With the “Player Settings” button at the bottom, you can set more parameters that affect your build. Pressing “Build” will start the process of compiling the stand-alone application, while “Build & Run” will in addition run the program after the compilation process has finished. When you have all parameters for your build already set, you can use “Build & Run” directly from the File menu. When you click "Build" you will be asked to choose a folder to save the project in. In the following save dialog, navigate to your “Documents” folder and use “Walkthrough” as the file name under which the application will be saved. Then click “Save”. Unity will show you the progress bar for building the application which can take a few minutes. If you have a Mac, the windows application would not be played on your computer. You need to create a Mac application.