Introduction
So far this course has focused predominantly on Esri’s ArcGIS Online platform to conduct exercises relevant to the coursework. As part of your StoryMap exercise in generating a spatio-cultural analysis of a cultural landscape, you may want to include a map of those landscapes. In addition to using ArcGIS Online’s Map Viewers, it may be easier to create a Google MyMap to embed into your story map. This brief tutorial will introduce you to the basic functionality of Google MyMaps.
Google MyMap Basics
- You’ll need a Google account. You can either use your existing Google account, or you can create an account for this course.
- Go to the Google MyMaps page.
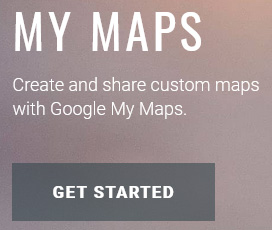
- From the Google MyMaps main page, select “Get Started”:
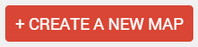
- To create a new map, click the “Create New Map” button at the top left:
- This will open a blank map called “Untitled Map.” Left click on the words “Untitled Map” to change the name and provide a description.
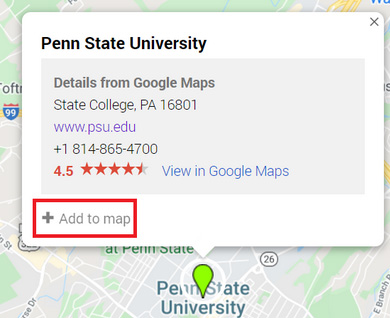
- Using the search bar to the right, you can type in coordinates, addresses, or search for the name of a place you wish to include on your map.

- When you click enter or the search button, the possible results will populate the map and the left layers area.
- To add this point to the map, click on the “Add to Map” button.
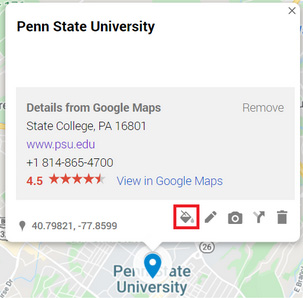
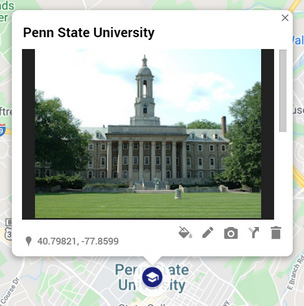
- It adds it to an “Untitled Layer.” We’ll address how to change this next, but first, let’s change the marker for Penn State. To change the symbol, click on the little paint bucket at the bottom. This will allow you to change both the color and the style of the icon.
- I changed the icon from the standard pin to this graduation cap:

- I changed the icon from the standard pin to this graduation cap:
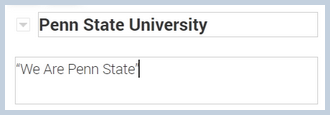
- The pencil next to the paint bucket allows you to change the name in the popup, as well as add a description.
- The camera allows you to add a photograph in case you’d like to showcase some photos of the landscape you are describing.
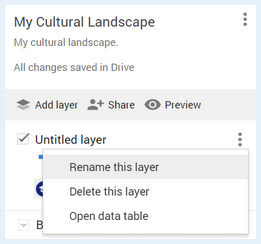
- To change the name of the Layer, left click on the three dots to the right of the layer, and click “Rename Layer”
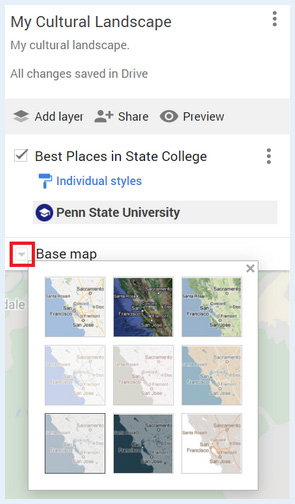
- You can also change your basemap clicking on the arrow to the left of “Basemap” and making a selection
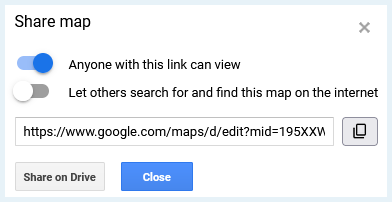
- Once you’ve added all of the places you want, make sure to enable link sharing to your map. To do so, click “Share”

- Then make sure the settings in the 'Share map' window are set to 'Anyone with this link can view' and then close the window.
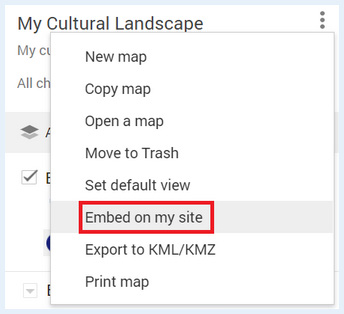
- Once you have made all of your selection for your map and are ready to embed it in your StoryMap, click the three dots to the right of your Map’s Name and select “Embed on my Site”
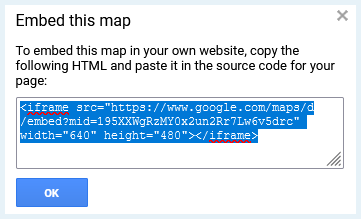
- This will generate a popup with some code. Copy this code.
You will now switch to the ArcGIS Online Portal:
- Sign into Penn State’s ArcGIS Online Portal with your Penn State credentials.
- Click on the square with nine dots to the left of your Name at the top right of window:

- Select StoryMaps from the list of options

- Select “Create story" and choose "Start from Scratch".

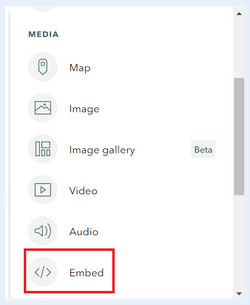
- In your ArcGIS StoryMap, click the plus button to add content. Under the “Media” subheading, click on Embed.
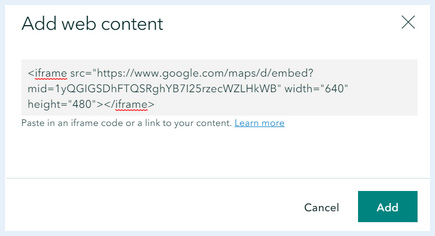
- Paste the code you copied from the 'Embed on my site' step above into the gray box and select “Add”
Your Google MyMap should now be added to your StoryMap.