Try This!
This activity guides you through a simulated pixel-based unsupervised classification of remotely sensed image data to create a land cover map. Our goal is for you to gain a hands-on appreciation of automated image classification technique. Begin by viewing and printing the Image Classification Activity PDF file.
1. Plot the reflectance values.
The two grids on the top of the second page of the PDF file represent reflectance values in the visible red and near infrared wavelength bands measured by a remote sensing instrument for a parcel of land. Using the graph (like the one below) on the first page of the PDF file you printed, plot the reflectance values for each pixel and write the number of each pixel (1 to 36) next to its location in the graph. Pixel 1 has been plotted for you (Visible Red band = 22, Near Infrared band = 6).
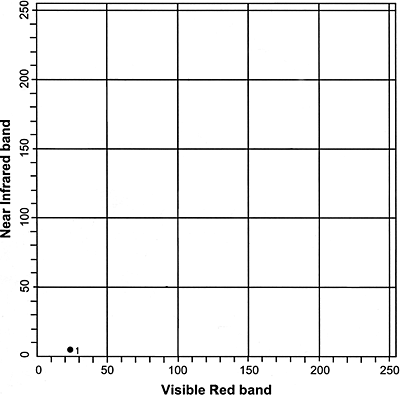
- After you have completed filling in the graph, you can check your progress by following this link to a completed graph.
2. Identify four land cover classes.
Looking at the completed plot from step one, identify and circle four clusters (classes) of pixels. Label these four classes A, B, C, and D.
- After you have circled the four clusters of pixels in the graph, you can check your progress by following this link to view the identified clusters.
- Note: You may have labeled the clusters differently, but the four clusters should contain the same points, more or less, as the example.
3. Complete the land cover map grid.
Using the clusters you identified in the previous step, fill in the land cover map grid with the letter that represents the land use class in which each pixel belongs. The result is a classified image.
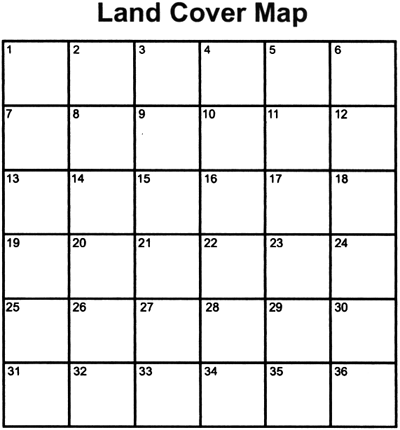
- If you would like to check your land cover map, you can follow this link to view a completed land cover map.
- Note: If you labeled the clusters in step two differently than the example, your land cover map may look different, but the patterns should look similar.
4. Complete a legend that explains the association.
Using the spectral response data provided on the second page of the PDF file, associate each of the four classes with a land use class.
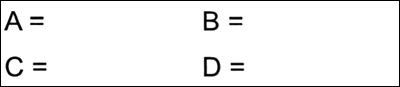
- You can check your results by following this link to view a completed legend.
- Note: Depending on how you labeled your clusters, your legend may differ from the example legend; however, when you apply your legend to your Land Cover Map, the land use classes on your map should match the example map.
You have now completed the unsupervised classification activity in which you used remotely sensed image data to create a land cover map.